Underground Pass RS3 Walkthrough - Slaying Iban

By Helen Gray | Created: July 21, 2023 | Last updated: December 17, 2024 | Read Time: 14 minutes

Welcome to DivicaSales Blog Series!

Hello readers! We're back once again to the DivicaSales blog series. Within this article, we will discuss the RS3 Underground Pass quest, looking at the requirements, rewards, and more. So, without further delay, let's get into it! 

What is the Underground Pass RS3? 

The Underground Pass in RS3 is a quest named after the location where it takes place. After being sealed for thousands of years, it has been reopened. The reopening uncovered a labyrinth of tunnels and chasms that are complex to navigate. 

The quest itself is members-only and is categorized as long/very long in terms of official length. So if you're up for the challenge, prepare to buckle down and start the long and tedious journey that is the Underground Pass RS3.

If you want to know how to get through Underground Pass RS3, you'll need to first understand the requirements, so let's get into it.

RS3 Underground Pass - Requirements 

Fortunately, there aren't many quests you will need to have completed in order to start this quest, meaning you won't need to put in too much groundwork. You'll need to have done the Biohazard and Plague City quests. 

Similarly to the quest requirements, the skilling requirements should be easily met, as you'll only need to be 25 Ranged.

As for item requirements, there are a few more of those, though not many. So we have compiled a list below. 

  • A rope
  • A bow 
  • Arrows (ogre, god, broad, araxyte, wild, dark, and ice are not suitable)
  • Free inventory for the items received

Now that we've covered the requirements for the quest let's take a look at the recommendations; though these are not vital, they will prove helpful. 

Underground Pass RS3 - Recommendations 

Having the following can significantly reduce the difficulties you face during this quest. However, you can still happily proceed without them if you wish to use them; they are as follows: 

  • 50 Agility 
  • 43 Prayer 
  • 50 Thieving 
  • Armor and weapons (preferably ranged/magic)
  • 1000 coins 
  • Agility potions/summer pies 
  • Emergency teleport 
  • Plank 
  • Catspeak amulet 
  • Daves spell book with chipped Ardougne teleport

We would also recommend that you enter this quest with no pet or follower, as a particular part of the quest causes you to freeze; your only way of escaping this situation is teleporting, undoing progress.

Now we've covered the quest recommendations, let's take a look at who exactly we'll be facing through the duration of this RuneScape adventure! 

Which Foe Will You Face in RS3 Underground Pass?

As with many RS3 quests, you must take down some enemies throughout. So, let's take a look at those: 

  • Kalrag
  • Sir Harry 
  • Sir Jerri
  • Sir Carl
  • Doomion 
  • Othanian 
  • Holthion 
  • Disciple of Iban 

Now we know who we're up against, let's get into the methods of this Underground Pass quest guide in RS3. 

the cavern, rs3 underground pass

How to Get Started in Underground Pass RS3

Speak with The King

The starting point of this quest is the first floor of the Ardougne Castle; here, you'll need to speak with King Lathas. You will learn that King Tyras, Lathas's brother, has abandoned his post as reigning king of West Ardougne and moved further west. You must then ask the king if his scouts were able to carve a path through the mountain. He will tell you they have by uncovering an ancient tunnel.

The downside to this discovery is that the tunnel is filled with cultists who follow the evil Lord Iban, the alleged son of Zamorak. The king will then ask you to check in on Koftik, the king's tracker. He will be waiting for you at the entrance to the tunnels on the West Ardougne side. 

Hawk Eye

Now that it is known the plague was just a ruse and you can enter West Ardougne through the main gate, do so. Make your way to the far west side of the city until you locate the cave entrance, where you will find Koftik. When you speak with him, he will inform you more about the pass before telling you to meet him inside beside the bridge.

Upon entering the dungeon, you will see three paths that branch into three different directions. Try to avoid the center path, as this can cave in beneath you, causing some hefty and unnecessary damage. 

After taking one of the paths, you must then climb over the rockslides and go around the swamp, after which you should see Koftik standing by a fire. Converse with him; he will say it looks like others have already been exploring the caves as he located a damp cloth and a book.

Take an arrow and use the damp cloth on it, then right-click to "light arrow" before equipping a bow and arrow. You'll then need to make your shot to continue. To do so, head to the small room north of you and look over the chasm. You should be able to see the guide rope which is holding up the drawbridge; click on it to fire your arrow. You'll know you have succeeded if the drawbridge drops and you're able to continue forward. 

On Grid, Off Grid

For the next part of this Underground Pass RS3 quest, head south, and you should come across a second fork in the road. Make sure to take the eastern path. Taking the southern path will result in being sucked into the swampy area. On your journey down the eastern path, you'll see stone tablets inscribed with messages on how to proceed safely. Take note of these. 

You'll then need to use a Trollope accompanied by the "old spike" located on your side of the pit to make a balance beam rope to walk over. Try not to fail; doing so will see you have to begin again from the beginning of the pass.

Once you succeed, carry on across the rock slides until you spot Koftik, who will be standing before a grid of mesh. Speak with him, and it will become apparent his mental state is unraveling slowly as he hears voices.

Your next task on the RS3 Underground Pass journey will be to dictate which of the grid squares will support you and which will drop you into the pit below. Each drop will cause 150 damage, so try to be cautious. If you do find yourself in the pit, there are protruding rocks within the pit that you can use to escape. 

Ensure to memorize the grid squares that support you, as you will come back on this path later in the quest. Once you do find the correct path and make it to the other side, pull the lever on the south wall to pass through the gate. 

Lights in the Night

Next, for our Underground Pass RS3 walkthrough, you'll need to locate the furnace to the north of you. You won't need to use it just yet, but make sure you're aware of its location. You should also see a one-way agility path that shortcuts back to the beginning; west of you will also be a narrow corridor. 

Approach the corridor with caution; there will be five traps located within the walls. Two are on the northern border, and three are on the southern. Having higher thieving can help you with disarming these traps, and failing to do so can cause 560 life points to be lost for each trap. Another method (though still posing its own risks) is to stand one square before a trap and then quickly run past. Though this can be successful, the danger is still prominent, so be cautious of your losses.

Keep in mind that while in the pass, the Surge ability is disabled, so that option isn't available when passing traps. 

No matter your chosen method, you'll eventually reach an area with a less-than-welcoming well at the center. There will be a book and an altar located close by; additionally, a stone tablet will reveal the message, "If a light should break the night, the dark will rise to win the fight." 

You'll need to next ensure that your life points are at a suitable level, so either eat, use rapid, or rapid renewal while you wait. Once you're satisfied with your life points, begin praying at the altar. 

The next step in this Underground Pass RS3 guide is to explore the four paths before you. Keeping in mind the "flat rock" pressure plate traps ahead. 

Northern Path 

Use your plank on each of the flat rocks to bypass traps, it is possible for those of a higher thieving level to disarm the traps, but as failure is still possible, you can entirely avoid it using the plank. 

Once you're past the traps, you should find an Orb of Light at the end of the tunnel; collect it before returning. 

North-West Path 

This passage will see you encountering level 42 Blessed Spiders and level 67 Ogres. You can choose to fight or bypass, whichever you see fit. Collect the second orb and make your way back. 

Midwest Path 

This path is similar to the northern path, but you will have to navigate past five traps rather than three. Use your plank once again to get by and collect the orb before returning. 

South West Path

This final path will see you having to face the trap within. You will be able to approach the orb unscathed, but you must undo the trap before you pick it up. Without doing so, a log will swing from above, inflicting varying damage depending on current life points. 

With your four orbs obtained, head back to the aforementioned furnace, remaining cautious of the traps you have yet to disarm. Place each of the orbs into the furnace to destroy them, and you will then be able to climb down the well. 

underground pass map, underground pass rs3

Don't Look Down

Once down the well, you'll find yourself by three crates. Searching the middle one will reward you with two salmon and two meat pies. You should also find a rope respawn point nearby.

Continue on deeper into the cave; you'll see you're surrounded by cages. Take the passage ahead of you, which leads to a dead end; this will force you to find an alternate way of moving forward. 

On the southern wall, go to the cage furthest east and pick the lock. You will notice a bizarre-looking patch of mud in the back of the cage, dif through the patch with a spade, and you'll encounter a hidden tunnel that will take you to the other side. Make your way across the narrow ledge, and you should enter a space near a maze of raised beams.

It's worth noting that falling from the beams will deal 50 damage, so be cautious. There are ramps nearby if you do fall, in which case, make your way back up to the beams and find your way across. Once you have completed the maze, head south and pass through the obstacle pipe, then make your way to the next area. 

Slaughtered 

At this stage in our Underground Pass RS3 quest guide, you'll locate a unicorn in a cage. Search until you find a loose piece of railing. From here, make your way south down the path until you locate a boulder. 

Using the loose railing, dislodge the boulder. This will kill the unicorn allowing you to return to the wreckage of the cage and retrieve the unicorn horn. Afterward, you must head north and go through the tunnel; here, you will encounter a small group of Paladins in a makeshift campsite. 

The Paladins, named Sir Carl, Sir Jerro, and Sir Harry, are all of level 81. Speaking with Jerro will see him giving you the following: 

  • Loaf of bread x2
  • Meat pie x2
  • Bowl of stew 
  • Prayer potion x2 
  • Attack potion x2

This generous act still does not take away from the fact you'll need their badges. To do so, you'll have to slay the Paladins. 

Be cautious, however, as they respawn. So you can try trapping them by safe-spotting them behind the rocks surrounding you. 

Now, with the three badges (red, green, and blue) in tow, make your way west. Remain vigilant, as there are more flat rock traps there, so you'll need to use your plank or your preferred method to pass. Continue on past this point until you find another well. 

The well will read, "Feed me three crests of the blessed and the creature's remains." So you'll need to use the three Paladin badges and unicorn horn on the well; doing so unlocks a large door.

Cornucopia 

Now we're coming toward the endgame of the Underground Pass RS3 quest; there are some potentially frustrating steps ahead. 

You'll enter an expansive cavern, which has rock ledges edging the perimeter. This open area has a maze of walkways for you to navigate, many of which are permanently broken. Falling from the maze’s paths can result in large damage hits and see you in a pit of the soulless. Try to keep your food in your inventory unless you're entirely out of options.

What you're about to embark on has no official requirements, but the lower your agility level, the harder you'll find the journey. However, it is still very possible to complete the quests maze, even at level one. 

For the moment, do not enter into the walkways. Instead, head as far south as possible until you reach the south wall. Once there, go slightly west until you locate some stairs. Upon walking down them, you will encounter Koftik. He will appear before you rambling nonsense while also informing you some dwarves are now residing there and are immune to Lord Iban's power before vanishing. 

The Tale of Lord Iban

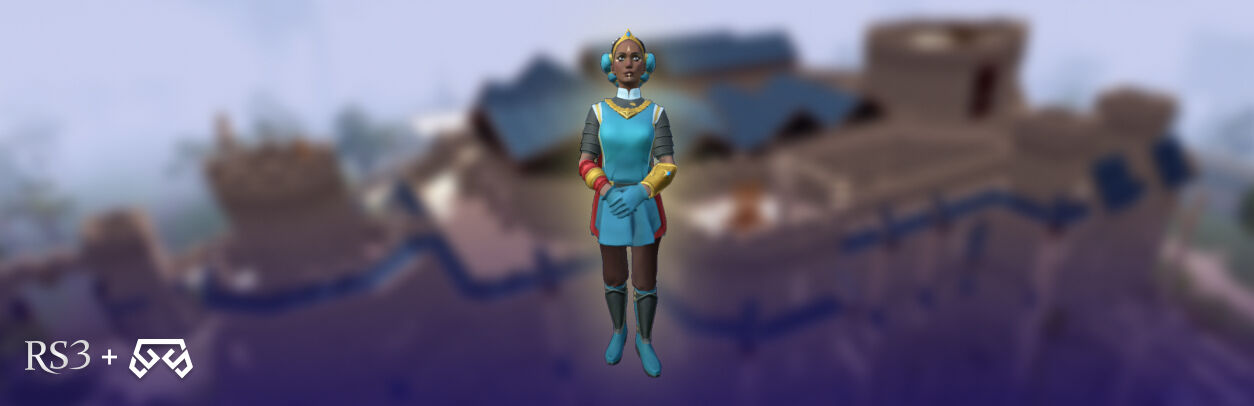
Continue onward into an opening of a fenced area where you will see three dwarves named Niloof, Klank, and Kamen. Niloof will provide you with food when you speak with him; if more is needed, you can speak with Kamen, who has an unlimited supply of meat pies, stews, and bread for 75 coins each. 

Niloof will inform you of a witch called Kardia; she holds the secret to killing Iban. After receiving this information, you'll need to climb the staircase again and head northeast. You will be led to the southernmost of all the walkways. Walk over this path to Kardias house. By listening outside her window, you should hear her talking to herself about her missing feline friend. If you open the door, you risk losing 900+ life points, but if you wish to avoid the damage, click away and end the conversation. 

So, next on your agenda will be locating the cat, and to do so, you'll need to head north before going west over the bridge gap. There will be a north branch of the path; take it. Continue along this route until you find a platform, at which point you'll want to check your minimap. Make your way toward the yellow dot and retrieve the witch's feline friend. 

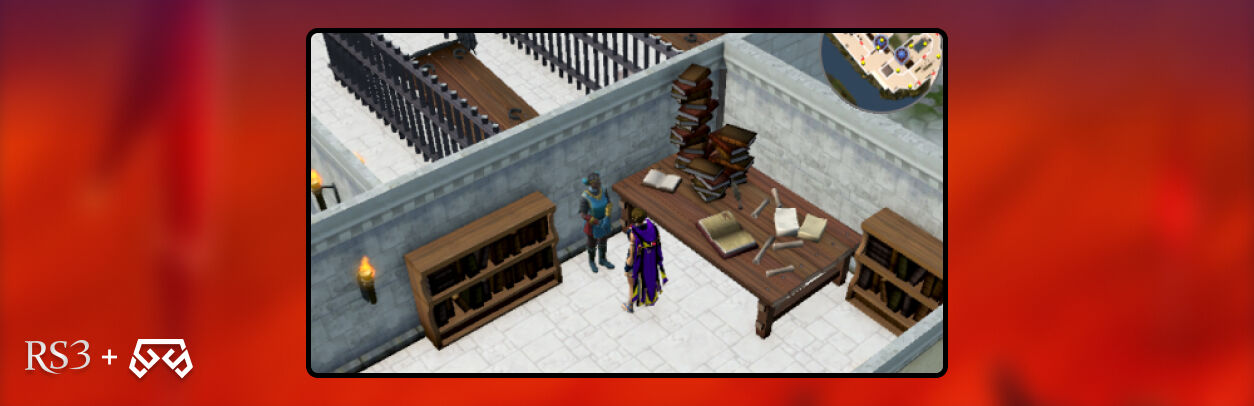
With the cat in tow, return to Kardias home and use the cat on the door. The action will automatically hide you behind a corner while the pair are reunited. While she is distracted, you'll need to sneak into her house and find the chest to search. 

Searching this chest should leave you with the following:

  • Restore potion
  • Super attack potion 
  • History of Iban
  • Doll of Iban 

The book was written by Kardia herself; read it and locate the information on how to take down Iban. Ending him must be done in the exact manner in which he was resurrected. This means collecting four of his life elements; Flesh, Blood, Shadow, and Conscience. Once you have done so, imbue them with his effigy, and when this is done, you will finally be able to destroy him. So, let's break down the steps to do that. 

rs3 disciples of iban, rs3 underround pass

Endgame Approaching - Killing Lord Iban 

Within this segment of our Underground Pass RS3 guide, we're going to walk through how to obtain the needed items, use them, and destroy Iban and his reign. The first to collect will be the Shadow. 

Iban’s Shadow

To do so, you'll need to slay three level 78 demons, Doomion, Othainian, and Holthion, and retrieve their amulets. Once you have all three, open the chest which was closest to Doomion and open the chest. This will destroy the amulets but release the Shadow, which you must then use on the doll.

Once you have done so, return to the dwarves and speak with Klank to receive Klanks Gauntlets. Once you have those, grab a bucket from the large building and make your way to the smaller one. 

Iban’s Flesh

Next, you must use your bucket on the barrel inside to acquire Dwarf Brew. Take it and head to the far southeast corner where the tomb of Iban is, dumping the bucket of alcohol into the tomb and lighting it with your tinder box. Once the fire has burnt out, you should see Lord Iban's Ashes left behind in your pack.

Iban’s Blood 

Your next endeavor in the Underground Pass RS3 quest is to obtain Iban’s blood. To do so, surpass the soulless until you reach a corridor riddled with Blessed Spiders; walk to the end of the enclosed area, and find the level 81 spider Kalrag. She was the one to feed on Iban's blood, meaning you'll have to slay her to smear his blood on the doll. 

Ensure you make a swift exit, as the smell of the blood will draw other spiders to attack. 

Iban’s Conscience 

The final step of imbuing the doll is to gain his conscience. To do so, you must locate a dove killed by Kardia; it represents the innocence of Iban's soul before evil corruption took hold. 

You'll find the dove inside an old wooden cage amongst many cages that have half soulless within them. The dove is in one of the cages at the center of the area. Ensure you're wearing the Klank Gauntlets, as while you search cages, the half soulless will bite at you. When you finally acquire the skeletal dove, use it on the doll. 

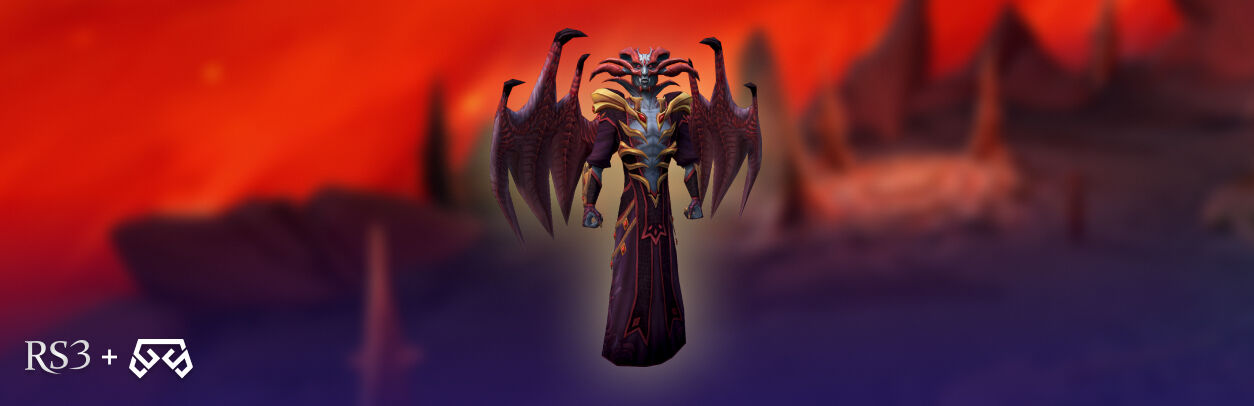
The Final Strike on Lord Iban

With the effigy ready, make your way to the Iban’s temple, which is at the heart of the cavern. When you're close to entering the temple, kill a Disciple of Iban in RS3 and wear the Zamorak robe outfit (red); ensure you're wearing nothing but the outfit for entrance to the temple. 

Your next objective in this RS3 Underground Pass guide is to use the doll on the well in the middle of the room, a simple task in theory, however, not in practice. Iban will sense your and the doll's presence and begin casting spells in your direction. Each strike he lands will inflict 100+ damage to your life points, so it is recommended you get as close to Iban as possible. 

When in his closer vicinity, he deals fewer spikes, so we recommend doing this and then running when there are no spells in practice. If you're of a high level with good defense, you may be able to simply go to the well and take the hits, but if this is not the case for you, try the above method of running between attacks. 

Upon throwing the doll into the well, Iban will be obliterated, and the temple will begin to fall. You will also be teleported out with your rewards; ensure you have the inventory space if you don't want to lose the Runes. 

Once this has taken place, you will be in a cavern with Koftik, who has found his sanity after Iban's hold has been diminished. Exit the cavern toward Tirannwn, where Koftik will lead you to the entrance for you to head back to East Ardougne to speak with King Lathas and complete the quest. 

rs3 underground pass certificate, underground pass rs3

Rewards

The items you will receive for completion of Underground Pass RS3 are as follows: 

  • Five quest points 
  • 3000 agility XP
  • 3000 attack XP
  • Iban’s Staff
  • 15 Death Runes
  • 30 Fire Runes
  • Klanks Gauntlets
  • 2 Treasure Hunter keys

You will also unlock the following music: 

  • Iban 
  • Cursed 
  • Intrepid 
  • Underground Pass
  • Moody 
  • Expecting 

Congratulations!

You've reached the end of the road for our Underground Pass RS3 walkthrough. A no doubt successful one at that! We would once again like to thank our readers for trusting us with their questing needs, and we sincerely hope that their journey has been smooth sailing. If you are looking for another exciting guide or gaming read, check out our extensive blog library. We cover many gaming quests, the latest gaming news, and much more; all to make your adventure that little bit easier. We'll see you next week!


Author profile
Helen Gray

Helen is a gaming blogger with a talent for dissecting complex gameplay. Her insightful analysis and vivid writing style place readers right in the heart of the games she passionately explores.


Related Articles
logo
Aftermath RS3: Reverse The Edicts Aftermath RS3: Reverse The Edicts Questing

Fear is one thing you should have when you enter this quest; however, with our help, you will be able to reverse the Editcs that will banish Zamorak, Lord of Chaos. Aftermath RS3 is part of the quest series, The Elder God Wars being the sixteenth quest in the line. It’s time to continue your fight against Gods and return victorious after conquering this terror. So, let’s begin!

RS3 Aftermath Requirements

You must understand this is a quest of a medium to long duration, so you can expect to spend about 25 to 35 minutes defeating this boss. Moreover, like the other quests in this series, RS3 Aftermath is a Members-only quest. So, you will need to meet the following recommendations to make your journey easier:

  • Completion of Twilight of the Gods quest
  • Ring of Respawn, Passage of the Abyss, Falador Teleport, activated Falador lodestone, or Master Archaeologist's Outfit for quick access to the White Knights' Castle
  • Archaeology journal or Master Archaeologist's outfit to teleport to Kharid-et Dig Site
  • Clan vexillum or Master Archaeologist's outfit to teleport to Armadyl's Tower
  • Ability to defeat various enemies within The Zamorakian Undercity and Zamorak, Lord of Chaos level 14,000

aftermath rs3, zamorak

Aftermath Quest RS3 Walkthrough

To begin with, Aftermath in RS3, head west of the library on the first floor of the White Knights’ Castle to find Adrasteia. Talk to her, and she will reveal that in order to reach Zamorak, you must go through The Zamorakian Undercity. You will find the undercity deep within Senntisten, a place occupied by Zamorakinas after the events of the Elder God Wars. Once you’re there, go through the portal located within. Adrasteia will suggest you meet with Sir Cadian, who is the leader of an assault into the undercity.

Knights

For your next step into the RS3 Aftermath quest, you must enter the undercity, and the best way to do it is through the Varrock Dig Site entrance of Senntisten. Once you are inside, enter the undercity by using the pulley lift; it’s near the larger-looking pulley lift used to enter and exit Senntisten. After you enter the undercity, walk north and meet with Sir Cadian. You must go through some dialogue options, and then a cutscene will begin. He will mention that The White Knights have been staging assaults against the followers of Zamorak, but all their tries were unsuccessful. They try to get the portal that leads to the Wilderness Crater. More information is revealed, and players will find out that Zamoriakians are sacrificing troops from the Elder God Wars Dungeon to fuel the portal.

In this section, you will be able to clear the Zamorakian Undercity without any difficulty. However, if you have already defeated Zamorak, Lord of Chaos, and exited the arena, you can go through the portal instead of teleporting; in other words, you can skip this step.

Edicts of Guthix

After you go through the Zamorakian Undercity and defeat Demons, Cultists, Hellhounds, and Waterfinds, it’s time to banish Zamorak by successfully reinstating the Guthixian Edicts. Part of this journey will have you fight him, and once you defeat and banish him, you will have to return to Adrasteia on the first floor of the library to continue with Aftermath in RS3. Tell her that the Edicts of Guthix were re-established and that you stopped Zamorak.

aftermath rs3, adrasteia

The Zarasians

Adrasteia will ask you to join her in saying her farewells to Saradomin on the second floor. Head to the second floor, and when you are talking to Saradomin, a cutscene will appear where you see him appointing Adrasteia as the new leader of the Saradominists on Gielinor. Once the cutscene is finished, he will ask Commander Zilyana to watch over Adrasteia and tell the people what happened. The latter will muster the last of his strength and leave Gielinor. Moreover, Adrasteia will suggest talking with Azzanadra and Armanyl before they depart.

Pack your bags and travel to the Kharid-et Dig Site to find Dr. Nabanik. Talk to him, and you will be immediately teleported to the Praetorium inside Kharid-et, where you will meet Azzanadra, Nex, Trindine and Wahisietel. Join them, and Azzandra will say that he and Nex will depart for Freneskae to plan the following steps. He will also task Trindine with following Adrasteia and intervening on her behalf when she isn’t able to. Azzandra will also discuss with Wahisietel about his human alter ego, Dr. Nabanik, to help Trindine out as much as he can with his knowledge of humans.

aftermath rs3, adrasteia

Armandyl And Adrasteia

In this section of Aftermath RS3, you must visit Armandyl at his tower south of Falador and talk to him. He will express all his regrets about not spending his final hours in Gielinor at the ruins of the farm he and Obi’Sooth built (what is now Wilderness), where he died along with countless other aviansie. He will also mention his desires and intentions to help free the Elves of Tarddiad from being bound to crystals and build a colony for aviansie there. He expects to find balance and a peaceful coexistence between his and Seren’s followers. Furthermore, he will thank you and depart as well.

Return to Adrasteia in the library. She will reveal her concerns about the Zamorakian civil war and how Moia will handle it. After finishing this conversation, you will complete the quest.

aftermath rs3, rewards

Aftermath RS3 Rewards

Congratulations! You’ve completed the Aftermath RS3 quest! After going through the undercity and banishing Zamorak, Lord of Chaos, your endeavours are still not done. However, you deserve rewards to use on your upcoming quests. Here’s what you will get for completing this one:

  • Small XP Lamp
  • Chaos Die Reroll Token

Aftermath Quest RS3 FAQ

Although your fight against the gods is not yet over, you will get some downtime to outline a new plan to help Gielinor overcome this dark period. However, before you move on and continue your questing journey, let’s clear some doubts you may have with this quest.

What achievements are unlocked after completing the Aftermath RS3 quest?

After you complete the Aftermath miniquest RS3 in the Elder God Series, you will unlock the achievement called “Aftermath.”

How many sections must I go through in The Zamorakian Undercity?

You have to go through three different sections on your way to banish Zamorak. You will pass through Section I, Section II (Mefis) and Section III (Eterna), where you must fight your way against the hordes of chaos.

RS3 Aftermath Summary

Once you complete this quest, you will be one step closer to finishing the Elder God Wars quest series. However, you will still need to go on more adventures to learn all of Gielinor’s lore. Likewise, to help you in your endeavors you can buy RS3 gold and skip the tedious bits without difficulties. Also, if you need a helping hand on your questing journey, you can check our blog section. That’s all for now. See you in our next blog!

logo
As A First Resort RS3: Ogresses Spa As A First Resort RS3: Ogresses Spa Questing

Welcome back to our blog section, where we cover different quests and make detailed guides for you. Today’s blog is about As a First Resort RS3, an experienced quest in the Ogre quest series where you will help the ogresses of Oo’glog expand their hot springs into a resort. Part of your job is to assist in the area preparation and eliminate a pest problem. Prepare yourself to help open a new Spa and Resort!

As A First Resort RS3 Requirements

Before thinking of diving into the hot springs, you will need to know this is a Member-only quest of long duration, so you will spend roughly 30 to 45 minutes completing all the steps and endeavors. With this clarification on the table, here’s what you will need to go through RS3 As a First Resort quest:

  • 51 Firemaking
  • 48 Hunter
  • 58 Woodcutting
  • Box Trap
  • Bird Snare
  • Teasing Stick (Unless you are buying the 8 larupia furs from the grand exchange)
  • 4 Spears of the same type (Bone Spears work; Poisoned Spears and Leaf-bladed Spears won’t work)

Available just outside Oo'glog:

  • 8 Achey Tree Logs
  • 15-26 Eucalyptus Logs (20 will be enough If you don't make any mistakes in the logic section)
  • 2 Raw Chompy (available to be caught in the Ogre Chompy Hunting Area)
  • 8 Stripy Feathers (available from the Tropical Wagtails in the hunting area to the north of Oo'glog)
  • 4 Wolf Bones (available from killing the wolves outside Oo'glog)
  • 8 Larupia Furs (tatty or perfect, available from pit-fall hunting Larupia in the hunting area to the north of Oo'glog)
  • At least ten each of the following plants found near Oo'glog, suggested around 15 or so of each:
    • Fever grass
    • Lavender
    • Primweed
    • Stinkbloom
    • Tansymum
  • Some Logs of any kind for traps
  • Teleport via Oo'glog lodestone
  • Archaeology Teleport to Chief Tess
  • Runes for South Feldip Hills Teleport (or Ring of Duelling), which is a short run from Oo'glog
  • Fairy Ring (code: AKS) is north of Oo'glog
  • Spirit Tree at South Feldip Hills Teleport

As A First Resort Quest Guide

To begin with the quest, you must travel to the center of the Oo’glog city and directly south of Yanille to find Chief Tess. Talk to her, and she will explain she can’t open her business unless the “Bossy Lady” at the bank of Oo’glog allows her to do so. After this short conversation, offer her your help, and the Chief will tell you to speak with Balnea, the “Human Lady” located in the ogre village’s bank. During the start of As a First Resort RS3, you will discover Balnea promised the ogres ‘shiny pretties’ in exchange for letting her establish her spa in the city.

Once you find the bank, enter and talk to Balnea. You will go through an extended dialogue with her, which is filled with business talk before she asks you to help turn Oo’glog into a spa. Agree to help, and she will send you to help the village’s Chief set up a spit and cooking fire.

as a first resort rs3, chargurr

What Do You Need?

Head to the ogre cook, Chargurr, north of the bank and speak with her. She will tell you she needs to make a big fire that requires several logs to cook chompy food. You must agree to help her and give her 8 Achey Logs and 10 Eucalyptus Logs. This has to be done in one go, so you must have 18 free spaces in your inventory to carry all the logs.

Once you have the logs, you must lay them in the pit to set up an Unlit Stove. Speak with Chargurr one more time, and she will ask you to find big, long spears to cook chompies on. You have to give her four spears to use as spits. To do so in this section of As a First Resort RS3, you must talk to Chargurr again and tell her you would like to give her the four spears. You will hang them in the trees, over the logs. Return and talk to Chargurr, who will ask you for 2 Chompy Birds this time. Find the Raw Chompy Birds and stick them on the Spears.

You must talk with Chargurr again. She will request that you light the fire; do so and inform her that everything is ready to complete this first task and set up catering services for the Resort.

Raw Meat Pillows in As a First Resort RS3

Return to the bank and speak with Balnea. She will ask you to help Snurgh, the hotel manager. She’s in the building on the southeast corner of the village She will inform you that the pillows in the hotel are made with Raw Meat, the softest thing she could find. Explain to her that Feathers would work better than meat, and she will agree and ask you if you can get her some Stripy Feathers. You must give her 8 Stripy Feather from Tropical Wagtails. Give them to her so she can make the pillows and return to Balnea to continue with the quest.

Hair Salon

You will have another conversation with Balnea, and she will assign you to help Kringk in the hair salon. The salon is east of the bank, and once you are there, Kringk will ask how she can do hair without tools. Tell her you can help with that and fetch her 4 Wolf Bones and 8 Larupia Furs. Once you have the items, talk to her again and give them the 4 “Wolsie Bone” and the 8 “Lup-Lup Furses” to complete this section.

as a first resort rs3, flying bugs

Flying Bugs

Head to the bank for the fourth time and speak with Balnea. This time, she will ask you to help Seegud, who is in the hut (northeast of the bank). Once there, talk to Seegud, and she will tell you she needs to eliminate the Flying Bugs from the five Spa Pools. You must light fires in the fire pits next to each pool to do so. For each bug, you must use Eucalyptus Logs and a specific plant to keep the swarms away. You will see Seegud stones next to each fire pit to help her remember what to burn. Although each combination is different for each player, you can use this list as a reference to complete this section of As a First Resort RS3 quest:

  • Long Brown: Eucalyptus Log
  • Green Lump-Shaped: Fever Grass
  • Red Round: Primweed
  • Yellow Egg-Shaped: Tansymum
  • Orange Squarish: Stinkbloom
  • Purple Tall: Lavender

Head outside Oo’glog to collect the plants and then combine each with the Eucalyptus Logs to light the fire. The first location you must go to is northwest of Seegud and examine the pile of stones between the Saltwater Spring and the fire pit. A message will appear in your chat section describing which type of stones they are. Once you know this information, place the logs with the right plants and light the fire pit. After you do so, you will notice the bugs are still flying over the pool, and you will hear a mischievous ogre child laughing.

With your failed attempt to kill the bugs, return to Seegud and speak with her. She will tell you that the ogre child must have mixed up the stones, so you now need to discover which plants the mixed-up stones represent to continue with this task of RS3 As a First Resort quest.

Run west of Seegud, and by the saltwater spring, you will find an ogre child called Snarrl. She recommends you start with a thermal bath, so you must go to the north of Seegud to see it. In this section of As a First Resort, you must discover the relationship between the stones and the plants, which will be done through elimination. Once you know which stone represents each plant, make a note of the match so you won’t need to go through the whole process since you can’t check what plant you used after you lit the fire. Each combination you will do requires two plants and one Eucalyptus Log, except for the Bandos Pool.

You must examine the pile of stones next to each pool, and place the logs with one of the plants in the fire pit, then light them. If you see the following message, “The fire has pungent aroma, but it doesn’t seem to have any effect on the insect”, it means it’s not the correct combination. So, place another log, use a different plant and try again. Remember, you must use a new log each time you intend to light the fire pit. Once you have the right combination, you will see this message: “The pungent smell makes the insects disperse”.

You can follow this route to complete and light all the fire pits in order for As a First Resort RS3.

  • Start right off the Thermal Bath north of Seegud (the green bath). You will see long brownstones that refer to Eucalyptus logs, so place one and figure out which plant will disperse the insects.
  • Move to the east to the Mud Bath as your second location and find the right plant which will disperse the insects.
  • Your next move is to the Saltwater Spring, west of the Thermal Bath. Here, you will need to use the second plant you used in the Mud Bath and find the correct plant.
  • Head to the Sulphur Spring, where you will find the next pile of stone. There, you need to place the second plant used in the Mud Bath and find the other one to light the fire.
  • Finally, head to the west, directly to the Bandos Pool, and use three different plants plus the Eucalyptus Log. Once you find the right combination, move to the next stage of RS3 As a First Resort.
  • If you need some help, talk to the ogre child (other than the one who laughed at you) to not mess up the patterns.

Once you have dispersed all the bugs, talk to Seegud, then return to the bank and meet Balnea again. You must keep the herbs after completing this section because you will need them in your next task.

as a resort rs3

Creatures in As a First Resort RS3

When you talk with Balnea again, she will tell you about the “one last outstanding matter”. She will ask you to trap creatures who are wandering around the village. Moreover, she will mention it won’t be an easy task and recommends you talk to Chief Tess to learn how to catch these creatures. Run toward Chief Tess and speak to her. She will explain to you that the animals in the area are clever, and you need to be sneaky to capture them. Likewise, she will mention you must burn “stuffs” to lure the animals to the traps.

Kebbits

In this phase, you will need to catch the Diseased Kebbits. To do so, you must set a Deadfall Trap on the boulders to the east and west of the Saltwater Spring. There are 4 Diseased Kebbits to catch, so you must catch two in every trap.

Inside the trap, you must bait with Fever Grass. You must light another Fever Grass and run around to lure a Kebbit to the trap. We recommend you walk instead of running to avoid any problems with attracting the Kebbits. The Fever Grass you lit will last only 30 seconds, so we also recommend you have a few in your inventory before starting this task. You must use the main hand weapon slot for the smoldering grass, so make sure to account for that.

Beware, since the Diseased Kebbits will turn aggressive if you burn Tansymum Flowers nearby them. Moreover, you must set one trap at a time because an ogre child will tell you, "Hey, you, human! You no allowed to clutter up Oo'glog wiv traps. You only set one at a time here."

Wimpy Birds

For these creatures, you will need to set a Bird Snare west of the bank. Here, you must light a Tansymun Flower and run around to attract the birds to your trap. You will need to catch 5 of these Wimpy Birds. During this stage, you must be careful since if you burn Fever Grass, you will repel the birds, and if you burn Lavender, they will peck you.

The final bird can be challenging to catch and may refuse to follow you and unrelated Wimpy Birds may appear in the Bird Snare. If you find this problem, return and ask Chief Tess how to catch Wimpy Birds, and make sure you go through the dialogue and finish with this sentence: "Nothing else to ask." option instead of walking away.

Platypodes in As a First Resort RS3

For these animals, you will need to lay a Box Trap and burn Lavender near Sulphur Sring and west of Chief Tess. Beware of the spurs of these Platypodes because they are poisonous. Don’t try to burn Fever Grass; if you do so, they will attack you with their “webbed feet of doom.”

Once you catch one Platypus, you must check the shaking box to put the animal in your inventory. You must catch a whole family (Patrick, Peanut, Penelope and Peter), head to the northeast corner of the village, and by the coast still in Oo’glog, release the platypodes near the bulrushes. You will find this location easily by seeing the Baby Platypus on the mini map. For every Platypus you release, you will obtain a Casket or an Oyster.

as a first resort rs3

Grand Opening

After you catch all the animals in As a First Resort RS3, it’s time to return to Balnea for the last time, and after you dismiss any active follower, you will trigger a cutscene of the grand opening of the spa. Moreover, the Wise Old Man will be taking water there. This will mark the end of the quest!

As A First Resort RS3 Rewards

Congratulations! You’ve completed As a First Resort, and after a long task list, it’s time to take a relaxing bath inside the resort. Let’s see what you’ll get from completing the quest:

  • 1 quest point
  • 15,000 Firemaking XP
  • 15,000 Hunter XP
  • 15,000 Woodcutting XP
  • A mixture of 4 items, either Caskets or Oysters
  • Access to the Spa facilities
  • Access to the Oo'glog Bank
  • Access to the Oo'glog Hunter area
  • Access to the Platypus Summoning Pet (level 10 Summoning Summoning). If you release your pet in the spot you released the others during the quest, you will receive another casket or oyster.
  • Access to the Fresh Meat shop
  • Access to the Gift Shop
  • Ability to travel to Oo'glog using the Charter ships
  • Ability to create Robust glass and Crystal glass
  • Access to decanting five and six dose flasks into other flasks or vials (speak to Teplin Macagan)
  • 2 Treasure Hunter keys (Not available for Ironman mode)

as a first resort rs3, rewards

RS3 As A First Resort FAQ

With the resort finally open and with rewards in your hands, you should be proud of yourself. However, we know you could have some extra questions you want answered. That’s why we will cover your back and help solve any doubt you have about As a First Resort RS3 quest. So, let’s begin!

What are the achievements unlocked after completing As a First Resort Runescape?

You will unlock three achievements when you complete this quest:

  • As a First Resort: to complete the quest
  • Elite - I’m sugar (part of the Desert Achievements): In Nardah, make a super antifire flask - making both the flask and potion from scratch.
  • Elite - The Expensive Range (part of the Tirannwn Achievements): Create a grand ranging potion in a crystal flask from nothing but raw ingredients.

Is there any extra reward for completing this quest?

Yes, you will also unlock some music tracks related to RS3 As a First Resort. The tracks you unlock after completing the quest are Bish Bash Bosh, Hot ‘n’ Bothered, Shaping Up, and Spa Bizarre.

As A First Resort Guide RS3 Summary

After a long adventure repelling insects, helping ogres and more. However, that doesn’t mean your work is over; you can still make your way and find more quests to complete. If you need help, you can check our blog section to find more guides like this. Moreover, if you want to level up faster, you can buy RS3 gold on our web page to get the best gear without much effort. That’s all for now. See you in the next blog!

logo
Vessel Of The Harbinger RS3 - Learn the Ins and Outs Vessel Of The Harbinger RS3 - Learn the Ins and Outs Questing

Welcome back to our blog series, where we cover different quests through RS3. Today’s blog will touch on the Vessel of the Harbinger in RS3, a continuation of your journey hrough the underworld and discovering all that the Necromancy skill has to offer. We’ve already covered Necromancy! and Rune Mythos, so don’t forget to check them if you haven’t already. In the third quest of The First Necromancer series, you will learn more about Rasial from one of his previous students at Port Phasmatys. With all being said, let’s break it down! 

rs3 ectofuntus, rs3 vessel of the harbinger

Vessel of the Harbinger Requirements RS3

Before you start your adventure, you must know some details about RS3 Vessel of the Harbinger; first, this is a Member only quest with an estimated medium length, so you must expect to spend about 20 to 30 minutes going through this quest. Moreover, here are all the requirements you will need to complete Vessel Of The Harbinger quest: 

  • 46 Necromancy 
  • 40 Prayer
  • Ghostspeak Amulet or Cramulet (Unless you’ve completed Hard Morytania Achievements)
  • Bucket of Slime 
  • Ectoplasm 
  • Necromancy Weapons (including Conduit)
  • Bucket
  • Ectophial 
  • A way to quickly teleport to the Slayer Tower (Ring of Slaying, Dungeoneering Cape, Activated Canifis lodestone)
  • Teleport to the City of Um (10 Spirit Runes to cast City of Um teleport twice, Activated City of Um lodestone, or Underworld Grimoire 2)
  • Salve Amulet or Salve Amulet (e) (To increase damage against the Tortured Souls) 
  • Completion of Rune Mythos and Ghosts Ahoy
  • Ability to defeat five Tortured Souls level 53

Items for the Empower Vessel Ritual: 

  • 11 Basic Ghostly Ink 
  • 2 Regular Ghostly Ink 
  • 4 Light Sources 

RS3 Vessel of the Harbinger Guide

To begin Vessel Of The Harbinger head to the City of Um, find Death, and ask him about Rasial. He will tell you that necromancers often create their own Vessels, the likes of which you've already encountered. Death will mention that Necrovarus was Rasial’s apprentice, and he can teach you more about Rasial's plans.

The Request Of Necrovarus

After your dialogue with Death, head to the Ectofuntus and speak to Necrovarus. The fastest way to get there is to use the Ectophial. At this point, you must equip your Ghostspeak Amulet unless you’ve completed the Hard Morytania Achievements. After your short conversation with Necrovarus, he will agree to help you but will ask you for a favor in return. 

Necrovarus will tell you the Ectofuntus has become stronger over time, and the Tortured Souls outside are preventing it from reaching its full potential. He’ll ask you to defeat the five Tortured Souls using Necromancy, and then he will give you a Soul Urn to collect their souls. Thankfully, only just over half of the damage dealt to the Tortured Souls needs to be from Necromancy in order for the souls to count toward the task. So, you can make use of some other combat methods to speed up the process, just keep an eye on the damage you deal to ensure your efforts are for nothing. As long as 1,500 damage comes from Necromancy attacks, you can switch to other weapons for the kill, and it will still count towards the quest objective. 

Once you defeat the Tortured Souls and fill the Soul Urn, the next step in Vessel of the Harbinger in RS3 is to worship the Ectofuntus with a Bucket of Slime and a full Soul Urn in the backpack. With this, you will earn 100 Necromancy XP. If you didn’t obtain the Bucket of Slime, you must head to the Pool of Slime in the basement and get some. Once you do this, return to Necrovarus and talk to him. He will tell you to perform a ritual to empower the Well of Souls, but sadly, he forgot how to do it. Instead, Necrovarus will tell you the information needed is in the Book of Haricanto, and you must ask Netty to get it back. 

vessel of the harbinger rs3

The Book Of Haricanto

After this conversation, head to Netty’s house. You will find it east of the Slayer Tower; using a Ring of Slaying or Dungeoneering Cape is the fastest way to get there. If you can’t use either of these items, you can teleport to the Canifis lodestone and then run northwest until you reach the Lustrous Wisp colony. You will immediately know Netty is not around, but you will find a pile of letters on the floor. Inspect the letters, and quickly, you will realize you need to visit Velorina in Port Phasmatys. 

To continue with Vessel of the Harbinger in RS3, return to the Ectofuntus using your preferred teleport method and head south, passing the energy barrier to Port Phasmatys. Run northeast to find her in the northernmost house. Talk to Velorina; she will inform you that Netty died some time ago when she was gathering some nettles for her tea. You must head to the City of Um and then go to The Last Call Pub. There, you will find Netty’s ghost standing in the northeastern corner of the place. Speak with her, and after a quick catch-up, you will tell Netty you need the Book of Haricanto. She will tell you it is inside a chest in her house, and she will give you her Death Certificate and Will; with this, you can claim her key from the Bank of Port Phasmatys. 

Note: If you have the Ghostspeak ability, or the Ghostspeak amulet equipped, Netty will tell you that it is unnecessary to do so; despite her being a ghost.. 

Your next step in RS3 Vessel of the Harbinger is to go to the bank in Port Phasmatys and talk with the Ghost Banker to obtain Netty’s key. To do so, use Netty’s Death Certificate and Will on the banker, it will deposit the key into your bank, and you don’t have to go through all the dialogue with the Ghost Banker. 

With Netty’s key with you, return to her house and open the Locked Chest. You will see how Netty’s Skeleton appears, and you must fight it before you can get the book. Her skeleton is immune to any type of damage, and you can’t defeat it using regular methods. Instead, you must cast Conjure Skeleton Warrior, which requires a Conduit and one Ectoplasm near the skeleton. This will cause it to collapse due to its poor self-esteem. Once you complete this task in the Vessel of the Harbinger RS3 quest, you will be able to open the chest and find the Book of Haricanto. 

Empower The Vessel

With the book in your inventory, return to the Ectofuntus and speak to Necrovarus. He will tell you to get the Bucket of Power Slime from the Ectofuntus; to do so, just use a Bucket on the Ectofuntus to obtain it. Head to the City of Um to perform the Empower Vessel Ritual. This ritual requires the following items: 

  • 2 Elemental I glyphs
  • 1 Charge I glyph
  • 1 Commune I glyph
  • 4 Ritual Light Sources
  • 1 Bucket of Powerful Slime
  • 11 Basic Ghostly Ink
  • 2 regular Ghostly Ink
  • 4 Basic Ritual Candles or better

Once you have everything, complete the ritual. This will trigger a cutscene where you can see Rasial, the First Necromancer, appear and send Necrovarus away. If the cutscene doesn’t play, return and talk to Necrovarus. When the cutscene ends, head back to Death to finish the Vessel of the Harbinger in RS3. 

Vessel of the Harbinger RS3 Rewards

Congratulations! You've completed the RS3 Vessel of the Harbinger quest. After covering quite some distance between Port Phasmatys and the City of Um, we're sure you're itching to know what's up for grabs. Along with taking your first steps in empowering your vessel and working through your Necromancy abilities, you will also be rewarded with the following: 

  • 1 Quest Point
  • 10,000 Necromancy XP lamp
  • 5,000 Prayer XP lamp
  • 25 souls added to the Well of Souls
  • 2 Treasure Hunter keys (Ironman accounts will not receive these)

vessel of the harbinger rs3 rewards

RS3 Vessel of the Harbinger FAQ

Even the very best of players can have their doubts, but don't be ashamed about those wanderings. It's our job to help your questing adventures become the best they can be, which is why we have compiled some of the most frequently asked questions about this underworld adventure to ease your confusion. Take a look below:

What achievements will unlock after completing Vessel Of The Harbinger in RS3?

Once you complete the Vessel Of The Harbinger quest, you will unlock the following achievements: Vessel Of the Harbinger for completion of the quest and Legal Entitlement, when you inform the Old Man about the fate of his mother after Vessel Of The Harbinger. 

Which quests will require RS3 Vessel Of The Harbinger to enter them?

After you go through Vessel Of The Harbinger, you will unlock The Spirit of War quest, which requires completion to get access to it. The Spirit of War is also part of The First Necromancer quest series. 

Vessel of the Harbinger RS3 Conclusion

After your adventure retrieving the Book of Haricanto, it’s time to relax or maybe you’d prefer to jump into a new quest or journey. With the endless possibilities that come with RS3, you can spend your time doing what you think is best. If you feel your bank is lighter following the adventure, you can replenish it by purchasing RS3 gold and focusing on the things that matter without wasting your time on money-making methods. If you like this guide, you can find more of it in our blog section. That’s all for now. See you in our next blog.

logo
Rune Mythos RS3 - The Origins Of Necromancy Rune Mythos RS3 - The Origins Of Necromancy Questing

After your journey through death and your return to life in the Necromancy! quest, introducing you to the different aspects of the underworld and the Necromancy skill now it’s time to discover the origin of Necromancy. Learn just how powerful you can become and dive further into the lore of the City of Um. We'd like to welcome you back to our blog series, where each week, we cover a new and exciting game topic and walkthrough. In today's article, we will cover the Rune Mythos quest in RS3, and everything that goes with it. So, let's break it down! 

rs3 rune mythos

RS3 Requirements Rune Mythos

Before you begin your adventure through the City of Um and its mysteries, you must know this is a Members-only quest. It is short to medium in length, so you can expect to spend around 10 to 20 minutes navigating through Rune Mythos RS3. Apart from that, the requirements for this quest are simple and uncomplicated; here’s what you need to go through all the endeavors: 

  • 24 Necromancy 
  • Resources for the Lesser Essence Ritual
  • 200 Noted Pure Essence 
  • 8 Basic Ghostly Ink 
  • 4 Regular Ghostly Ink 

Thankfully, this quest has no enemies for you to face, meaning you can go through this journey without worrying about any sort of showdown. 

Rune Mythos RS3 Guide

To begin with Rune Mythos RS3, you must head to the Ritual Site in the City of Um. Next to the Ritual site, you will see Malignius Mortifer. You'll need to speak with him to get the quest going, but before that, ensure you have an empty inventory. There are several chat options that you can cycle through if you wish to learn about Necromantic Runes or Incantations, but the one to get the quest going will be 'I'm good, what's next?' You don't have to worry about the other options; they won't affect your quest journey either way, but they are there if you wish to grow your knowledge. 

 Once you've selected the correct dialogue to get the quest started, Malignius will give you everything you need for the Lesser Essence Ritual: 

  • 200 Noted Pure Essence 
  • 8 Basic Ghostly Ink 
  • 4 Regular Ghostly Ink 
  • 4 Basic Ritual Candles. 

If you have some items, he will give you only the ones you missed. It is vital that you do not drop or lose the materials he provides you, as he will not replace them. Once you have all the items in your inventory, it’s time to head to the Pedestal in the Ritual Site; here, you must click the center and select the Lesser Essence Ritual. Performing this ritual will require cleaning any remains from previous Glyphs to make space for your ritual. 

rs3 rune mythos

To complete this ritual, you must create 2 Elemental I Glyphs that will cost you 3 Basic Ghostly Ink each, and 2 Change I Glyphs that cost you 2 Basic Ghostly Ink and 1 Regular Ghostly Ink each. You must place the candles to create the sources of light required for the ritual. Once everything is ready, stand on the platform and perform the ritual. This ritual will consume the Pure Essence Malignius gave you. 

After completing the ritual, head to the Ritual Chest close to Malignius, take as much Impure Essence as you can carry in your inventory, and then bank all the other items. Head to the northeastern area of the City of Um, and you must go through the Dark Portal. Before entering the portal, you must ensure you have at least one Unnoted Impure Essence. 

To continue your journey in Rune Mythos quest, you must attempt to craft some Spirits Runes, but before you are able, Rasial, The First Necromancer, will tell you to stop “playing with things you aren’t ready for.” Moreover, he won’t let you craft the runes until you speak to him. You must go through all the conversations and dialogue with Rasial until he finishes and disappears. Once he’s gone, craft the runes and return to Malignius Mortifer to receive your rewards. 

Rune Mythos Rewards RS3

Congratulations! You have completed Rune Mythos RS3. Even though this was a short and sweet quest, there are still some decent rewards at play. So, now that you've come to the end of the road let's take a look at what you receive for your efforts: 

  • 1 quest point
  • 1,500 Necromancy XP lamp
  • 250 Runecrafting XP lamp
  • Access to Lesser, Greater, and Powerful Essence Rituals
  • Access to Necromancy Runecrafting
  • Access to Necromancy Incantations
  • City of Um Teleport incantation
  • Lesser Bone Shield incantation
  • 2 Treasure Hunter keys (Ironman accounts will not receive these)

rune mythos rs3

Rune Mythos RS3 FAQ

After going through the process of the Rune Mythos quest, you may have some questions. It may be a short quest, but the doubts surrounding what is to come in the next quest of the series, and some general wonderings may be playing on your mind. So, we're here to answer those all-important questions. Let’s begin! 

What achievements can you unlock after completing the Rune Mythos quest RS3?

Once you finish the quest, you will receive the following achievements: Rune Mythos, which you earned by completing the quest and City of Um Set Task. The last one you will receive is from Ichlarin, and you can find him near the Ritual Site of the City of Um, but you need to complete all Easy Tasks in the city first. 

What quest will be unlocked after completing RS3 Rune Mythos?

Since this is the second quest in the First Necromancer quest series, you will unlock the third quest 'Vessel of the Harbinger'. This will continue your journey through the underworld, and the Necromancy skill. 

RS3 Rune Mythos Summary

It feels nice completing one more quest, even the short ones like Rune Mythos. However, it’s not just the reward and completion of the quest that is worth the time, but the knowledge you obtain that will be useful in the upcoming quests. Until then, take a look at some of our other RS3 titles in our blog section, and if you want to build your bank without the grind, consider buying RS3 gold to level up your gear, skills, and everything related to conquering Gielinor. That’s all for now, we’ll see you on the next blog.