Ritual of the Mahjarrat Quest Guide

By Armand Visser | Created: May 12, 2023 | Last updated: July 11, 2025 | Read Time: 11 minutes

Introduction to The Ritual of The Mahjarrat Quest

Ritual of the Mahjarrat is one of the grandmaster quests in RuneScape, requiring players to complete a series of challenging tasks that will test their skills and abilities. This quest is part of the Mahjarrat storyline and follows the events of the previous quests, including The Temple at Senntisten, The Curse of Arrav, and The World Wakes. In this guide, we will walk you through the steps required to complete the Ritual of the Mahjarrat.

The Beginning of the Ritual of the Mahjarrat Quest

To start the quest, players must have completed the following quests:

  • The Temple at Senntisten
  • The Curse of Arrav
  • The World Wakes

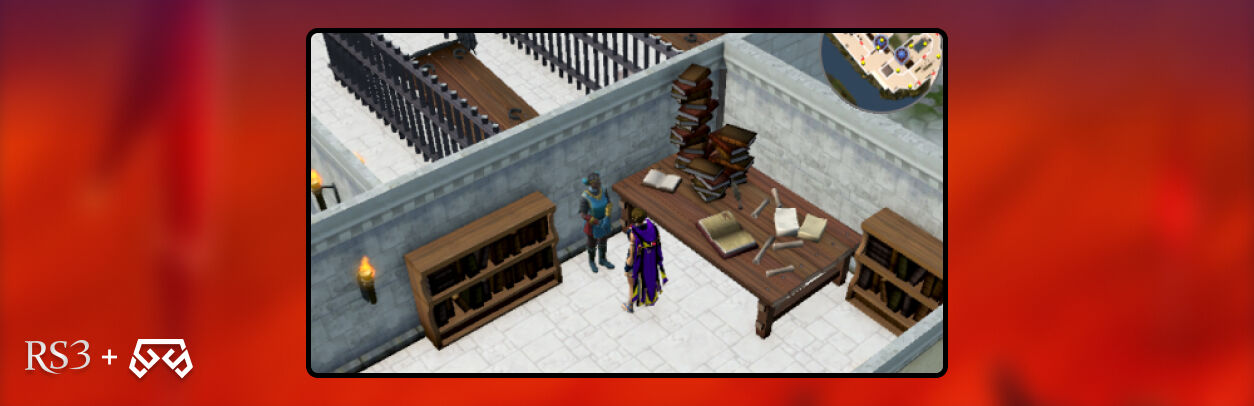
Once you have completed these quests, you can begin the Ritual of the Mahjarrat in RS3 by talking to the Curator at the Varrock Museum. The Curator will give you a book that contains information about the quest and what you need to do to complete it.

  1. Hammer and Chisel: The hammer and chisel can be obtained from any general store in the game. They are inexpensive and easy to find.
  2. Black Dragonhide: To obtain black dragonhide, you will need to kill black dragons. Black dragons can be found in the Taverley Dungeon and the Catacombs of Kourend. They can also be found in the wilderness, but this is a dangerous option as you risk being attacked by other players.
  3. Climbing Boots: Climbing boots can be obtained from the Death Plateau quest. Once the quest is completed, you can purchase climbing boots from Tenzing in the Burthorpe Troll Warzone for 12 coins.
  4. Blue Dragon Scale: Blue dragon scales can be obtained by killing blue dragons. Blue dragons can be found in a number of locations, including the Taverley Dungeon, the Ogre Enclave, and the Myths' Guild basement.
  5. Mithril Bar: Mithril bars can be obtained by smelting mithril ore in a furnace. Mithril ore can be mined in several locations, including the Mining Guild, the Crafting Guild, and the Dwarven Mine.
  6. Rune Bar: Rune bars can be obtained by smelting runite ore in a furnace. Runite ore can be mined in a number of locations, including the Mining Guild, the Wilderness, and the Heroes' Guild.
  7. Dragonstone: Dragonstones can be obtained by mining them in the Crandor and Karamja Dungeon, or by purchasing them from other players.
  8. Dragonkin Artifacts: Dragonkin artifacts can be obtained by killing dragonkin creatures. These creatures can be found in a number of locations, including the Brimhaven Dungeon, the Dragonkin Laboratory, and the Elder Halls.

You should keep in mind that some of these items can be obtained more easily by buying them cheaply. Remember that having a substantial stock of RS3 gold gives you greater flexibility, power and opportunities within the game.

NPCs to Talk to

To prepare for the Ritual of the Mahjarrat quest in RuneScape, you need to talk to several NPCs to gather information about the quest and what they need to do. Here are the NPCs players should talk to and where to find them:

  • The Curator: The Curator can be found in the Varrock Museum. He is the NPC who starts the quest and gives you a book that contains information about the quest.
  • Akrisae: Akrisae can be found in the Barrows area. He provides you with information about the ritual and what they need to do to prepare for it.
  • Azzanadra: Azzanadra can be found in the Jaldraocht Pyramid in the Kharidian Desert. He provides information about the ritual and its significance in the Mahjarrat storyline.
  • Hazelmere: Hazelmere can be found in the Gnome Stronghold. He gives you the information about the dragonkin and their involvement in the ritual.
  • Jhallan: Jhallan can be found in the Glacor Cave. he tells you all you need to know about the Glacors and their involvement in the ritual.
  • Zemouregal: Zemouregal can be found in the Senntisten Temple. He provides players with information about the ritual and what they need to do to complete it.

You should talk to these NPCs before starting the quest to gather as much information as possible. Some of the NPCs may provide you with hints and tips about how to complete the quest more easily, while others may provide background information about the Mahjarrat storyline. By talking to these NPCs, you can gain a better understanding of the quest and its significance in the game's lore.

All Skill Requirements for Ritual of the Mahjarrat

In addition to the quest requirements, this quest is very long and highly advanced, as it is a grandmaster quest, so it also requires you to have relatively high skill levels for almost all of the skills in RS3; here we have laid out what you need:

Combat Skills

Players need a minimum combat level of 111 to face the quest's challenges effectively. Additionally, high combat stats are recommended, including melee (Attack, Strength, and Defense) and ranged or magic skills. Having level 70+ in these combat skills is advised.

Agility

Players must have an Agility level of 76 to access certain areas during the quest.

Mining and Smithing

There is a requirement to mine and smith runite bars. Players need a Mining level of 76 and a Smithing level of 80 to do so.

Thieving

Players need a Thieving level of 77 to pickpocket a character during the quest.

Woodcutting

There is a requirement to chop a blisterwood tree during the quest, which requires a Woodcutting level of 76.

Firemaking

Players need a Firemaking level of 77 to light a pyre during the quest.

Herblore

There is a Herblore requirement of level 76 to create a ritual shard.

Summoning

Players need a Summoning level of 77 to summon a familiar during the quest.

These skill requirements ensure that players have a well-rounded set of abilities to face the challenges presented in this quest, one of the most significant and difficult quests in RuneScape.

Preparing for the Ritual

The next step in this Ritual of the Mahjarrat guide involves preparing for the ritual itself. This involves gathering a number of items and completing a series of tasks. The first task is to retrieve the Stone of Jas from the Mahjarrat Ritual Site. To do this, you will need to travel to the Ritual Site, which is located south of the Legends' Guild. Once you arrive, you must navigate a series of traps and puzzles to reach the Stone of Jas.

The second task is to gather three types of ore: mithril, adamantite, and runite. You can obtain these ores by mining them yourself or by purchasing them from other players. The third task is to gather a number of dragonkin artifacts. These artifacts can be obtained by killing dragonkin creatures, which can be found in a number of locations throughout the game.

Once you have gathered all of the required items, you will need to take them to the Ritual Marker, located in the Mahjarrat Ritual Site. Place the items on the marker and the ritual will begin.

The Ritual Itself in The Ritual of the Mahjarrat Quest

The ritual itself is a complex series of tasks that require you to use a variety of skills and abilities. The tasks include:

  1. Summoning the Mahjarrat: You must use the Stone of Jas to summon the Mahjarrat, who will then appear and begin the ritual.
  2. Protecting the Mahjarrat: You must protect the Mahjarrat from attack by a group of dragonkin creatures.
  3. Activating the Forge: You must activate the forge and use it to melt the three types of ore.
  4. Creating the Blade: You should use the melted ore to create a blade that can be used to defeat the dragonkin creatures.
  5. Defeating the Dragonkin: You have to use the blade to defeat the dragonkin creatures and prevent them from disrupting the ritual.
  6. Restoring the Shield: You have to restore the shield that protects the ritual site from the dragonkin's attacks.
  7. Finishing the Ritual: You should complete the ritual by using the dragonstone to activate the Stone of Jas.

Each of these tasks requires a different set of skills and abilities, so you will need to be well-prepared in All skill requirements for the Ritual of the Mahjarrat if you want to complete the ritual successfully.

Boss Fights in The Ritual of The Mahjarrat Quest

One of the most challenging aspects of the quest is the boss fights. There are several boss fights throughout the quest that require you to use combat skills and abilities to defeat powerful enemies. Here's a breakdown of each boss fight and what you need to do to defeat them.

Bal'lak the Pummeller

Firstly, The Bal'lak the Pummeller. Bal'lak is a powerful ogre that you need to defeat to obtain the ogre artifact. During the fight, you should use melee weapons and armor, as well as food and potions to heal yourself. Bal'lak uses both melee and ranged attacks and has a special attack that creates an earthquake. You need to attack Bal'lak using the right combat style and watch out for his special attack. After defeating Bal'lak, players can progress to the next part of the quest with the ogre artifact.

The Mercenary Leader

The second boss fight is against the Mercenary Leader, a powerful human. The fight is mixed combat, so you should bring melee and magic weapons and armor, as well as food and potions to heal. The Mercenary Leader uses melee and magic attacks and has a special attack that creates a whirlwind. You need to use both melee and magic attacks to defeat him. After defeating the Mercenary Leader, you can progress with the human artifact.

The Dragonkin Laboratory

The third boss fight in the Ritual of the Mahjarrat quest takes place in the Dragonkin Laboratory. The laboratory is a complex area filled with powerful dragonkin creatures that you must defeat to obtain the dragonkin artifact. The fight against the dragonkin creatures is a mixed combat battle, so you should bring both melee and ranged weapons and armor, as well as food and potions to heal yourself during the fight.

The dragonkin creatures have several attacks, including fire breath and melee attacks. You must use their combat skills and abilities to defeat the creatures, and should focus on taking them down one at a time. After defeating the dragonkin creatures, you will obtain the dragonkin artifact, which is needed to complete the ritual.

The Queen Black Dragon

The final boss fight in this quest is against the Queen Black Dragon. The Queen Black Dragon is one of the most challenging bosses in the game and requires a high level of combat skills and abilities to defeat. The fight is mixed combat and requires you to bring both melee and ranged weapons and armor, as well as food and potions to heal yourself during the battle.

The Queen Black Dragon has several attacks, including fire breath and melee attacks, and can also summon minions to assist her. You need to use their combat skills and abilities to defeat the Queen Black Dragon and complete the quest. After defeating the Queen Black Dragon, you can enjoy the rewards of the quest, including access to the Glacor Cave and the ability to fight the Queen Black Dragon again.

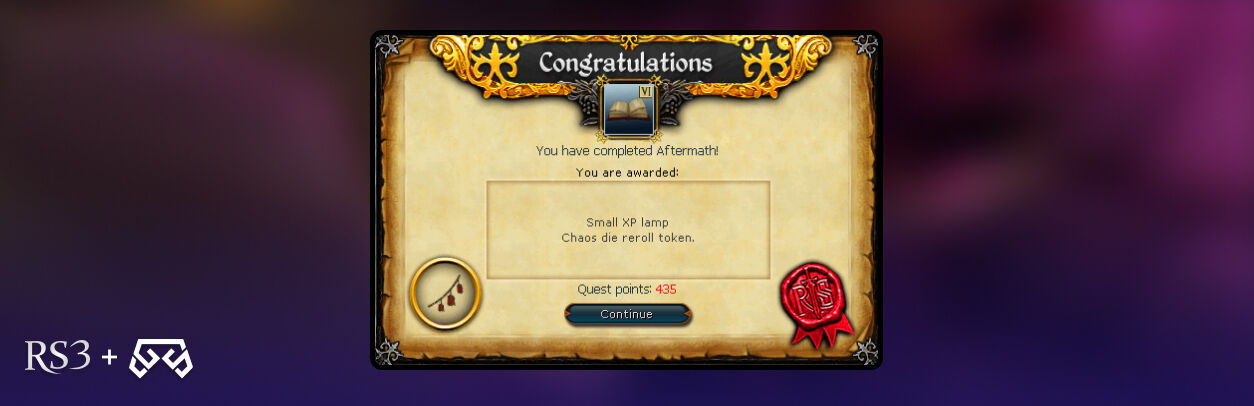
Ritual of The Mahjarrat Rewards

Completing the offers several rewards for players. Some of the rewards are tangible, while others are intangible. Here are some of the rewards players can get for completing the quest:

  • Access to the Glacor Cave: After completing the quest, you gain access to the Glacor Cave, where they can fight the Glacors. The Glacors drop rare items and provide experience points in several skills.
  • Access to the Queen Black Dragon: You who complete the quest can fight the Queen Black Dragon, one of the most challenging bosses in the game. The Queen Black Dragon drops rare items and provides experience points in several skills.
  • Experience Points: Completing the Ritual of the Mahjarrat quest provides experience points in several skills, including Agility, Crafting, Herblore, Smithing, and Summoning. The amount of experience points earned depends on the player's skill levels.
  • Quest Points: Completing this quest provides you with three quest points, which can be used to unlock other quests in the game.
  • Storyline Progression: The Ritual of the Mahjarrat in Runescape is part of the Mahjarrat storyline in RuneScape. Completing the quest allows you to progress further in the storyline and learn more about the lore of the game.

Tips and Strategies to Beat the Ritual of The Mahjarrat Quest

Completing this quest can be a daunting task, but there are a number of tips and strategies that can help make the process easier.

  • Prepare thoroughly: Make sure you have all of the required items and are well-equipped with the necessary skills and abilities before beginning the quest.
  • Bring food and potions: The quest involves a lot of combat, so bringing food and potions to heal yourself is essential.
  • Join a team: The quest can be completed solo, but it's much easier to do it with a team. Joining a group of other players can help you complete the tasks more quickly and easily.
  • Practice combat: The combat in the quest can be challenging, so it's a good idea to practice your combat skills before attempting the quest.

FAQ

How do I get to the Mahjarrat ritual site?

To reach the Mahjarrat Ritual Site in RS3, you need to complete the Ritual of the Mahjarrat quest. Access to the site is granted during this quest. Start in Zemouregal's fort in the wilderness, then follow the icy path to the north. Enter the cave, and you'll find the ritual marker. Use the Stone of Jas, and you'll be teleported to the Mahjarrat Ritual Site. Remember that accessing the site requires completing prerequisite quests, including "Defender of Varrock," "The Tale of the Muspah," "Missing My Mummy," "While Guthix Sleeps," and "The Curse of Arrav."

What is the story of the Mahjarrat?

The Mahjarrat are a powerful race of shape-shifting, magic-wielding beings in the world of Gielinor. They originated from the realm of Freneskae, where they participated in constant battles, honing their combat skills. The god Icthlarin brought them to Gielinor to fight against the Zarosian Empire. However, many Mahjarrat betrayed Icthlarin and joined Zaros due to disagreements over power and influence. Mahjarrat are known for their ritual of rejuvenation, where they sacrifice one of their own to gain strength. This ritual maintains their longevity and power, making them key players in many of Gielinor's historical conflicts.

How did Azzanadra become a god?

In RuneScape 3, Azzanadra's ascension occurred during the "Azzanadra's Quest" and "Elder God Wars" storylines. He achieved godhood by absorbing the energy of the Elder Artifact, the Elder Horn, which Sliske had stolen from the Elder Gods. This transformation was unintentional, as Azzanadra initially sought the Elder Horn to communicate with the Elder Gods and negotiate peace. However, the absorption of the artifact's energy elevated him to divine status. In OSRS, Azzanadra remains a powerful Mahjarrat, but has not ascended to godhood.

Conclusion to The Ritual of The Mahjarrat Quest

Completing this quest is a challenging and rewarding experience for RuneScape players. If you are wondering, “Why do Ritual of the Mahjarrat?” Now you know the quest requires you to use a variety of skills and abilities to complete a complex series of tasks, but the rewards are well worth the effort. By following the tips and strategies outlined in this guide, you can increase your chances of completing the quest successfully and enjoying all of the benefits that come with it. However, if this is not your thing, you could jump to our Buy RS3 Gold site and grab cheap gold to instantly boost your progress.


Author profile
Armand Visser

Armand is a blogger at Chicks Gold with a passion for gaming, SEO, and copywriting. He creates fresh, research-driven content that informs and entertains a wide range of readers across niches.


Related Articles
logo
Aftermath RS3: Reverse The Edicts Aftermath RS3: Reverse The Edicts Questing

Fear is one thing you should have when you enter this quest; however, with our help, you will be able to reverse the Editcs that will banish Zamorak, Lord of Chaos. Aftermath RS3 is part of the quest series, The Elder God Wars being the sixteenth quest in the line. It’s time to continue your fight against Gods and return victorious after conquering this terror. So, let’s begin!

RS3 Aftermath Requirements

You must understand this is a quest of a medium to long duration, so you can expect to spend about 25 to 35 minutes defeating this boss. Moreover, like the other quests in this series, RS3 Aftermath is a Members-only quest. So, you will need to meet the following recommendations to make your journey easier:

  • Completion of Twilight of the Gods quest
  • Ring of Respawn, Passage of the Abyss, Falador Teleport, activated Falador lodestone, or Master Archaeologist's Outfit for quick access to the White Knights' Castle
  • Archaeology journal or Master Archaeologist's outfit to teleport to Kharid-et Dig Site
  • Clan vexillum or Master Archaeologist's outfit to teleport to Armadyl's Tower
  • Ability to defeat various enemies within The Zamorakian Undercity and Zamorak, Lord of Chaos level 14,000

aftermath rs3, zamorak

Aftermath Quest RS3 Walkthrough

To begin with, Aftermath in RS3, head west of the library on the first floor of the White Knights’ Castle to find Adrasteia. Talk to her, and she will reveal that in order to reach Zamorak, you must go through The Zamorakian Undercity. You will find the undercity deep within Senntisten, a place occupied by Zamorakinas after the events of the Elder God Wars. Once you’re there, go through the portal located within. Adrasteia will suggest you meet with Sir Cadian, who is the leader of an assault into the undercity.

Knights

For your next step into the RS3 Aftermath quest, you must enter the undercity, and the best way to do it is through the Varrock Dig Site entrance of Senntisten. Once you are inside, enter the undercity by using the pulley lift; it’s near the larger-looking pulley lift used to enter and exit Senntisten. After you enter the undercity, walk north and meet with Sir Cadian. You must go through some dialogue options, and then a cutscene will begin. He will mention that The White Knights have been staging assaults against the followers of Zamorak, but all their tries were unsuccessful. They try to get the portal that leads to the Wilderness Crater. More information is revealed, and players will find out that Zamoriakians are sacrificing troops from the Elder God Wars Dungeon to fuel the portal.

In this section, you will be able to clear the Zamorakian Undercity without any difficulty. However, if you have already defeated Zamorak, Lord of Chaos, and exited the arena, you can go through the portal instead of teleporting; in other words, you can skip this step.

Edicts of Guthix

After you go through the Zamorakian Undercity and defeat Demons, Cultists, Hellhounds, and Waterfinds, it’s time to banish Zamorak by successfully reinstating the Guthixian Edicts. Part of this journey will have you fight him, and once you defeat and banish him, you will have to return to Adrasteia on the first floor of the library to continue with Aftermath in RS3. Tell her that the Edicts of Guthix were re-established and that you stopped Zamorak.

aftermath rs3, adrasteia

The Zarasians

Adrasteia will ask you to join her in saying her farewells to Saradomin on the second floor. Head to the second floor, and when you are talking to Saradomin, a cutscene will appear where you see him appointing Adrasteia as the new leader of the Saradominists on Gielinor. Once the cutscene is finished, he will ask Commander Zilyana to watch over Adrasteia and tell the people what happened. The latter will muster the last of his strength and leave Gielinor. Moreover, Adrasteia will suggest talking with Azzanadra and Armanyl before they depart.

Pack your bags and travel to the Kharid-et Dig Site to find Dr. Nabanik. Talk to him, and you will be immediately teleported to the Praetorium inside Kharid-et, where you will meet Azzanadra, Nex, Trindine and Wahisietel. Join them, and Azzandra will say that he and Nex will depart for Freneskae to plan the following steps. He will also task Trindine with following Adrasteia and intervening on her behalf when she isn’t able to. Azzandra will also discuss with Wahisietel about his human alter ego, Dr. Nabanik, to help Trindine out as much as he can with his knowledge of humans.

aftermath rs3, adrasteia

Armandyl And Adrasteia

In this section of Aftermath RS3, you must visit Armandyl at his tower south of Falador and talk to him. He will express all his regrets about not spending his final hours in Gielinor at the ruins of the farm he and Obi’Sooth built (what is now Wilderness), where he died along with countless other aviansie. He will also mention his desires and intentions to help free the Elves of Tarddiad from being bound to crystals and build a colony for aviansie there. He expects to find balance and a peaceful coexistence between his and Seren’s followers. Furthermore, he will thank you and depart as well.

Return to Adrasteia in the library. She will reveal her concerns about the Zamorakian civil war and how Moia will handle it. After finishing this conversation, you will complete the quest.

aftermath rs3, rewards

Aftermath RS3 Rewards

Congratulations! You’ve completed the Aftermath RS3 quest! After going through the undercity and banishing Zamorak, Lord of Chaos, your endeavours are still not done. However, you deserve rewards to use on your upcoming quests. Here’s what you will get for completing this one:

  • Small XP Lamp
  • Chaos Die Reroll Token

Aftermath Quest RS3 FAQ

Although your fight against the gods is not yet over, you will get some downtime to outline a new plan to help Gielinor overcome this dark period. However, before you move on and continue your questing journey, let’s clear some doubts you may have with this quest.

What achievements are unlocked after completing the Aftermath RS3 quest?

After you complete the Aftermath miniquest RS3 in the Elder God Series, you will unlock the achievement called “Aftermath.”

How many sections must I go through in The Zamorakian Undercity?

You have to go through three different sections on your way to banish Zamorak. You will pass through Section I, Section II (Mefis) and Section III (Eterna), where you must fight your way against the hordes of chaos.

RS3 Aftermath Summary

Once you complete this quest, you will be one step closer to finishing the Elder God Wars quest series. However, you will still need to go on more adventures to learn all of Gielinor’s lore. Likewise, to help you in your endeavors you can buy RS3 gold and skip the tedious bits without difficulties. Also, if you need a helping hand on your questing journey, you can check our blog section. That’s all for now. See you in our next blog!

logo
As A First Resort RS3: Ogresses Spa As A First Resort RS3: Ogresses Spa Questing

Welcome back to our blog section, where we cover different quests and make detailed guides for you. Today’s blog is about As a First Resort RS3, an experienced quest in the Ogre quest series where you will help the ogresses of Oo’glog expand their hot springs into a resort. Part of your job is to assist in the area preparation and eliminate a pest problem. Prepare yourself to help open a new Spa and Resort!

As A First Resort RS3 Requirements

Before thinking of diving into the hot springs, you will need to know this is a Member-only quest of long duration, so you will spend roughly 30 to 45 minutes completing all the steps and endeavors. With this clarification on the table, here’s what you will need to go through RS3 As a First Resort quest:

  • 51 Firemaking
  • 48 Hunter
  • 58 Woodcutting
  • Box Trap
  • Bird Snare
  • Teasing Stick (Unless you are buying the 8 larupia furs from the grand exchange)
  • 4 Spears of the same type (Bone Spears work; Poisoned Spears and Leaf-bladed Spears won’t work)

Available just outside Oo'glog:

  • 8 Achey Tree Logs
  • 15-26 Eucalyptus Logs (20 will be enough If you don't make any mistakes in the logic section)
  • 2 Raw Chompy (available to be caught in the Ogre Chompy Hunting Area)
  • 8 Stripy Feathers (available from the Tropical Wagtails in the hunting area to the north of Oo'glog)
  • 4 Wolf Bones (available from killing the wolves outside Oo'glog)
  • 8 Larupia Furs (tatty or perfect, available from pit-fall hunting Larupia in the hunting area to the north of Oo'glog)
  • At least ten each of the following plants found near Oo'glog, suggested around 15 or so of each:
    • Fever grass
    • Lavender
    • Primweed
    • Stinkbloom
    • Tansymum
  • Some Logs of any kind for traps
  • Teleport via Oo'glog lodestone
  • Archaeology Teleport to Chief Tess
  • Runes for South Feldip Hills Teleport (or Ring of Duelling), which is a short run from Oo'glog
  • Fairy Ring (code: AKS) is north of Oo'glog
  • Spirit Tree at South Feldip Hills Teleport

As A First Resort Quest Guide

To begin with the quest, you must travel to the center of the Oo’glog city and directly south of Yanille to find Chief Tess. Talk to her, and she will explain she can’t open her business unless the “Bossy Lady” at the bank of Oo’glog allows her to do so. After this short conversation, offer her your help, and the Chief will tell you to speak with Balnea, the “Human Lady” located in the ogre village’s bank. During the start of As a First Resort RS3, you will discover Balnea promised the ogres ‘shiny pretties’ in exchange for letting her establish her spa in the city.

Once you find the bank, enter and talk to Balnea. You will go through an extended dialogue with her, which is filled with business talk before she asks you to help turn Oo’glog into a spa. Agree to help, and she will send you to help the village’s Chief set up a spit and cooking fire.

as a first resort rs3, chargurr

What Do You Need?

Head to the ogre cook, Chargurr, north of the bank and speak with her. She will tell you she needs to make a big fire that requires several logs to cook chompy food. You must agree to help her and give her 8 Achey Logs and 10 Eucalyptus Logs. This has to be done in one go, so you must have 18 free spaces in your inventory to carry all the logs.

Once you have the logs, you must lay them in the pit to set up an Unlit Stove. Speak with Chargurr one more time, and she will ask you to find big, long spears to cook chompies on. You have to give her four spears to use as spits. To do so in this section of As a First Resort RS3, you must talk to Chargurr again and tell her you would like to give her the four spears. You will hang them in the trees, over the logs. Return and talk to Chargurr, who will ask you for 2 Chompy Birds this time. Find the Raw Chompy Birds and stick them on the Spears.

You must talk with Chargurr again. She will request that you light the fire; do so and inform her that everything is ready to complete this first task and set up catering services for the Resort.

Raw Meat Pillows in As a First Resort RS3

Return to the bank and speak with Balnea. She will ask you to help Snurgh, the hotel manager. She’s in the building on the southeast corner of the village She will inform you that the pillows in the hotel are made with Raw Meat, the softest thing she could find. Explain to her that Feathers would work better than meat, and she will agree and ask you if you can get her some Stripy Feathers. You must give her 8 Stripy Feather from Tropical Wagtails. Give them to her so she can make the pillows and return to Balnea to continue with the quest.

Hair Salon

You will have another conversation with Balnea, and she will assign you to help Kringk in the hair salon. The salon is east of the bank, and once you are there, Kringk will ask how she can do hair without tools. Tell her you can help with that and fetch her 4 Wolf Bones and 8 Larupia Furs. Once you have the items, talk to her again and give them the 4 “Wolsie Bone” and the 8 “Lup-Lup Furses” to complete this section.

as a first resort rs3, flying bugs

Flying Bugs

Head to the bank for the fourth time and speak with Balnea. This time, she will ask you to help Seegud, who is in the hut (northeast of the bank). Once there, talk to Seegud, and she will tell you she needs to eliminate the Flying Bugs from the five Spa Pools. You must light fires in the fire pits next to each pool to do so. For each bug, you must use Eucalyptus Logs and a specific plant to keep the swarms away. You will see Seegud stones next to each fire pit to help her remember what to burn. Although each combination is different for each player, you can use this list as a reference to complete this section of As a First Resort RS3 quest:

  • Long Brown: Eucalyptus Log
  • Green Lump-Shaped: Fever Grass
  • Red Round: Primweed
  • Yellow Egg-Shaped: Tansymum
  • Orange Squarish: Stinkbloom
  • Purple Tall: Lavender

Head outside Oo’glog to collect the plants and then combine each with the Eucalyptus Logs to light the fire. The first location you must go to is northwest of Seegud and examine the pile of stones between the Saltwater Spring and the fire pit. A message will appear in your chat section describing which type of stones they are. Once you know this information, place the logs with the right plants and light the fire pit. After you do so, you will notice the bugs are still flying over the pool, and you will hear a mischievous ogre child laughing.

With your failed attempt to kill the bugs, return to Seegud and speak with her. She will tell you that the ogre child must have mixed up the stones, so you now need to discover which plants the mixed-up stones represent to continue with this task of RS3 As a First Resort quest.

Run west of Seegud, and by the saltwater spring, you will find an ogre child called Snarrl. She recommends you start with a thermal bath, so you must go to the north of Seegud to see it. In this section of As a First Resort, you must discover the relationship between the stones and the plants, which will be done through elimination. Once you know which stone represents each plant, make a note of the match so you won’t need to go through the whole process since you can’t check what plant you used after you lit the fire. Each combination you will do requires two plants and one Eucalyptus Log, except for the Bandos Pool.

You must examine the pile of stones next to each pool, and place the logs with one of the plants in the fire pit, then light them. If you see the following message, “The fire has pungent aroma, but it doesn’t seem to have any effect on the insect”, it means it’s not the correct combination. So, place another log, use a different plant and try again. Remember, you must use a new log each time you intend to light the fire pit. Once you have the right combination, you will see this message: “The pungent smell makes the insects disperse”.

You can follow this route to complete and light all the fire pits in order for As a First Resort RS3.

  • Start right off the Thermal Bath north of Seegud (the green bath). You will see long brownstones that refer to Eucalyptus logs, so place one and figure out which plant will disperse the insects.
  • Move to the east to the Mud Bath as your second location and find the right plant which will disperse the insects.
  • Your next move is to the Saltwater Spring, west of the Thermal Bath. Here, you will need to use the second plant you used in the Mud Bath and find the correct plant.
  • Head to the Sulphur Spring, where you will find the next pile of stone. There, you need to place the second plant used in the Mud Bath and find the other one to light the fire.
  • Finally, head to the west, directly to the Bandos Pool, and use three different plants plus the Eucalyptus Log. Once you find the right combination, move to the next stage of RS3 As a First Resort.
  • If you need some help, talk to the ogre child (other than the one who laughed at you) to not mess up the patterns.

Once you have dispersed all the bugs, talk to Seegud, then return to the bank and meet Balnea again. You must keep the herbs after completing this section because you will need them in your next task.

as a resort rs3

Creatures in As a First Resort RS3

When you talk with Balnea again, she will tell you about the “one last outstanding matter”. She will ask you to trap creatures who are wandering around the village. Moreover, she will mention it won’t be an easy task and recommends you talk to Chief Tess to learn how to catch these creatures. Run toward Chief Tess and speak to her. She will explain to you that the animals in the area are clever, and you need to be sneaky to capture them. Likewise, she will mention you must burn “stuffs” to lure the animals to the traps.

Kebbits

In this phase, you will need to catch the Diseased Kebbits. To do so, you must set a Deadfall Trap on the boulders to the east and west of the Saltwater Spring. There are 4 Diseased Kebbits to catch, so you must catch two in every trap.

Inside the trap, you must bait with Fever Grass. You must light another Fever Grass and run around to lure a Kebbit to the trap. We recommend you walk instead of running to avoid any problems with attracting the Kebbits. The Fever Grass you lit will last only 30 seconds, so we also recommend you have a few in your inventory before starting this task. You must use the main hand weapon slot for the smoldering grass, so make sure to account for that.

Beware, since the Diseased Kebbits will turn aggressive if you burn Tansymum Flowers nearby them. Moreover, you must set one trap at a time because an ogre child will tell you, "Hey, you, human! You no allowed to clutter up Oo'glog wiv traps. You only set one at a time here."

Wimpy Birds

For these creatures, you will need to set a Bird Snare west of the bank. Here, you must light a Tansymun Flower and run around to attract the birds to your trap. You will need to catch 5 of these Wimpy Birds. During this stage, you must be careful since if you burn Fever Grass, you will repel the birds, and if you burn Lavender, they will peck you.

The final bird can be challenging to catch and may refuse to follow you and unrelated Wimpy Birds may appear in the Bird Snare. If you find this problem, return and ask Chief Tess how to catch Wimpy Birds, and make sure you go through the dialogue and finish with this sentence: "Nothing else to ask." option instead of walking away.

Platypodes in As a First Resort RS3

For these animals, you will need to lay a Box Trap and burn Lavender near Sulphur Sring and west of Chief Tess. Beware of the spurs of these Platypodes because they are poisonous. Don’t try to burn Fever Grass; if you do so, they will attack you with their “webbed feet of doom.”

Once you catch one Platypus, you must check the shaking box to put the animal in your inventory. You must catch a whole family (Patrick, Peanut, Penelope and Peter), head to the northeast corner of the village, and by the coast still in Oo’glog, release the platypodes near the bulrushes. You will find this location easily by seeing the Baby Platypus on the mini map. For every Platypus you release, you will obtain a Casket or an Oyster.

as a first resort rs3

Grand Opening

After you catch all the animals in As a First Resort RS3, it’s time to return to Balnea for the last time, and after you dismiss any active follower, you will trigger a cutscene of the grand opening of the spa. Moreover, the Wise Old Man will be taking water there. This will mark the end of the quest!

As A First Resort RS3 Rewards

Congratulations! You’ve completed As a First Resort, and after a long task list, it’s time to take a relaxing bath inside the resort. Let’s see what you’ll get from completing the quest:

  • 1 quest point
  • 15,000 Firemaking XP
  • 15,000 Hunter XP
  • 15,000 Woodcutting XP
  • A mixture of 4 items, either Caskets or Oysters
  • Access to the Spa facilities
  • Access to the Oo'glog Bank
  • Access to the Oo'glog Hunter area
  • Access to the Platypus Summoning Pet (level 10 Summoning Summoning). If you release your pet in the spot you released the others during the quest, you will receive another casket or oyster.
  • Access to the Fresh Meat shop
  • Access to the Gift Shop
  • Ability to travel to Oo'glog using the Charter ships
  • Ability to create Robust glass and Crystal glass
  • Access to decanting five and six dose flasks into other flasks or vials (speak to Teplin Macagan)
  • 2 Treasure Hunter keys (Not available for Ironman mode)

as a first resort rs3, rewards

RS3 As A First Resort FAQ

With the resort finally open and with rewards in your hands, you should be proud of yourself. However, we know you could have some extra questions you want answered. That’s why we will cover your back and help solve any doubt you have about As a First Resort RS3 quest. So, let’s begin!

What are the achievements unlocked after completing As a First Resort Runescape?

You will unlock three achievements when you complete this quest:

  • As a First Resort: to complete the quest
  • Elite - I’m sugar (part of the Desert Achievements): In Nardah, make a super antifire flask - making both the flask and potion from scratch.
  • Elite - The Expensive Range (part of the Tirannwn Achievements): Create a grand ranging potion in a crystal flask from nothing but raw ingredients.

Is there any extra reward for completing this quest?

Yes, you will also unlock some music tracks related to RS3 As a First Resort. The tracks you unlock after completing the quest are Bish Bash Bosh, Hot ‘n’ Bothered, Shaping Up, and Spa Bizarre.

As A First Resort Guide RS3 Summary

After a long adventure repelling insects, helping ogres and more. However, that doesn’t mean your work is over; you can still make your way and find more quests to complete. If you need help, you can check our blog section to find more guides like this. Moreover, if you want to level up faster, you can buy RS3 gold on our web page to get the best gear without much effort. That’s all for now. See you in the next blog!

logo
Vessel Of The Harbinger RS3 - Learn the Ins and Outs Vessel Of The Harbinger RS3 - Learn the Ins and Outs Questing

Welcome back to our blog series, where we cover different quests through RS3. Today’s blog will touch on the Vessel of the Harbinger in RS3, a continuation of your journey hrough the underworld and discovering all that the Necromancy skill has to offer. We’ve already covered Necromancy! and Rune Mythos, so don’t forget to check them if you haven’t already. In the third quest of The First Necromancer series, you will learn more about Rasial from one of his previous students at Port Phasmatys. With all being said, let’s break it down! 

rs3 ectofuntus, rs3 vessel of the harbinger

Vessel of the Harbinger Requirements RS3

Before you start your adventure, you must know some details about RS3 Vessel of the Harbinger; first, this is a Member only quest with an estimated medium length, so you must expect to spend about 20 to 30 minutes going through this quest. Moreover, here are all the requirements you will need to complete Vessel Of The Harbinger quest: 

  • 46 Necromancy 
  • 40 Prayer
  • Ghostspeak Amulet or Cramulet (Unless you’ve completed Hard Morytania Achievements)
  • Bucket of Slime 
  • Ectoplasm 
  • Necromancy Weapons (including Conduit)
  • Bucket
  • Ectophial 
  • A way to quickly teleport to the Slayer Tower (Ring of Slaying, Dungeoneering Cape, Activated Canifis lodestone)
  • Teleport to the City of Um (10 Spirit Runes to cast City of Um teleport twice, Activated City of Um lodestone, or Underworld Grimoire 2)
  • Salve Amulet or Salve Amulet (e) (To increase damage against the Tortured Souls) 
  • Completion of Rune Mythos and Ghosts Ahoy
  • Ability to defeat five Tortured Souls level 53

Items for the Empower Vessel Ritual: 

  • 11 Basic Ghostly Ink 
  • 2 Regular Ghostly Ink 
  • 4 Light Sources 

RS3 Vessel of the Harbinger Guide

To begin Vessel Of The Harbinger head to the City of Um, find Death, and ask him about Rasial. He will tell you that necromancers often create their own Vessels, the likes of which you've already encountered. Death will mention that Necrovarus was Rasial’s apprentice, and he can teach you more about Rasial's plans.

The Request Of Necrovarus

After your dialogue with Death, head to the Ectofuntus and speak to Necrovarus. The fastest way to get there is to use the Ectophial. At this point, you must equip your Ghostspeak Amulet unless you’ve completed the Hard Morytania Achievements. After your short conversation with Necrovarus, he will agree to help you but will ask you for a favor in return. 

Necrovarus will tell you the Ectofuntus has become stronger over time, and the Tortured Souls outside are preventing it from reaching its full potential. He’ll ask you to defeat the five Tortured Souls using Necromancy, and then he will give you a Soul Urn to collect their souls. Thankfully, only just over half of the damage dealt to the Tortured Souls needs to be from Necromancy in order for the souls to count toward the task. So, you can make use of some other combat methods to speed up the process, just keep an eye on the damage you deal to ensure your efforts are for nothing. As long as 1,500 damage comes from Necromancy attacks, you can switch to other weapons for the kill, and it will still count towards the quest objective. 

Once you defeat the Tortured Souls and fill the Soul Urn, the next step in Vessel of the Harbinger in RS3 is to worship the Ectofuntus with a Bucket of Slime and a full Soul Urn in the backpack. With this, you will earn 100 Necromancy XP. If you didn’t obtain the Bucket of Slime, you must head to the Pool of Slime in the basement and get some. Once you do this, return to Necrovarus and talk to him. He will tell you to perform a ritual to empower the Well of Souls, but sadly, he forgot how to do it. Instead, Necrovarus will tell you the information needed is in the Book of Haricanto, and you must ask Netty to get it back. 

vessel of the harbinger rs3

The Book Of Haricanto

After this conversation, head to Netty’s house. You will find it east of the Slayer Tower; using a Ring of Slaying or Dungeoneering Cape is the fastest way to get there. If you can’t use either of these items, you can teleport to the Canifis lodestone and then run northwest until you reach the Lustrous Wisp colony. You will immediately know Netty is not around, but you will find a pile of letters on the floor. Inspect the letters, and quickly, you will realize you need to visit Velorina in Port Phasmatys. 

To continue with Vessel of the Harbinger in RS3, return to the Ectofuntus using your preferred teleport method and head south, passing the energy barrier to Port Phasmatys. Run northeast to find her in the northernmost house. Talk to Velorina; she will inform you that Netty died some time ago when she was gathering some nettles for her tea. You must head to the City of Um and then go to The Last Call Pub. There, you will find Netty’s ghost standing in the northeastern corner of the place. Speak with her, and after a quick catch-up, you will tell Netty you need the Book of Haricanto. She will tell you it is inside a chest in her house, and she will give you her Death Certificate and Will; with this, you can claim her key from the Bank of Port Phasmatys. 

Note: If you have the Ghostspeak ability, or the Ghostspeak amulet equipped, Netty will tell you that it is unnecessary to do so; despite her being a ghost.. 

Your next step in RS3 Vessel of the Harbinger is to go to the bank in Port Phasmatys and talk with the Ghost Banker to obtain Netty’s key. To do so, use Netty’s Death Certificate and Will on the banker, it will deposit the key into your bank, and you don’t have to go through all the dialogue with the Ghost Banker. 

With Netty’s key with you, return to her house and open the Locked Chest. You will see how Netty’s Skeleton appears, and you must fight it before you can get the book. Her skeleton is immune to any type of damage, and you can’t defeat it using regular methods. Instead, you must cast Conjure Skeleton Warrior, which requires a Conduit and one Ectoplasm near the skeleton. This will cause it to collapse due to its poor self-esteem. Once you complete this task in the Vessel of the Harbinger RS3 quest, you will be able to open the chest and find the Book of Haricanto. 

Empower The Vessel

With the book in your inventory, return to the Ectofuntus and speak to Necrovarus. He will tell you to get the Bucket of Power Slime from the Ectofuntus; to do so, just use a Bucket on the Ectofuntus to obtain it. Head to the City of Um to perform the Empower Vessel Ritual. This ritual requires the following items: 

  • 2 Elemental I glyphs
  • 1 Charge I glyph
  • 1 Commune I glyph
  • 4 Ritual Light Sources
  • 1 Bucket of Powerful Slime
  • 11 Basic Ghostly Ink
  • 2 regular Ghostly Ink
  • 4 Basic Ritual Candles or better

Once you have everything, complete the ritual. This will trigger a cutscene where you can see Rasial, the First Necromancer, appear and send Necrovarus away. If the cutscene doesn’t play, return and talk to Necrovarus. When the cutscene ends, head back to Death to finish the Vessel of the Harbinger in RS3. 

Vessel of the Harbinger RS3 Rewards

Congratulations! You've completed the RS3 Vessel of the Harbinger quest. After covering quite some distance between Port Phasmatys and the City of Um, we're sure you're itching to know what's up for grabs. Along with taking your first steps in empowering your vessel and working through your Necromancy abilities, you will also be rewarded with the following: 

  • 1 Quest Point
  • 10,000 Necromancy XP lamp
  • 5,000 Prayer XP lamp
  • 25 souls added to the Well of Souls
  • 2 Treasure Hunter keys (Ironman accounts will not receive these)

vessel of the harbinger rs3 rewards

RS3 Vessel of the Harbinger FAQ

Even the very best of players can have their doubts, but don't be ashamed about those wanderings. It's our job to help your questing adventures become the best they can be, which is why we have compiled some of the most frequently asked questions about this underworld adventure to ease your confusion. Take a look below:

What achievements will unlock after completing Vessel Of The Harbinger in RS3?

Once you complete the Vessel Of The Harbinger quest, you will unlock the following achievements: Vessel Of the Harbinger for completion of the quest and Legal Entitlement, when you inform the Old Man about the fate of his mother after Vessel Of The Harbinger. 

Which quests will require RS3 Vessel Of The Harbinger to enter them?

After you go through Vessel Of The Harbinger, you will unlock The Spirit of War quest, which requires completion to get access to it. The Spirit of War is also part of The First Necromancer quest series. 

Vessel of the Harbinger RS3 Conclusion

After your adventure retrieving the Book of Haricanto, it’s time to relax or maybe you’d prefer to jump into a new quest or journey. With the endless possibilities that come with RS3, you can spend your time doing what you think is best. If you feel your bank is lighter following the adventure, you can replenish it by purchasing RS3 gold and focusing on the things that matter without wasting your time on money-making methods. If you like this guide, you can find more of it in our blog section. That’s all for now. See you in our next blog.

logo
Rune Mythos RS3 - The Origins Of Necromancy Rune Mythos RS3 - The Origins Of Necromancy Questing

After your journey through death and your return to life in the Necromancy! quest, introducing you to the different aspects of the underworld and the Necromancy skill now it’s time to discover the origin of Necromancy. Learn just how powerful you can become and dive further into the lore of the City of Um. We'd like to welcome you back to our blog series, where each week, we cover a new and exciting game topic and walkthrough. In today's article, we will cover the Rune Mythos quest in RS3, and everything that goes with it. So, let's break it down! 

rs3 rune mythos

RS3 Requirements Rune Mythos

Before you begin your adventure through the City of Um and its mysteries, you must know this is a Members-only quest. It is short to medium in length, so you can expect to spend around 10 to 20 minutes navigating through Rune Mythos RS3. Apart from that, the requirements for this quest are simple and uncomplicated; here’s what you need to go through all the endeavors: 

  • 24 Necromancy 
  • Resources for the Lesser Essence Ritual
  • 200 Noted Pure Essence 
  • 8 Basic Ghostly Ink 
  • 4 Regular Ghostly Ink 

Thankfully, this quest has no enemies for you to face, meaning you can go through this journey without worrying about any sort of showdown. 

Rune Mythos RS3 Guide

To begin with Rune Mythos RS3, you must head to the Ritual Site in the City of Um. Next to the Ritual site, you will see Malignius Mortifer. You'll need to speak with him to get the quest going, but before that, ensure you have an empty inventory. There are several chat options that you can cycle through if you wish to learn about Necromantic Runes or Incantations, but the one to get the quest going will be 'I'm good, what's next?' You don't have to worry about the other options; they won't affect your quest journey either way, but they are there if you wish to grow your knowledge. 

 Once you've selected the correct dialogue to get the quest started, Malignius will give you everything you need for the Lesser Essence Ritual: 

  • 200 Noted Pure Essence 
  • 8 Basic Ghostly Ink 
  • 4 Regular Ghostly Ink 
  • 4 Basic Ritual Candles. 

If you have some items, he will give you only the ones you missed. It is vital that you do not drop or lose the materials he provides you, as he will not replace them. Once you have all the items in your inventory, it’s time to head to the Pedestal in the Ritual Site; here, you must click the center and select the Lesser Essence Ritual. Performing this ritual will require cleaning any remains from previous Glyphs to make space for your ritual. 

rs3 rune mythos

To complete this ritual, you must create 2 Elemental I Glyphs that will cost you 3 Basic Ghostly Ink each, and 2 Change I Glyphs that cost you 2 Basic Ghostly Ink and 1 Regular Ghostly Ink each. You must place the candles to create the sources of light required for the ritual. Once everything is ready, stand on the platform and perform the ritual. This ritual will consume the Pure Essence Malignius gave you. 

After completing the ritual, head to the Ritual Chest close to Malignius, take as much Impure Essence as you can carry in your inventory, and then bank all the other items. Head to the northeastern area of the City of Um, and you must go through the Dark Portal. Before entering the portal, you must ensure you have at least one Unnoted Impure Essence. 

To continue your journey in Rune Mythos quest, you must attempt to craft some Spirits Runes, but before you are able, Rasial, The First Necromancer, will tell you to stop “playing with things you aren’t ready for.” Moreover, he won’t let you craft the runes until you speak to him. You must go through all the conversations and dialogue with Rasial until he finishes and disappears. Once he’s gone, craft the runes and return to Malignius Mortifer to receive your rewards. 

Rune Mythos Rewards RS3

Congratulations! You have completed Rune Mythos RS3. Even though this was a short and sweet quest, there are still some decent rewards at play. So, now that you've come to the end of the road let's take a look at what you receive for your efforts: 

  • 1 quest point
  • 1,500 Necromancy XP lamp
  • 250 Runecrafting XP lamp
  • Access to Lesser, Greater, and Powerful Essence Rituals
  • Access to Necromancy Runecrafting
  • Access to Necromancy Incantations
  • City of Um Teleport incantation
  • Lesser Bone Shield incantation
  • 2 Treasure Hunter keys (Ironman accounts will not receive these)

rune mythos rs3

Rune Mythos RS3 FAQ

After going through the process of the Rune Mythos quest, you may have some questions. It may be a short quest, but the doubts surrounding what is to come in the next quest of the series, and some general wonderings may be playing on your mind. So, we're here to answer those all-important questions. Let’s begin! 

What achievements can you unlock after completing the Rune Mythos quest RS3?

Once you finish the quest, you will receive the following achievements: Rune Mythos, which you earned by completing the quest and City of Um Set Task. The last one you will receive is from Ichlarin, and you can find him near the Ritual Site of the City of Um, but you need to complete all Easy Tasks in the city first. 

What quest will be unlocked after completing RS3 Rune Mythos?

Since this is the second quest in the First Necromancer quest series, you will unlock the third quest 'Vessel of the Harbinger'. This will continue your journey through the underworld, and the Necromancy skill. 

RS3 Rune Mythos Summary

It feels nice completing one more quest, even the short ones like Rune Mythos. However, it’s not just the reward and completion of the quest that is worth the time, but the knowledge you obtain that will be useful in the upcoming quests. Until then, take a look at some of our other RS3 titles in our blog section, and if you want to build your bank without the grind, consider buying RS3 gold to level up your gear, skills, and everything related to conquering Gielinor. That’s all for now, we’ll see you on the next blog.