Plague’s End RS3: Regrow Prifddinas

By Jesus Marquez | Created: April 02, 2024 | Last updated: December 15, 2024 | Read Time: 27 minutes

It’s time to be a hero and stop Iorwerth from summoning the Dark Lord. You must interfere with Lord Iorwerth’s plan to focus on darkness to make the elf gain power to re-grow the city of Prifddinas as an Iorwerth-only city. This Plague’s End RS3 Guide will focus on regrowing Prifddinas before Lord Iorwerth can and make the eight clans live together in peace. Close the chapter of Elf Prifddinas quest series by frustrating the plans one more time. Let’s begin! 

Plague’s End Requirements RS3

The requirements for this quest are pretty long, but an essential aspect is that this is a Member-only quest with a long to very long length, so ensure you have plenty of time to focus on this quest, its lore, and the challenges you’ll face. You will need the following items and skills: 

  • Completion of Within the Light, Catapult Construction and Making History. 
  • 75 Agility
  • 75 Construction
  • 75 Crafting
  • 75 Dungeoneering
  • 75 Herblore 
  • 75 Mining
  • 75 Prayer
  • 75 Summoning
  • 75 Woodcutting
  • Full set of Mourner Outfit
  • Rune bar 
  • Plant Cure or runes to cast Cure Plant
  • 100 Magic Logs
  • 200 Spirit Shards
  • 1 Gold, Green, Crimson and Blue Charm 
  • Pouch
  • Super Defence

plagues end rs3

Recommendations

For a better experience during the quest, we have some recommendations you can follow to have a comfortable walkthrough, mostly for teleportation and some extras you will also need while you are focusing on the Plague’s End RS3 quest: 

  • 1-2 Crystal Teleport Seed 
  • Antipoison Potions, Poison Purge Aura or Anti-Poison Totem. 
  • 3,200 Coins for chattering a ship to Port Tyras
  • Tirannwn Quiver for extra damage against Mourners. If possible, Tirannwn Quiver 2 will be better for the free Teleport to Tyras Camp. Tirannwn Quiver 1 will let you teleport to Lletya and Eluned for free. 
  • Ring of Kinship to teleport to Daemonheim

Enemies To Defeat

In RS3 Plague’s End, you will face several enemies, so you must be prepared with excellent armor and weapons since most of them are above level 70. Let’s see what you will defeat during this quest: 

  • Mourners up to level 83
  • Level 100 Head Mourner
  • Sir Hugo Level 107 
  • 3 Trahaern Automatons level 70
  • Shadows and Greater Shadows level 107 
  • Dark Lord Level 107 (you must defeat him five times)

rs3 plagues end

Plague’s End RS3 Quest Guide

The first thing you must do in RS3 Plague’s End is infiltrate the Iorwerth. To do so, head to Lletya and talk to Arianwyn in the easternmost house. He will greet you and then tell you that dwarves cleared the rock slide in the Corridor of Light. Finally, he sneaks into the Prifddinas and finds out what Lord Iorwerth is up to. 

Infiltrating

Sadly, the Death Guards (Mourners) are monitoring the path now, so in order for you to continue down this path, and in Plague’s End RS3, you will need to become camouflaged with the full Mourner Gear. When you equip the set, or at least have it in your inventory, head back and speak with Arianwyn again to teleport you to the Corridor of Light. 

Once in the corridor, if you speak with the dwarf, he will mention the report he found on the dead elf underneath the rubble. This report is the same one you discovered at the end of the Within the Light quest. This note is written by Iestin Edern, the elven archaeologist, who reports that the city of Prifddinas has been reverted to a crystal. With the help of the Temple of Light, he hopes to restore the city to its glory once again. 

At this point of Plague’s End RS3, you must head west across the corridor and enter the door at the end. You will reach a storeroom. Continue on your path, passing another door into the next room. Here, you will meet the Deathguard Captain, who will ask you what you are doing in the storeroom. Be careful when you answer because if you answer any question incorrectly, Arianwyn will teleport both of you back to the Corridor of Light. 

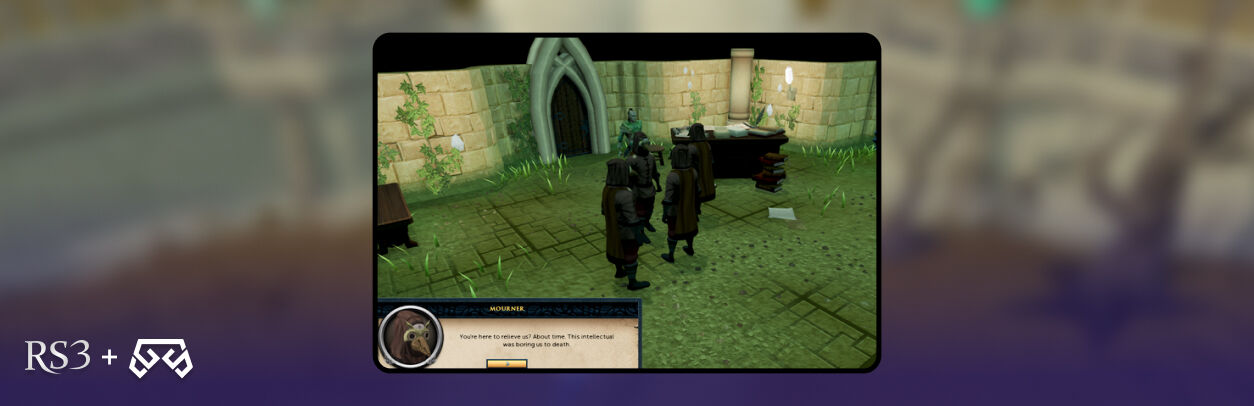
To avoid restarting your progress in Plague’s End RS3, when the Deathguard Captain asks, you must answer that you “thought you saw a mouse” and that “it might have gotten into the food stores.” You must continue the conversation with you “didn’t tell her because you knew she was busy.” If you convince her, she will tell you to relieve the guards in the room to the west, the ones in charge of keeping Iestin. The only thing you should do here is talk to any of the guards to relieve them. 

Iestin And Iorwerth’s Plan

When the guards leave their position, speak to Iestin. He will tell you about his work with Lord Iorwerth and his plan to regrow Prifddinas from a crystal seed without the need for the remaining seven elven leaders. Iorwerth's focus is to power up the crystal using a secret source of magical power. Iestin will also mention he heard something referring to a ‘Dark Lord,’ and Iorwerth wants him to prepare the crystal to receive the power. 

Next in Plague’s End RS3 Guide, Iestin will ask you to bring his reports to the Mayor of Prifddinas before returning to work. Since you are with Arianwyn, he will tell you to accept the task and try to learn more about Iorwerth’s plan while you are there. The report discusses Iestin's progress in regrowing the crystal. However, he will mention that he can work faster if he only knows the plan and what power Iorwerth is trying to use. 

Once you finish and continue with Plague’s End RS3, you must take the north stairs to reach the surface camp in Prifddinas. There, you will find some Mourners and starving elves. You must head to the northern building and enter it. Once you are inside, locate the Mayor and speak to her. She will tell you about Lord Iorwerth’s drab writing, telling you more about his new plan after the defenses of the Temple are working again. The Mayor will also mention how Iestin’s report keeps her busy while she waits for a shipment of gnomish food from Arposandra. She will then give you an additional task to embark upon: check up for the delivery. 

You have no other option but to head south to the gnomecopter and speak to the Mourner in front of three starving elves. You must tell him the Mayor wants to distribute the food among everyone, and he’s responsible for that. Once you finish, return to the Mayor and tell her the Mourners Guards will distribute the food. This will give you the opportunity to grab the master plan from her desk because she will leave the place in anger. 

rs3 plagues end

The Revolutionary Army

With the plan in your hands, it’s time to continue the Plague’s End RS3 quest. Head back to Iestin and show everything you got. After going through all the documents, Iestin concludes that Iorwerth will summon the Dark Lord. To do so, it will require a massive amount of death energy; with that, it can regrow Prifddinas. One alternative to summon the Dark Lord is based on the death altar inside the Temple of Light; however, it’s not a viable option for Ioswerth, so he decides to perform a mass kill of all humans in West Ardougne, and with all the death energy from that, use necromancy to power the ritual. 

Next in Plague’s End RS3, Arianwyn will tell you that they can overthrow Iorwerth by raising a rebellion against him. This is an important task, so he will ask you to get all the people of Ardougne on your side. The best way to do so is to show the master plan to Bravek in his Civic Office of West Ardougne and Councillor Halgrive, located outside the East Ardougne church. 

At this point of RS3 Plague’s End, head to East Ardougne to speak to the Councillor, located south of the chapel. When you tell him, he will not believe your accusation and stay in shock, but he will eventually believe in you due to your reputation. He will give you a proclamation that can control the East Ardougne army to fight the Mourners. Since you already have the support of West Ardougne, you only need to head to Bravek. 

You will find him on the first floor in the West Ardougne Civic Office. When you reach him, he will tell you he already suspected the plague was a hoax, and it was easy to uncover the real reason for someone living inside the city. Still, Bravek preferred to look as an ignorant person who ‘didn’t want to catch the plague.’ Sadly, he won’t be able to help you by himself. Instead, he will give you a list of people you can recruit to start your plan of raising a revolution. 

At this point in Plague’s End RS3, you must take off the Gas Mask you have for camouflage to speak with all the people in any order, so let’s see where you will find them: 

Elena: She’s in a house in the northwestern part of East Ardougne, near the river and the log balance Agility shortcut. 

rs3 plagues end

Carla: She’s in an open area north of the graveyard, wearing purple clothes. 

Ted and Martha Rehnison: They are in the building, north of the Civic Office. 

Jethick: He’s in West Ardougne, on the east side of the town square. 

Koftik: He’s located at the entrance of the Underground Pass. He may be inside the cave, but he must be at the entrance to recruit him. 

Nurse Sarah: In West Ardougne, you will locate her in the long building southwest of the church. 

When you finally get all of them on board with your plan, meet them in the Church of West Ardougne and speak to everyone to start the revolution. 

The Ardougne’s Revolution 

With everything ready, it’s time to move to the next step in Plague’s End RS3. You must head to the Mourners’ headquarters in the northeastern corner of the city. Pass the door by kicking it and kill all the Mourners that are on the first floor. Once you're done with the Mourners, head to the northwest corner to use the trapdoor and defeat the remaining Mourners there. 

When you finish your fight and defeat the Head Mourner, you will have the option to interrogate him and ask about the Iorwerth plan. He will reply that he only followed orders. Before moving on, you must choose between killing or sparing him. If you decide to spare him, you will see him in Prifddinas after you finish the quest. 

At this point, Elena will give you a flag to replace the one on the headquarters' roof. You must go upstairs and plant the new flag. A short time after you do so, Sir Hugo, a paladin, and Sir Edmund will arrive at the scene to command you to leave the place. You must show them the Councillor’s proclamation and, after an argument trying to decide if it is appropriate to follow the Councilor’s orders or pass from them, Sir Hugo will return to defend King Lathas from a coup, and Sir Edmund will come back to prepare the knight army for your aid. 

Now, in Plague’s End RS3, you must prepare yourself for the upcoming combat. Talk with Sir Edmond; he’s near the entrance of the East Ardougne Castle. Head directly to the King’s bedroom and kill Sir Hugo; he is level 107, so you must be prepared. Sir Hugo is guarding King Lathas, but once you defeat him, you must talk to the King and ask him what he’s up to by partnering with Iorwerth. King Lathas will explain how his father, King Ulthas, decided to divide the kingdom by kicking out the Sinclairs from the Camelot Castle and giving all to a new King from another world. This division includes Lathas’ young brother, who received a piece of the kingdom. Lathas promised to help Iorwerth summon the Dark Lord, but in exchange, he wanted his help to go back to Camelot and remove Tyras from his throne and power. After the story of King Lathas, you have to choose if you let him live or die. 

The Six Lost Elders

With this victory that overcomes the Mourners in the last section of Plague’s End RS3, you must go back to Iestin either way you like, using the teleport offered by Arianwyn or by going down the hole near the east gate in Prifddinas. What matters is to reach Iestin. 

Upon your arrival, Iestin and Arianwyn will inform you that even with all the effort to stop the Iorwerth’s plan, it will only delay what is already inevitable. The only alternative left is to stop him by regrowing Prifddinas before he has the chance. Whoever regrows the city controls it, so if you want to take a step ahead, you will need to find and recall the eight elven leaders. With their magic abilities combined, they will form the city, and instead of one clan in charge, there will be a collective control of all eight clans. 

You must find the other six elven clan leaders since Iestin can perform as a leader from Iorwerth’s clan because of all the knowledge of the magic and the clan itself, and Arianwyn is actually Lord Cadarn. Arianwyn will tell you to locate the remaining six elders by talking to Gwir, the elven scribe. He’s in Lletya, and the way to bring all of them back is to perform a ritual.

Head to Lletya with the help of Arianwyn using his teleport and talk to Gwir; you can locate her north of the bank. You must mention the lost elders, and she will ask you to bring her back a book from a nearby bookcase. You must read it because you will discover crucial clues about the actual location of each leader. Moreover, you must go through the book and the chat option referring to the elders to progress in Plague's End RS3 and obtain all the necessary information about each of them. You must ask Gwir about each of the leaders so you can go through and find them how you like, so don’t stress about it. 

plagues end rs3

Lady Ithell

Continue with the Plague’s End RS3 quest; you will ask Gwir about Lady Ithell, and you will discover she’s the one who built Lletya as an image of Prifddinas’ beauty; sadly, she died shortly after finishing that because she didn’t use Seren’s Crystals. So, you must head to Lletya and locate five symbols carved into the wood inside the city. You will see each symbol is small with a blue color. If you miss some details, you will have a hard time finding these symbols, so try to rotate the camera angle to get some help. Still, if you need extra help, here is the location of each symbol: 

  • Inside the bank, south of the table. 
  • Inside the southernmost building. 
  • Inside the archery shop.
  • Upstairs, above the clothing shop
  • Upstairs, outside the church. 

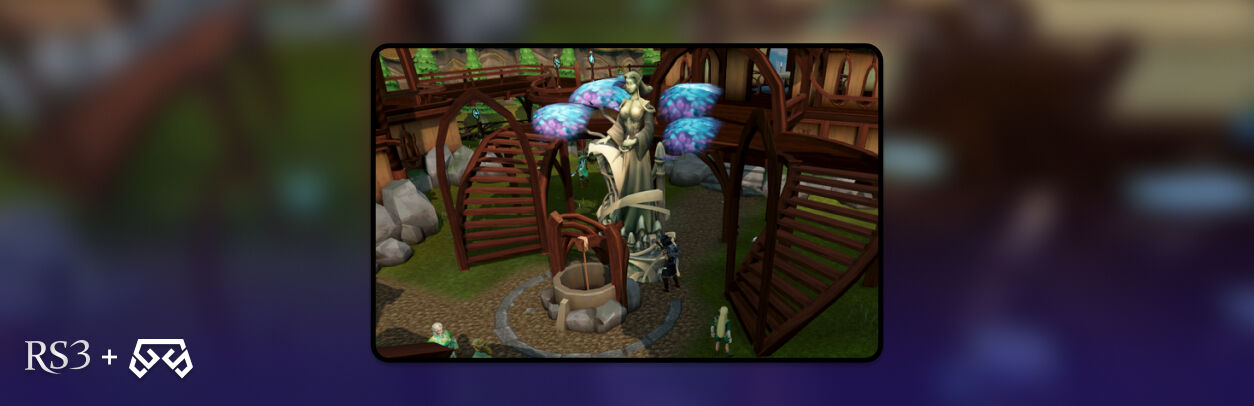
Once you find all the symbols, you must use 10 Magic Logs to create the design. It’s a statue in the heart of Lletya, so you must head to the center of the city. There, you will find a new construction spot for the statue. Build the Ithell statue, and Kelyn will ask you to speak with her on the main balcony upstairs. 

Kelyn is formerly part of the Ithell clan. By staring at the statue she gains some knowledge of Lady Ithell, and she will now be equipped and ready to become her successor. Once she finished explaining everything, tell her it’s time to regrow Prifddinas and, and she will go to the Undercity; getting one of the six elders to complete Plague’s End RS3.

Lord Amlodd

You must go back and ask Gwir about Amlodd; this time, she will give you a mysterious Summoning Charm that was his. Your task is to infuse the charm with summoning energy to create an Amlodd Pouch. It's important to note that you can use any summoning obelisk, but the best you can use is the one near the Well of Voyages because it will save you time to find another elder, Lady Trahaearn.

During this section of Plague’s End RS3, you can teleport directly to Well of Voyage using a Fang of Mohegan, but remember you can only use it once daily. If you don’t own that necklace, you must exit Lletya from the northwest trees, step over the tripwires and go through the dense growth to the west. You must jump over the leaves to the north, then go to the east, and you will be at a cave entrance, so go inside. 

Once you reach the well, you must use the Summoning Charm on the obelisk, and you will see a prompt to create the Amlodd Pouch; with that, you will summon Lord Amlodd. He will explain to you he was in the Spirit Plane with other spirit creatures. You will tell him it’s time to regrow Prifddinas, and he will go to the Prifddinas Undercity. 

rs3 plagues end

Lady Trahaearn

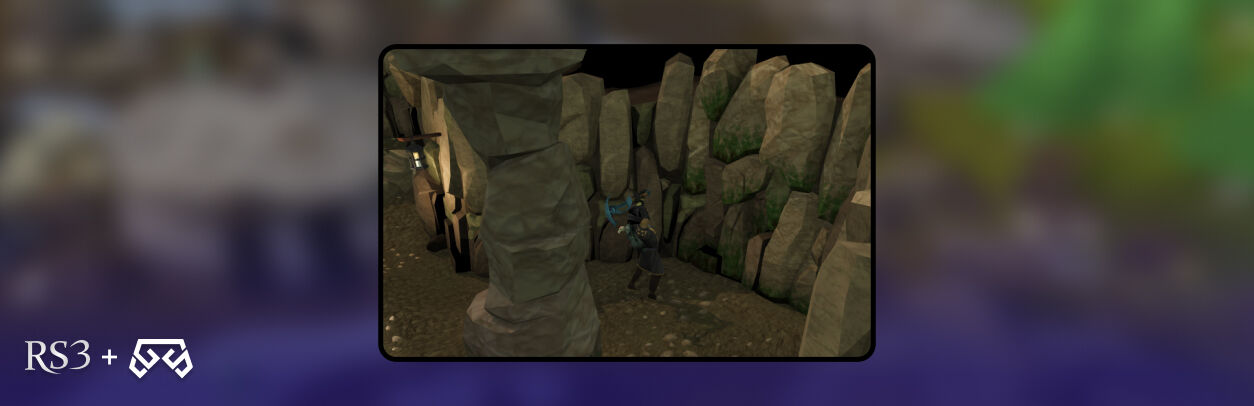
If you ask Gwir about Lady Trahaearn, she will tell you she was a master of mining and smithing; you will need to use those skills to reach her. The clue you get is the Well of Voyage itself. The well is in Iban’s Temple, inside the large expansive cavern through the crack in the wall inside Iban’s tomb. 

Once you summon Lord Amlodd and speak to him, you can continue using the cracked wall you can find southwest of the well. You have to mine and enter the new cavern. You must fight immediately after entering the cave against tree Trahaearn Automatons. Each will master a combat style: melee, ranged, and magic. You won’t find any difficulty defeating them besides their abilities, and after you finish the combat, go to inspect Lady Trahaearn on her chair. You will find her broken exoskeleton, so you must repair it using a Rune Bar. 

When you finish fixing the exoskeleton, you will see how Lady Trahaearn will float out of her chair. She will thank you for your help and will explain to you all of this was necessary to keep her alive because of her advanced age. As you do for the other leaders during Plague’s End RS3, you should tell her about regrowing Prifddinas, and she will go to the Undercity. 

Lord Crwys

During your talk with Gwir, she mentioned that Lord Crwys was near nature. Since he was an expert at farming and woodcutting, he considered all the trees as his brothers. Finding him should be easy. You will need to cut some trees in the Isafdar forest, and as a result, yellow lights will stream in the direction of Lord Crwys. These lights will disappear after a few seconds and will lead you near the Tyras Camp. 

You must follow two paths, in RS3 Plague’s End, to pick Red and Blue Isafdar Mushrooms. Pick them since you will need them for Lady Meilyr. If you can’t pick the mushrooms, go to Gwir and talk about Lady Meilyr. You will take two paths, so teleport to the Tirannwn lodestone; you can pick the Blue Mushrooms there. Head to the west, entering the dense forest, where you can find the Red Mushrooms. You must cross the tripwire to the north and then through the dense forest. 

If you want an alternative path, you can travel to Port Tyras using a charter ship and head north from the Tyras Camp. Then, you must go east and south to reach the exact location in the dense forest. The main point is to pass the last tree in the dense forest and chop the tree closest to the right. This will infuse the dead tree on the other side of the dense forest, and now you can inspect it. You should go to the west side to inspect the dead tree. You should use a Plant Cure Potion or cast a Cure Plant spell on it. After doing so, you will be in front of Lord Crwys after his transformation. 

At this point of Plague’s End RS3, Crwys will tell you he turns into a tree to escape from Iorwerth. He will also mention that he is sick from all the corruption of the Poison Wastes by Arposandra and the growing power the Dark Lard is obtaining. Tell him it’s time to regrow Prifddinas, and he will also go to Prifddinas Undercity. 

Lady Hefin

When you talk to Gwir, she will reveal that Poison Waves was a lake before. Now, you will need to go through this location to find Lady Hefin. It’s a small rock maze, and if you want to access it, you must go west out of Lletya, passing the tree gate. From here, head south, passing the dire wolves and magic trees; you must jump on the rocks. It should be relatively easy, and once you finish, go to the west until you reach a tent with an elf hermit. 

She will tell you she’s not Lady Hefin, but you must ask her about the wisdom of Seren. When she finishes her explanation, she will ask you questions about what she said. You must answer the following: 

  1. Seren's faithfulness to the elves
  2. The symmetry of crystals
  3. I don't know.

After this, you will see that she is Lady Hefin. She will be impressed by you, admitting you don’t know something and want to learn more about Seren and the elf race. At this point, you should do the same: tell her about regrowing Prifddinas, and she will go to the Prifddinas Undercity. 

Lady Meilyr

If you go in order, this will be the final leader. Gwir will give you a Meilyr potion recipe. Read the recipe, and you will know how to make the potion. To do so, you will need to add the Red and Blue Isafdar Mushrooms to a Super Defence (3) potion. As you already picked the mushrooms on your way to finding Lord Crwys, it should be a straightforward process. Still, you can go back to Isafdar and close to the Tirannwn lodestone, you can find the mushrooms, or in the southwest area of Lletya, nearby the magic trees is another spot you can get those. 

Once you get the mushrooms, you should continue Plague’s End RS3. Grind them and add them to the Super Defence (3) potion to make a 3-dose Meilyr Potion. Go to Daemonhein, this is the “dungeon of the kin” that the clue refers to, and drink the potion in the middle of the main hall. In front of your eyes, you will see a portal appear that will take you to a small room within Daemonheim. This is Lady Meilyr’s house. Once you are there, she will tell you she and other elves discovered this location during King Baxtorian’s campaign. She stays there to study its rare herbs while working as a hidden place to avoid Iorwerth. Tell her it’s time to regrow Prifddinas, and she will move to the Undercity as the other leaders. 

Last Details 

Once you have reunited all the elders, it’s time to return to Lletya and let Arianwyn take you directly to Prifddinas Undercity. You will meet all the elders, and Arianwyn will mention that you must go to Tyras Camp and try to convince General Hining. He will be responsible for distracting Lord Iorwerth’s army while the elders perform an undisturbed ritual.  

Head to Port Tyras and talk to General Hining. He will be satisfied with your plan and ecstatic that the wait will be over, and finally, he and his men will return home. When you finish talking to him, return to Lletya for the next step in the Plague’s End RS3 quest. It’s time to prepare with your best combat gear. It would be better if you could include some fire-based magic. Remember, you must have food and a way to teleport out if needed. We recommend you wear ranged gear to avoid heavy attacks and high damage. After this, you must speak to Arianwyn to teleport black to the Undercity.

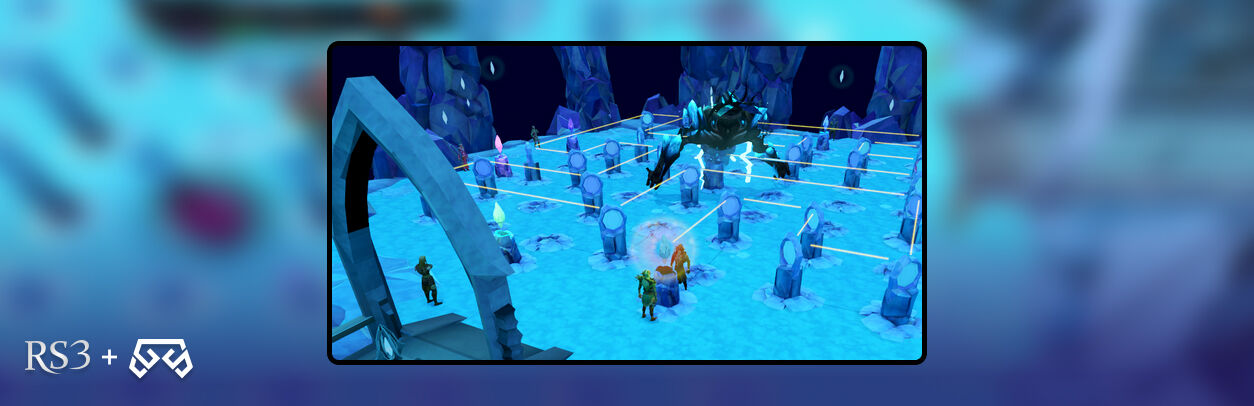
Upon arrival, you must find and talk to Arianwyn again; he will tell you to enter the library. Once you enter, you will be facing a light puzzle. Your main objective is to activate the central Seal of Seren. You must power it with the eight seals that protect Prifddinas. During this phase of Plague’s End RS3, you must use mirrors to guide the light emanating from the Prifddinas seeds to the central seal. To complete this, you must do this puzzle eight times, once for each Elder Crystal. 

Some mirrors are fixed, and you can’t rotate or remove them. These mirrors have a pink reflective area instead of white. For an easy process, you must start in the middle and work your way toward the crystal to activate it. You must find out that the mirror can only rotate in two directions, and you can’t point the light through beams. Moreover, every time you complete a puzzle, the pillar and raised plinths will change; however, you can go through without stressing too much. Let’s go through each of them: 

plagues end rs3

Cadarn

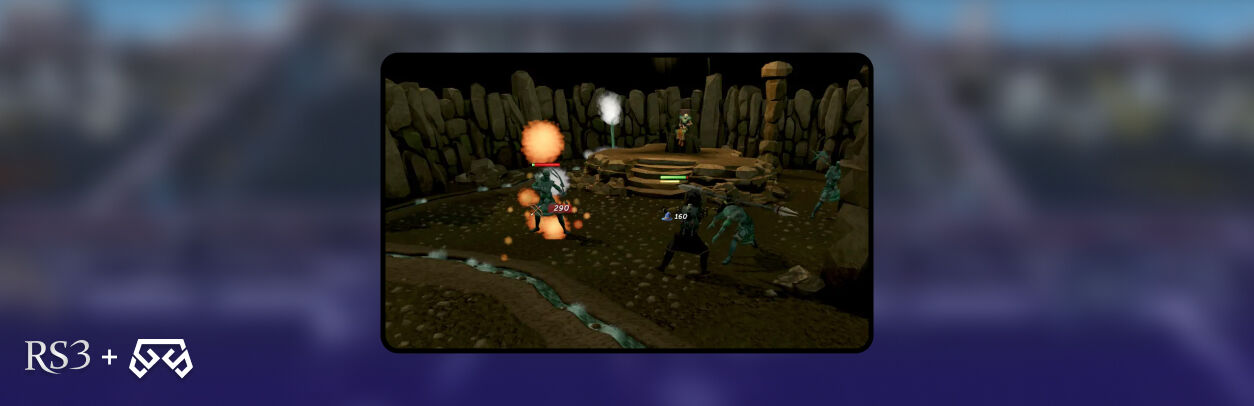
For this one, you must start by activating the Cadarn Seal. It’s the southern crystal on the east side. Arianwyn is the one controlling everything. Beware once you power Cardarn up because you will see two level 97 Shadows appear, which will be the Dark Lord's minions. Still, you can defeat them easily since each of them only has 100 HP, and you can delete them with one hit. However, try to avoid their attacks since they can deal over 800 HP per attack. But first, here’s what you need to do: 
Mirror Locations (relative)

  • First plinth west of the seal - North (beam direction)
  • Second plinth west of the seal - West (beam direction)
  • Second plinth to the west - South, into the Seal of Seren

Trahaearn

Once you defeat the Shadows and continue with RS3 Plague’s End, you must move clockwise to the next seal. The second seal is the eastern crystal on the south side. When you power it up, you will see how a Great Shadow and three Shadows appear before you. Try to defeat the Shadows First, since you can one hit them, and focus your attention on the level 105 Great Shadow with 9,000 HP and max hit 900. Still, you should defeat them easily. But first, let’s go through the puzzle: 

  • Mirror Location (relative)
    First plinth north of the seal - East (beam direction)
  • First plinth to the east - North (beam direction)
  • Second plinth to the north - West (beam direction)
  • First plinth to the west - South, into the Seal of Seren (beam direction)

Iorwerth

It’s time for the Iorwerth seal, and you can start on the western crystal on the southern side. Once you power up the seal, you will face the Dark Lord; he will appear with a Great Shadow as company. Still, to make him show, you must complete the seal first: 

Mirror Location (relative)

  • First plinth north of the seal - West
  • First plinth to the west - North
  • Northen-most plinth - East
  • Eastern-most plinth - South
  • First plinth to the south - West
  • First plinth to the west - South, into the Seal of Seren

The Dark Lord

After you complete the Iorwerth seal during this part of Plague’s End RS3, the Dark Lord will show himself before you. It will reveal that it’s the foil of every life form and is obsessed with death. You can do nothing but fight it every time you activate a seal. You will notice the Dark Lord attacks you using magic, with an area-of-effect on each attack. If you get hit, he will deal 10% of your maximum life points; this will count on each hit. It will raise its left arm in the air when preparing its attacks. It will oppose pulling both arms to its right side when doing a normal attack. 

Before you continue with Plague’s End RS3, you will see how the combat starts when the Dark Lord does his blast, covering its area-of-effect. Then, he will alternate between his two attacks. We don't recommend battling with Melee due to its area. However, the Dark Lord and his minions are weak to fire spells, but you can counter them by using magic instead of a ranged combat style. Also, take Protect from Magic/Deflect with you to take less damage. 

You can defeat him by simply moving around the arena and casting spells, with a short time between each one. By taking your distance, you can avoid and predict the most damage you will get; however, you must be careful when clicking around the area. If you stand for an extended period, you will receive the hit of the area-of-effect attack. Moreover, avoid accidentally engaging with the Shadows if you would rather not be an easy target. 

In RS3 Plague’s End, when you try to defeat the Dark Lord first, you can focus on the Shadows after that. Kill them one at a time; just go to their respective corners and attack them. If you want to defeat the Great Shadows first, use the crystal seals to protect yourself from the attack, and you can counter in a safe spot without worrying about getting hit by the Dark Lord. 

Another thing you can do between rounds is bank, but you can only leave at the start of each battle. You can’t do it after it ends because you will have to redo the fight again. You can log out if you want to keep your teleports since you will reappear in Lletya. Once you're done banking, talk with Arianwyn to return to the Undercity and enter the library to continue your fight. 

rs3 plagues end

Crystal Seals

Since you stopped doing the crystal seal puzzles, you must continue after you defeat the Dark Lord in Plague’s End RS3. The next seal you will do is the Ithell seal, so let’s go through it. 

Ithell

Go to the southwestern side of the room to continue your puzzle-solving. Once you power up, Lord Amlodd will tell you that the beam of light directed at the Dark Lord causes damage to it. If you regrow Prifddinas, you will defeat him once and for all. The Dark Lord and Two Greater Shadows will attack you again; do as previously described. But first, move through the puzzle like this: 

Mirror Location (relative )

  • First plinth east of the seal - North
  • First plinth to the north - East
  • Fist plinth to the east - North
  • First plinth to the north - East
  • Second plinth to the east - South
  • First plinth to the south - East
  • First plinth to the east - North
  • First plinth to the north - East
  • First plinth to the east - South
  • First plinth to the south - West, into the Seal of Seren and the Dark Lord

Amlodd

After the second defeat of the Dark Lord in Plague’s End RS3, you must head to the western side of the room, north of the Ithell seal. After you power up the crystal seal, Lady Hefin will tell you her ancestors sealed the Dark Lord within the Temple of Light. That’s the darkness Seren warned them about when she transformed into crystals by shattering herself. Since the Temple has this darkness, it was attracted by the Death Altar due to the fascination with the death of the Dark Lord. You must defeat the Dark Lord and three Greater Shadows again, and it will use the same mechanics as before. To solve the puzzle and continue with the third fight against the Dark Lord, you must follow the instructions:

Mirror Location (relative)

  • First plinth east of the seal - North
  • First plinth to the north - East
  • First plinth to the east - South
  • First plinth to the south - East
  • Third plinth to the east - South
  • Second plinth to the east - South
  • First plinth to the south - East
  • Second plinth to the east - North
  • First plinth to the north - East
  • First plinth to the east - North
  • Second plinth to the north - West, into the Seal of Seren and the Dark Lord

Hefin

After defeating them once again in Plague’s End RS3, it’s time to activate the Hefin seal; it’s in the western crystal on the north side of the library. For this puzzle, two mirrors will already be in place, and you can’t move them. When you power up the seal, you will strike against the Dark Lord and reduce his health. At this time, it will summon and kill Lord Iorwerth to gain more power. The Dark Lord will enjoy his death and describe the death of Iorwerth and King Lathas as delicious. It will reveal that it’s responsible for giving the elves their magic, extending their lifespan, and claiming that it’s Seren. You will have to defeat the Dark Lord again with three Great Shadows, but you will need to complete the puzzle first, so let’s jump in: 

Mirror Location (relative)

  • North-east corner plinth - South
  • South-east corner plinth - West
  • South-west corner plinth - North
  • North-west corner plinth - East, into the fixed-position mirror
  • First plinth to the south - East
  • First plinth to the east - North
  • First plinth to the north - West
  • First plinth to the west - South
  • First plinth to the south - East
  • First plinth to the east - North
  • First plinth to the north - West
  • First plinth to the west - South, into the Seal of Seren and the Dark Lord

Meilyr

When you defeat the Dark Lord, it’s time for the Meilyr’s crystal seal. You will start at the eastern crystal on the north side of the room. As before, you will get two fixed mirrors that you can move. Once you power up the seal, the Dark Lord will tell it’s an aspect of Seren, but it’s cast out by the other parts when she shattered herself when the God Wars ended. Moreover, the Dark Lord will reveal it’s a source of the voices in the Underground Pass. With the death of King Lathas and Lord Iorwerth grants enough power to make it manifest in the room. This will be the last time you must defeat the Dark Lord, but it will claim the soul of a great hero will be a true delicacy. You will face four Greater Shadows and numerous Shadows that help it, complicating this battle. As you must know, the first step to go through the final of the Dark Lord is completing the puzzle with this solution in Plague’s End RS3: 

Mirror Location (relative)

  • First plinth east of t he northern fixed mirror - South
  • First plinth to the south - West
  • Second plinth to the west - South
  • First plinth to the south - West
  • Second plinth to the west - South
  • Third plinth to the south - East
  • First plinth to the east - South
  • First plinth to the south - East
  • Fourth plinth to the east - North
  • Second plinth to the north - West
  • First plinth to the west - North
  • First plinth to the north - West, into the Seal of Seren and the Dark Lord

plagues end rs3

Crwys

When you defeat the Dark Lord one more time in Plague’s End RS3, it’s time to power up the Crwys crystal seal. It’s in the northern crystal on the east side of the room. You will notice most crystals are fixed in this puzzle, so let’s solve the puzzle to power the Crwys crystal and complete the ritual with this guide: 

Mirror Location (relative)

  • First plinth north of the fixed mirror - East
  • First plinth to the east - North
  • First plinth to the north - West, into a fixed mirror
  • The plinth between the Crwys and Cadarn Seals - South
  • South-east corner plinth - West, into a fixed mirror
  • The plinth directly north of the Trahaearn Seal - West
  • South-west corner plinth - North, into a fixed mirror
  • The plinth directly north of the Iorwertg Seal - North, into a fixed mirror
  • The plinth next to the Ithell Seal - North
  • North-west corner plinth - East
  • The plinth one-diagonl from the north-west corner - East
  • The plinth next to the Hefin Seal - East
  • The linth between the Hefin and Meilyr Seals - South, into the Seal of Seren and the Dark Lord

Prifddinas Is Restored

With the eight seals working properly, the resulting light will finally destroy the Dark Lord, and the city will start regrowing. Arianwyn and the elders will thank you for your hard work and tell you the city of Prifddinas will now function differently. They learned from their past mistakes, so all the clans decided to open their gates of the city and abolish their rules that didn’t allow other races inside their clans. 

After this and to complete Plague’s End RS3, Arianwyn will give you 15 items. Don’t be excited if you run out of space in your inventory; he will open a bank deposit screen so you can empty your inventory without a problem getting the items. After this, you must talk to him again to finish the quest and claim your reward. 

RS3 Plague’s End Rewards

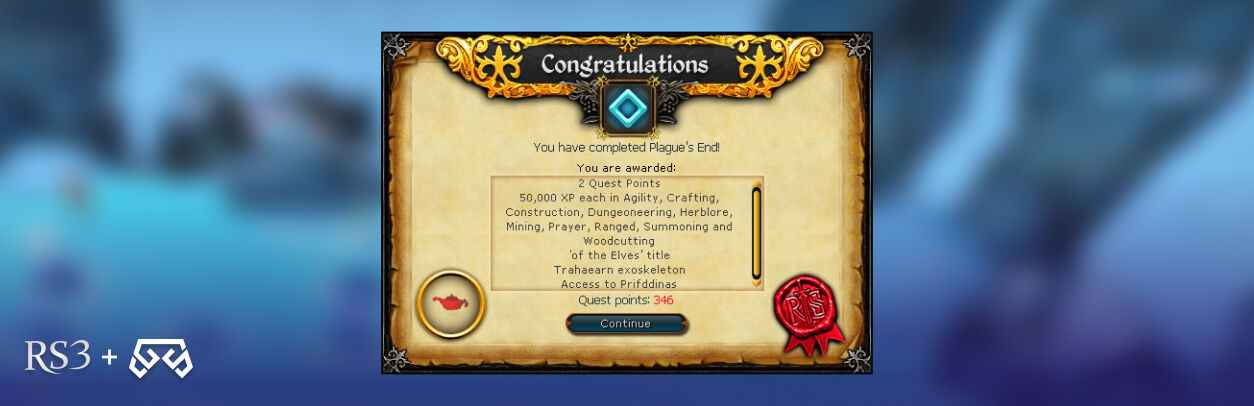
After a long journey, you have completed RS3 Plague’s End. Congratulations, it’s the minimum you can receive after going through the Elf (Prifddinas) quest series and finishing the last quest. Let’s see what you will be rewarded: 

  • 2 quest points
  • 50,000 XP lamps for 10 skills: Agility, Construction, Crafting, Dungeoneering, Herblore, Mining, Prayer, Ranged, Summoning and Woodcutting (You won’t re-obtain this reward if you lose the lamps)
  • Access to the city of Prifddinas
  • The [Name] of the Elves title
  • The Trahaearn exoskeleton set has the same benefits as the Black Ibis Outfit. It provides a 25% chance of avoiding being stunned and damaged while pickpocketing and being bitten when looting urns in Pyramid Plunder. Each piece reduces 2 kg of weight.
  • Access to the Prifddinas Undercity
  • Access to the Mourner Headquarters entrance in West Ardougne without the need for Mourner Gear
  • 2 Treasure Hunter keys (Ironman accounts will not receive these)
  • Three Music Unlocked: Undercity, Scape Bold Heroic, and The Dark Lord

rs3 plagues end

RS3 Plague’s End FAQ

It was a long adventure, and we are sure you still have some questions and doubts you want to clear, so let’s answer the most common ones here. 

What Will Happen After The Completion Of RS3 Plague’s End?

Once you complete this quest, you can go to Prifddinas city. The elven clan leaders will be waiting for you and lining the path to the city's gates. As you pass in front of them, they will greet you and say something kind. If you wish, you can talk to them directly. They will invite you to explore Prifddinas and trigger a cutscene after you meet again with Arianwyn. 

In RS3, How Long Does Plague’s End Take To Complete?

To complete Plague’s End in RS3, you will need to visit all the locations and face several fights against the Dark Lord. We recommend taking at least between one to one and a half hours to complete the quest. 

Plague's End RS3 Summary

This isn’t the end of your journey, but it’s the end of the Plague’s End RS3 Quest Guide, but don’t be sad; you served as a great hero and made friends along the way. With all the honor and pride you get from this, your next adventure can be small, but we will be your companions in the next steps, bringing more guides like this to our blog section. Moreover, don’t forget that you can buy RS3 gold on our page to make your progress smooth and focus on what matters the most: have fun. See you in the next blog! 


Author profile
Jesus Marquez

Jesús is an SEO and creative writer with a medical background. With passions in fiction and gaming, he uses rich language and precision to make his content both impactful and beautifully crafted.


Related Articles
logo
Branches of Darkmeyer RS3: Helping Myreque Branches of Darkmeyer RS3: Helping Myreque

Welcome back to our blog series, where we cover the different quests in RS3. Today’s quest is Branches of Darkmeyer, the seventh quest of the Myreque quest series and part of the Fifth Age. In this quest, you must access the Darkmeyer and find the Blisterwood Tree, which is capable of harming the vampires; because of this, Lord Drakan had previously sealed off the city to protect his kind. Vanstrom Klause has also been tasked with obliterating the entirety of the Myreque in this adventure. So, if you're up to the task of being a hero, let's dive into Branches of Darkmeyer RS3 and uncover the Blisterwood Tree before it's too late.

rs3 branches of darkmeyer

Requirements Branches of Darkmeyer RS3

Before you take on this adventure, there are a few things to be considered. Firstly, this is a members only quest, secondly if you're wondering how long does Branches of Darkmeyer take in RS3, expect to spend an average of 50 minutes; making it a long quest. Lastly, there are some requirements that you must have to navigate the quest. So, let's take a look: 

  • Completion of Legacy of Seergaze and Legends’ Quest. 
  • 63 Agility 
  • 64 Crafting
  • 63 Farming 
  • 70 Fletching
  • 70 Magic
  • 67 Slayer
  • 76 Woodcutting
  • Gadderhammer (recommended if you want a higher vampyric title)
  • Wolfsbane Dagger
  • Combat equipment
  • Food
  • 4 Thread (obtainable during the quest)
  • Ability to defeat level 98 Harold and level 140 Vanstrom Klause.

RS3 Branches of Darkmeyer Walkthrough

To begin this quest, head under the pub in Burgh de Rott and speak to Veliaf Hurtz. He will ask you for help with Vanstrims Klause and the Vyrewatch, which become stronger while the Myreque weakens. He will also explain to you, in more detail, the situation the Myreque and Burgh de Rott are in. The supply routes to Meiyerditch were cut off, and the Vyrewatch discovered Burgh de Rott. They also abducted Marius and brutally murdered him. 

Ask what you can do to help and this will mark the beginning of the Branches of Darkmeyer RS3 quest. Veliaf will tell you he feels terrible asking, but will go on to tell you Cornelius saw a shadowy figure digging south of the bank a couple of nights before, and it looks like an entrance to something underneath there. No one has been down just yet for the danger it represents, but someone has to do it. Veliaf believes the mysterious figure is Vanstrom, and there’s a chance he’s still there. He will ask you to go down and explore what is underneath and defeat Vanstrom if you find him. 

branches of darkmeyer rs3

Branches of Darkmeyer RS3: The Tunnel

Your next stage in Branches of Darkmeyer RS3 is to head to the dungeon entrance south of Burgh de Rott bank and go down. You will see yourself inside a tunnel with a rope connecting to the surface. Moreover, you will see a coffin, a blood drop symbol on the floor, a letter, a decaying tome and a blood fountain. You must pick up the letter, which is addressed to Safalaan Hallow, from someone called ‘V’. He knew about Safalaan’s parents and his childhood. In the letter, V mentioned that they had the answers that Safalaan was seeking and requested to meet with him in the clearing in middle sector four. 

At this stage, you will find a decaying tome in the corner, with only two readable pages, since the rest is stained with blood. One of the pages you can read will mention something about Icyene. You must inspect the coffin; when you do so, a small amount of blood will be spilt, inflicting 10 points of damage to your life points. Inside the coffin, you will find a Medallion with an orange symbol on it, similar to the one seen on the floor when you entered. 

Once you finish your endeavors, head back to Veliaf and explain to him what you found. When you mention the Medallion, he will tell you it is the symbol of Drakan, and had vampyric origins. Veliaf is doubtful that the medallion was placed there by Vanstrom, as it is too old looking and dusty. He will refuse to take it and refers to it as ‘evil’. After this, show him the letter. This time he is more inclined to believe that the letter could have been placed by Vanstrom, as it appears to be much cleaner than the Medallion, and doesn't seem to have been there long. 

Veliaf thinks that noticing Vanstrom descending into the tunnel might ruin his plans to pretend to be a Meiyerditch citizen. He also believes that the plan is too subtle for Vanstrom and points out that you took the letter that was referred to Safalaan. He will also tell you it is dangerous to enter Meiyerditch in any usual way. Then he will give you a teletab to let you reach Safalaan before Veliaf sends you away and will tell you about Safalaan and his preoccupations that make him not feel like himself lately. Once you agree to use the teletab, you will head to the Meiyerditch Myreque hideout. 

branches of darkmeyer rs3

Safalaan

Next, you must speak to Safalaan to continue with Branches of Darkmeyer RS3; to do so, head to the north end of the hideout. He will ask you how you got there and tell you the supply runners from Burgh de Rott have been unable to get through. You must explain to him about the Medallion, and Safalaan will ask you where you found it. Tell him about the cave and what Veliaf explained to you about it. When you show him the Medallion, he will say it looks familiar and ask you to take it from you. When you hand it to him, you will see that it begins to glow in his hand. He will then inform you that he has added a new destination to the Medallion; the Meiyerditch Myreque hideout. Safalaan will be surprised because he didn’t know he was able to alter a vampyric artifact and asks you to take the Medallion away from him. 

You must ask him what the vampyres are doing, and he will tell you that tithes increase, and any citizen unable to meet them is forced and taken away to a mysterious location. Rogue vyrewatch have also been appearing and snatching healthier citizens. Safalaan claims they seem restless, and they’re not following tithing orders. 

At this point of Branches of Darkmeyer RS3, you must tell Safalaan you have a letter for him. He will ask you where it came from, and you must explain everything that happens in Burgh de Rott. He will take the letter and read it. Ask him what he thinks, and he will express disbelief and ask you if you are sure it was Vanstrom. You must repeat the story about the night the cave was uncovered. Still, Safalaan will have some doubts since the letter speaks about his parents, experiences, and visions. 

You must go through the dialogue options that appear in this stage of RS3 Branches of Darkmeyer quest. Safalaan will tell you that he doesn’t remember much about his past; even, he can’t remember how old he is. He will tell you he has had visions and recently feels some great power growing in him, ready to be released soon. 

Ask what your next step should be in Branches of Darkmeyer RS3, and he will tell you he will meet with the letter’s sender. Safalaan thinks Vanstrom must know something, and if he were truly after Burgh de Rott, he would attack. You will tell him it might be a trap, and Safalaan will agree. However, he won’t give Vanstrom what he wants; he will find out what’s happening. Safalaan decides you should go in his place, and sends Vertida Sefalatis and Mekritus A’hara with you, telling you to look from a window to the north of the clearing before meeting the contact. 

rs3 branches of darkmeyer

Branches of Darkmeyer RS3: Meiyerditch

It’s time to travel to the meeting spot, exit the base, and go through the wall to the north. You will find stairs you must use to go up, then jump the floorboard to the west and use the ladder to go down. Open the door to exit, head west a bit, then south until you find a barricade. You will be in front of a building, and you must head inside. Open the door, and you will be in a room with the portrait. Use the ladder to go up and continue with RS3 Branches of Darkmeyer quest.

At this stage of Branches of Darkmeyer RS3, you will run into two of the rogue vyrewatches described by Safalaan. The first you encounter wants more than a tithe from you; the second will tell it to wait and then says you are “the one”. The other will agree and call you fresh and full of blood. It will continue saying you will “have a worse time with her”. Ask them what they are talking about, but they just fly off. You must jump over the wall to the building to the west and use the ladder to go down. Next, open the door and exit; it’s important you close the door before you head north and then west around the building. Enter the building and head east to find Vertida standing.

Speak with him, and he will tell you that Mekritus is upstairs and can climb the wall beside him to reach him. Once you reach Mekritus, he will explain that the windows overlook the meeting place and can be used to check whether the coast is clear. Mekritus and Vertida will give you ground support by flanking around. To spy, you must click on the white sickle logo, which will trigger a cutscene showing Vertida and Mekritus in position when the informant exits a building: a young girl called Nessie who is crying. You must head downstairs and speak with her. 

The Contact

In this stage of Branches of Darkmeyer in RS3, Nessie will say she saw you in the window and ask why you took too long to come down. She will claim she knows your name since you are the great hero of the Myreque. When you ask her what she is doing here, she will tell you she’s lost, and a scary vampyre called Vanstrom told her to stay there. You will tell her he’s the worst vampyre, second only to Drakan, but Nessie will laugh, saying his power is nothing compared to hers. Immediately, she will transform into Vanescula Drakan. 

Vertida will yell for you to attack. You must do so, and she will counter with something that looks like a Ring of Smoke, which will throw you backwards and teleport your Myreque companion far away. You will then have the option to speak to Vanescula because she’s not there to fight. She asks you to calm down since you aren’t a challenge; to do so, you must step back until you are out of sight of Vanescula before leaving your combat posture. You will ask her what she is doing here, and she replies she’s here to help. She was the one who planted the letter in Burgh de Rott, and she knew about Safalaan, but any information related to him was between them. 

Vanescula is aware of Myreque’s dream of defeating Drakan and freeing Meiyerditch. She will explain there’s no reason why that shouldn’t happen, but at the same time, she thinks the Myreque are not doing a decent job alone. She will also tell you she will help the Myreque because she thinks Lowerniel Drakan is not a good leader, and he’s spending most of his time shut in his castle obsessing over a rock. Drakan doesn’t even notice the influx of the Mercenary Protocol, the threats from Misthalin, or the recent fight amongst the vyrewatch. Vanescula thinks he’s a blind fool, letting the vampyric society fall into ruin. Moreover, she is bored. 

Sadly, she can’t kill Drakan because she needs to command the respect of the vyrelords. Vanescula also tells you her discoveries made through the study of Haemalchemy, which means that vampyres could survive without blood. With this, the citizens of Meiyerditch could taste freedom if she were the leader. She will also say you must trust her because she hasn’t killed you yet. Vanescula will claim you are her personal blood tithe, so you won’t have any problem with any vyrewatch while you are traveling to Meiyerdtich. 

She then goes on to tell you about the vampyre city Darkmeyer, “where the greatest weapon lies”, before mentioning the Blisterwood Tree, and stating if a vampyre touches it, it will cause harm to them. This can be a more potent weapon than the Ivandis Flail, if you are able to chop it and have the logs carved. Finally, she will give you a written offer, which you must provide to Safalaan to continue with the Branches of Darkmeyer RS3 quest. 

branches of darkmeyer rs3

Darkmeyer

Your next task in RS3 Branches of Darkmeyer quest is to use the Medallion to return to the Meiyerditch Hideout with the letter Vanescula gave you. Head to Safalaan, who is worried about you. Once he sees you, he will be excited, and when he reads the letter, he’ll be excited about its contents. Vanescula knows about his past, which is an exciting prospect for him, but you must ask that he focuses on her promises to help them instead. Safalaan will agree and suggest that you follow Vanescula's advice. He will also tell you to talk with Vertida for advice since he will be busy with the letter. 

When you reach Vertida, talk to him. He’s unsure if he can trust Vanescula and Safalaan since Safalaan hasn't been himself lately. Vertida thinks Safalaan is desperate for information and is not thinking clearly. Another thing Vertida will mention is the walls of Darkmeyer and how dangerous this city can be. It’s almost impossible to enter, except if you’re using a Drainage Gate along the uppermost wall in the eastern Meiyerditch. This allows you to continue with Branches of Darkmeyer in RS3 because you can climb under to access the city. 

Vertida also recommends taking some Smoke Bombs and a Hatchet from the storeroom to help you cut the Blisterwood Tree. He will tell you to be on the lookout for seeds to plant and grow their own tree. With all that being said, you must head to the storeroom and take 30 Smoke Bombs from the crate west of the exit ladder, then head to the Drainage Gate by using the Medallion to teleport to Meiyerditch Laboratories. Once you get there, go upstairs through the slashed tapestry and exit the building. After you leave the building, run southwest along the diamond building clockwise and then run north until you reach the Drainage Gate. 

If you don’t have the Medallion, you can walk to reach Darkmeyer by heading out of the Myreque Hideout to continue with the Branches of Darkmeyer in RS3. Go upstairs and across into the next building. Exit this building and go through the building directly north. Turn right, then continue your path north. When you pass the Fish Shop, turn left and head north to reach the Drainage Gate.

On the other side of the Drainage Gate, you will meet Vanescula, and she will tell you the tree is guarded in the upper tier of Darkmeyer. The Darkmeyer vyrewatch are more independent than the ones in Meiyerditch. She will also tell you to use the Smoke Bombs to find a Darkmeyer Outfit to fool the vampyre juvinates. However, this outfit won’t help you with the vyrewatch because they have the ability to smell you. Vanescula will tell you to find the Darkmeyer disguise, and she will give you a Needle and some Thread to adjust the outfit. 

Once she finishes talking, you must continue your mission in RS3 Branches of Darkmeyer. You must only use the Smoke Bombs after you are out of sight of the juvinates, and stay away from the vyrewatch. Instead, search for the chests inside the buildings and find the four outfit pieces. If you get caught, you will be teleported back to Vanescula. You must reach the building before your Smoke Shourd Vanishes. Once inside, immediately close the door and move to the back of the building. Doing so will help you keep the vampyres outside, and you can continue your path without being teleported. You will notice they may wait for you until you re-emerge and teleport you away. To avoid this, look for any vyrewatch or juvinates that match your movements, as they will also try to catch you when you leave. If you see a vyrewatch or juvinate waiting for you, exit to the lobby, and they will move on.  

After you find, fix, and equip the four outfit pieces of the Darkmeyer outfit, you will see your title change to Vyreling, and the vampyres will be a bit nicer to you; well, at least they won’t throw you out. Return to Vanescula, and she will cover your scent with her own, masking your human smell and tell you how to get the Blisterwood Tree. 

branches of darkmeyers rs3

Gaining Status in Branches of Darkmeyer RS3

Your next step in Branches of Darkmeyer in RS3 is to get to the Arboretum with the Blisterwood Tree; however, you’ll need to gain respect among vampyres first. You must raise your status in Darkmeyer, so go northeast through the low tier to reach the middle tier, where you can find Vanescula waiting for you. Sentinel Mortshade will ask you what your vampyric name is, and you'll be shown some options on your screen; make one up using them.. Don’t worry if you want to change it, you can do it later once you complete the quest by speaking to Vanescula. 

With your new vampyric name, head to the named vampyres to get all the tasks from them to continue with RS3 Branches of Darkmeyer. Once you complete these tasks, you will earn a rating, and when you hit the halfway mark of the rating, you will get access to the upper section. When you reach three-quarters full, you can access the Arboretum. Here are some of the tasks you will find:

Middle Tier

  • Recapture the Six Bloodveld. These vanish for up to 30 minutes, which means they can appear in places you've already checked. They can be in buildings with closed doors. So it’s better to start this one first so you can catch them while running around in the middle or lower tier.
  • You must vandalize posters put up by vyrelords and vyreladies since this task came from Sanguinus Varnis. Of the two options for vandalizing, pick the one with lighthearted options (e.g., cat ears vs. red eyes).
  • Talk to Maria Gadderanks in jail while wielding the Gadderhammer to achieve more reputation than you would for talking to her without it.
  • Use the Angry, Laugh, Stomp, or Trick emotes a few times beside Maria to terrorize her. You can also use the Zombie Walk and Zombie Dance emotes. If you scare her too much, she will refuse to leave her cell if you try to free her later.
  • Talk to Valentina Kaust, and she will offer you a vial of blood to drink. Select any of the options available. It’s important to note that drinking the blood damages you for half your health, so click on it to drink and then click no (which will throw it on the floor). Say that you are already full from drinking blood. You will still gain most of the reputation.
  • Once your status bar is halfway full, talk to Sentinel Gorthaur, Sentinel Mortshade, or Sentinel Draemus about Citizens in Meiyerditch, The Myreque and The town of Burgh de Rott.

Upper Tier

  • Speak to Vanescula Drakan to pledge allegiance to the Drakan family.
  • You must talk to any upper-tier sentinel about your opinion of Vanstrom Klause and Lord Drakan.
  • Entertain Misdrievus Vakan by humiliating a blood tither, then talk to the tithe master about the tither (you can find him in the building west of Misdrievus Vakan). If you let him go this time, you will get 13 status points. If you choose to lie, he will order his death, and you will get 24 status points.
  • You must kill captured Meiyerditch citizens for the vyrewatch guards. If you refuse, you will need a Wolfbane Dagger if you want to gain enough status to enter the Arboretum.
  • Beware if you have LootShare enabled that killing the citizens will NOT give you a reputation.
  • In the case you do not wish to kill the citizens, you must tell the guard about it when you talk to him. Otherwise, you will have no choice but to kill them to complete the quest. You will note sparing the citizens gives less status.
  • If you refuse to kill the citizens, the guard will ask you to get him some blood from the Darkmeyer Blood Trader. The only thing you must remember is the blood types he asks for (AB, A, B and O). When you head into the Darkmeyer Blood Trader, they will initially refuse as you have yet to get any Darkmeyer notes. He will instead ask you to recover money for him from a werewolf. The werewolf is either the male or female Canifis Settler, which you can find located in the lowest tier of Darkmeyer. You will need the Wolfbane Dagger to convince them to give you Darkmeyer Notes. When you get it, trade with the Darkmeyer Blood Trader and get the blood for the guard. Once you are done, return to the guard to gain status.
  • If you choose not to kill the citizens, you can talk to Vanescula Drakan after the quest, and she'll lead you to the guards, and he will ask you for more bottles of blood from who will ask the Darkmeyer Blood Trader. This will give you 20 status points every time you do it; however, you won’t find the option unless you complete Branches of Darkmeyer in RS3 quest.

rs3 branches of darkmeyer

Branches of Darkmeyer RS3: The Arboretum

After you gain enough status to continue with RS3 Branches of Darkmeyer, talk to Vanescula, and she will tell you to go to the Arboretum; during this conversation, she will remind you to be cautious about Ranis

Upon your arrival at the Arboretum, Ranis will stop you as you approach the doors. He will question you as to whether you think he or Vanescula, with whom you hold an alliance too, is more important. He will then ask you to pledge loyalty to him, and you must do so. After that, the blood mark you have will cause you pain, and Ranis will dismiss you but give you a warning that he’ll be watching. 

During this phase of Branches of Darkmeyer RS3, remember to check the health of the Blisterwood Tree because, as you have been told, the Tree needs to be given sequences of energy in the correct order to survive. The first one is water, light and then nutrition. In front of you, there will be a machine, you must pull the lever to make it work. You will see how the first three rows of circles will glow, and you must see each has a different color from top to bottom. You can move the circles clockwise by clicking on the bottom left of a group of four. You will see four sets of circles: bottom left, top left, bottom right and top right. 

Note: If you can’t distinguish the circle colors, you can right-click on them to learn what they are about. Moreover, if you encounter a glitch after you pull the lever and the game freezes, all you need to do is press the escape key to close the overlay, and if it doesn’t work, adjust the graphics to the minimum during the puzzle. Then, once you finish, set everything back.

To begin with the puzzle in Branches of Darkmeyer RS3, you must start aligning the first three rows of circles like this: 

  • Water, water, water, water
  • Light, light, light, light
  • Nutrition, nutrition, nutrition, nutrition

Once you line up all the circles, pull the lever and check the Tree. This time, your combination will change, and the Blisterwood Tree will need nutrition, water, light, and nutrition. This means you will use four rows this time, so pull the lever to get more circles and move them as before. This must be your alignment: 

  • Nutrition, nutrition, nutrition, nutrition
  • Water, water, water, water
  • Light, light, light, light
  • Nutrition, nutrition, nutrition, nutrition

You must check the Tree again; this time, the instructions will become complex. At this time, no water can touch another water, nor can nutrition touch nutrition, diagonally, vertically, or horizontally. In any case, water and nutrition can touch each other, and light can touch anything. Here’s a solution: 

  • Light, nutrition, water, nutrition
  • Water, light, light, light
  • Nutrition, light, water, nutrition 
  • Water, light, light, light

Once you finish, check the Tree again, and you will enter the final part of the puzzle of Branches of Darkmeyer in RS3. Your last infusion may not touch energy, light, and water by any means; however, light can touch light, water can touch water, and nutrition can touch anything. Here’s one solution: 

  • Light, light, light, nutrition
  • Nutrition, nutrition, nutrition, nutrition
  • Water, Water, Water, Water 
  • Nutrition, nutrition, nutrition, water
  • Light, light, nutrition, water
  • Light, light, nutrition, water

Once you complete the four energy infusions, you will be able to chop the three logs from the Blisterwood Tree. However, this will attract Ranis's attention and he will demand that you come out of the Arboretum while changing to his vyre form. You will not fight him because Vanescula will break out in her vyre form, and Rains will tell her he doesn’t think you will ever be one of them. After he says that, the screen will become black, and you will see Rains’ corpse on the floor with Vanescula standing next to him. 

After you see this awful scene in Branches of Darkmeyer RS3, leave the Arboretum and talk to Vanescula; you can take a moment to collect additional logs if you wish to create more stakes. When you talk to her, she will blame the death of Ranis on you (the Myreque), but it’s something that has to be done because he would have exposed you. 

Vanescula will also tell you that the Blisterwood Tree doesn’t produce seeds and that Vanstrom discovered the Myreque Hideout in Meiyerditch. She will also demand you take the Medallion off to restore its full potential before you can use it again. She will hand it back once she finishes. She will also add a teleport to Darkmeyer and the Barrows to the medallion before returning it. After she is done, she will teleport you away, leaving you just outside Darkmeyer, to bring you into safety while she explains what happened with the vampyres. 

branches of darkmeyer rs3

Emergency Status 

You must return to Myreque base using the medallion to reach Meiyerditch by teleportation. There, find Vertida and talk to him. He discovered that Safalaan had been missing since the moments after you left Darkmeyer. This will result in Vertida calling a meeting to discuss everything you have discovered during your journey so far. 

At this stage of Branches of Darkmeyer RS3, Kael will remark he’s suspicious of Vanescula during all the meetings. You will inform Myreque that Vanstrom discovered the location of the base, and Vertida will immediately want to evacuate. Kael and Mekritus will reply that they are tired of running and hiding and wish to fight back. Vertida will agree with the majority, and instead of his original plan to evacuate, they plan to take the fight to Vanstrom and enter Darkmeyer. You must go alone since you are a respected member of the vampyre society and recognized amongst the vyres ranks. 

Speak with Vertida; he will explain how to make Blisterwood Weapons. Part of his explanation will be advice for making one weapon in each style and getting two silver sickles from Kael. You must use a Knife on the set of Blisterwood Logs you collected and start making the Polearm, Staff and some Stakes; if you do not have a knife, Vertida will offer you one. Once you have the three weapons, it will be time to face the final boss. If you don’t have the necessary weapons, you won’t be able to enter the fight, and you will see the following message: “This looks far too dangerous for now”. 

Alongside the Blisterwood Weapons, you will receive a Bottle of Holy Water, which is useful against the Vampyre’s Mist and the Bloodveld Minions Vanstrom is known to utilize. Vertida also suggests you ask the other Myreque for advice on fighting Vanstrom. If you go and talk Kael will tell you about Vanstrom’s Darkness Attack, which he witnessed when he was a vampyre juvinate. When you reach Merkitus, he will warn you that Vanstrom will turn into mist if he’s weakened severely. 

With all the information with you, continue your path in the Branches of Darkmeyer in RS3 by teleporting back to Darkmeyer and bank in the Darkmeyer Treasury bank chest. Remember to take with you: 

  • Super Potion Set, 
  • Extreme Set or Overloads, 
  • Food, The best armor you have, 
  • the Holy Water 
  • Drakan’s Medallion.
  • Something to restore energy
  • A Spirit Terrorbird 
  • Scrolls

Once you have all you need to face the foe, head to Vanstrom’s house southeast of Vanescula’s and look for the biggest house. Once you enter, you will see a level 98 Bloodvled Pet, Harold, who will attack you when he sees you. This fight won’t represent a challenge if you have decent armor and high-level Combat stats. You must throw the Holy Water on him to accelerate this fight and defeat him quickly. Moreover, use a different weapon than the Polearm to defeat Harold and then return to the bank, take the Blisterwood Weapon, and take more supplies you need before you get back on track to face Vanstrom. 

If you die inside the house, you will keep the medallion and the Darkmeyer Disguise, making it easy to teleport back to your gravestone. You will find it outside the house. After you defeat Harold, go through the metal door on the other side of the hall's entrance, and when you pass through it, Vanstrom will be waiting for you. 

Before the final fight of Branches of Darkmeyer RS3, Vanstrom will tell you that he wants to kill Safalaan. The main reason is that Safalaan is half-Icyene and harnesses considerable powers. For all the previous events, like bringing him to Myreque Hideout and rebuilding Burgh de Rott, Vanstrom will thank you. But the thanks is short- lived as he will attack you after this conversation, so make sure you have equipped your armor and drink your potion before entering the room. 

rs3 branches of darkmeyer

The Final Battle in Branches of Darkmeyer RS3

When Vanstrom finishes talking, he will attack you in his human form. You can attack him with your chosen weapon, but we recommend using the Blisterwood Polearm. Once you do him some damage, he will transform into his vampyric form and become more powerful (Vanstrom’s vampyric form is level 140). 

If you have Combat stats level 80 or more, you shouldn’t find this fight difficult; lower-level players will face some struggles. You must continue to hit him with your chosen weapon and use Protect against/deflect Melee to reduce the damage he deals. Vanstrom will use Melee attacks when possible; if you’re out of range, he will use magical attacks like red energy balls instead. Be careful since both of his styles will deal you 250 life points. 

Vanstrom will also use different deadly attacks randomly during your battle with him. Here are the four abilities Vanstrom will use during Branches of Darkmeyer RS3: 

  • Darkness “Stare into the darkness”: When Vanstrom uses this ability, the screen turns black for a few seconds. You must face your character and the camera away from him since this ability will deal you 4,000 damage. 
  • Blood “Let the blood consume you”: You will be teleported into the middle of the room, and a small patch of blood will appear underneath you. When you see this, run away immediately to avoid receiving damage from this ability. 
  • Flight: You will see how Vanstrom flies into the air and starts attacking you with magic; he will throw balls under you, similar to the blood pool attack. It will deal high damage (up to 4,000 life points). During this ability, we recommend you use your Blisterwood Stakes against him. 
  • Heal “Come, fiends, and aid your master”: During the fly, Vanstrom will summon two level 35 Bloodveld Leechers that will heal him if you don’t kill them quickly. Thankfully, they are weak and slow, so you can act before they heal Vanstrom. 

When you drop Vanstrom’s health below 25%, he will transform into a Ball of Mist, and if you try to touch or get near him, you will receive damage. You must use the Bottle of Holy Water to lure him into the puddles and damage him. 

Be careful before you finish Vanstrom; he will scream, “You have me, but I won’t be going down alone”. He will cast an attack at the point of death and this attack will take most of your life points, so heal as much as possible because otherwise, you will die and have to go over the fight again. 

After he explodes, he will summon eight level 98 Bloodveld Guardians. However, you will faint because of the large amount of damage, but luckily Vanescula and Sarius will enter the room. You will see how Sarius protects you, and Vanescula will take control to kill the Bloodvled Guardians. The Guardians will attack her but never damage her vampyre form. Sadly, at this part of the Branches of Darkmeyer RS3, you won’t be able to attack the Guardians directly; however, you can deal some damage with special attacks (Dart, Shadow Stalk, and Shriek). 

After the Bloodvelds are defeated, Vanescula will destroy Vanstrom’s desk with an explosion to delete all his information on the Myreque. She will tell you that she must return to Meiyerditch after Sarius comments that Vanescula can do it since she knows the location of the Myreque hideout. She knows about it because her father, Mauritys, was a Myreque member. Vanescula won’t be happy with what Sarius said, but she will praise Sarius for her courage. However, to continue with the final part of the Branches of Darkmeyer RS3, Sarius will take your unconscious body to the Myreque Hideout, where you will wake up next to Mekritus. 

Returning To Myreque Hideout

After you wake up, find Vertida and speak to him. He will congratulate you on your achievement. Defeating Vanstrom is an impressive thing you accomplished. At this point in Branches of Darkmeyer RS3, you will see a cutscene where Safalaan leaves Meiyerditch, but several vyrewatches stop him. Vanescula will appear and send all vyrewatch away, and Safalaan will tell her he is heeding her warning, and she will tell him that they will begin once he’s back from his endeavor. 

After that, Vertida will send you to meet Veliaf at the pub's basement in Burgh de Rott because there is nothing valuable in Meiyerditch to reward you. So, you must teleport to Burgh de Rott using the medallion and then go to the Myreque Hideout under the ruined pub. Find Veliaf and explain to him you defeated Vanstrom Klause. Veliaf will reply that Vanstrom’s and Ranis’ deaths have put the Myreque in greater danger than before since vampyres now consider them a threat. 

A few seconds later, Veliaf will reconsider and tell you they may be closer than ever to defeating Drakan with two of his stronger vampyres gone for good. This will mark the end of the Branches of Darkmeyer RS3 quest. 

RS3 Rewards Branches of Darkmeyer 

Congratulations! You have completed the Branches of Darkmeyer quest, and after a very long journey full of vampyres, secrets and battles, you deserve a reward that matches your efforts to help Myreque and take a step closer to defeating Drakan. Here’s what you will get after the completion of the quest: 

  • ​​2 Quest Points
  • 20,000 Agility experience
  • 50,000 Woodcutting experience
  • 20,000 Farming experience
  • 40,000 Fletching experience
  • 20,000 Crafting experience
  • 25,000 Slayer experience
  • 35,000 Magic experience
  • A tome of XP 3rd ed with three 50,000 experience chapters in any skill 60 or higher.
  • Access to Darkmeyer.
  • Ability to fletch and use Blisterwood weapons.
  • Darkmeyer disguise (can be put into a Costume box in a Player-owned house).
  • A new title depending on your status bar progress
  • Vyreling [Name] (0–24%)
  • Vyre Grunt [Name] (25–49%)
  • Vyrewatch [Name] (50–99%)
  • Vyrelord / Vyrelady [Name] (100%)
  • Drakan's medallion allows teleportation to various places in Morytania (Barrows, Burgh de Rott, Meiyerditch, Darkmeyer and Meiyerditch Dungeon).
  • Ability to receive Vyrewatch as a Slayer task from Chaeldar, Sumona, Duradel or Lapalok, Kuradal, and Morvran.
  • Access to a Bloodwood Tree outside the Arboretum.
  • 2 Treasure Hunter keys (Ironman accounts will not receive these)

Branches of Darkmeyer RS3 FAQ

What a journey you had tracking and defeating one of the strongest vampyres in Meiyerditch. All of your hard work has taken the Myrequre one step closer to Drakan, but success doesn’t mean you won’t have some interesting questions to be answered. So, to ensure you have a full grasp on the understanding of this quest and all of its components, take a look below at some of the most frequently asked questions:

What are the achievements you can unlock during Branches of Darkmeyer in RS3?

During this quest, you will be able to unlock various achievements like: 

  • The Branches of Darkmeyer - to complete this quest.
  • Got a Vyre Reputation - by unlocking the Vyrelord/Vyrelady title and reaching the maximum vyre reputation in Darkmeyer. 
  • Hard - Raising The Stakes - Fletch a Blisterwood Polearm in Morytania 
  • Elite - On Wings Of Bling - By using the Drakan’s Medallion to teleport you to Darkmeyer
  • Elite - Properly Metal - By clearing wave 15 in a Gold or Platinum wave of the Rush of Blood D&D. 

What are the following quests in the Myreque quest series?

To continue your journey to help the Myreque restore their peace, you must complete the following quests in the series: The Lord of Vampurium, In Memory of the Myreque, The Lost Toy, River of Blood and Continued In… quests.  

RS3 Branches of Darkmeyer Summary

Though this long journey has come to an end, it’s just the beginning in some ways. As the restoration of peace will never be truly complete until Drakan is defeated. So, gear up for action in the upcoming quests within the series by taking a look at some of other quest guides to level up skills, hone your combat talents and grow your knowledge; all can be found right here on our site in our blog section. You can also purchase RS3 gold, items and other services to ensure you’re ready to take down Drakan when the time is right. We’ll be back real soon with some more exciting gaming guides to keep your days brimming with action; until next time dear readers!

logo
Vessel Of The Harbinger RS3 - Learn the Ins and Outs Vessel Of The Harbinger RS3 - Learn the Ins and Outs Questing

Welcome back to our blog series, where we cover different quests through RS3. Today’s blog will touch on the Vessel of the Harbinger in RS3, a continuation of your journey hrough the underworld and discovering all that the Necromancy skill has to offer. We’ve already covered Necromancy! and Rune Mythos, so don’t forget to check them if you haven’t already. In the third quest of The First Necromancer series, you will learn more about Rasial from one of his previous students at Port Phasmatys. With all being said, let’s break it down! 

rs3 ectofuntus, rs3 vessel of the harbinger

Vessel of the Harbinger Requirements RS3

Before you start your adventure, you must know some details about RS3 Vessel of the Harbinger; first, this is a Member only quest with an estimated medium length, so you must expect to spend about 20 to 30 minutes going through this quest. Moreover, here are all the requirements you will need to complete Vessel Of The Harbinger quest: 

  • 46 Necromancy 
  • 40 Prayer
  • Ghostspeak Amulet or Cramulet (Unless you’ve completed Hard Morytania Achievements)
  • Bucket of Slime 
  • Ectoplasm 
  • Necromancy Weapons (including Conduit)
  • Bucket
  • Ectophial 
  • A way to quickly teleport to the Slayer Tower (Ring of Slaying, Dungeoneering Cape, Activated Canifis lodestone)
  • Teleport to the City of Um (10 Spirit Runes to cast City of Um teleport twice, Activated City of Um lodestone, or Underworld Grimoire 2)
  • Salve Amulet or Salve Amulet (e) (To increase damage against the Tortured Souls) 
  • Completion of Rune Mythos and Ghosts Ahoy
  • Ability to defeat five Tortured Souls level 53

Items for the Empower Vessel Ritual: 

  • 11 Basic Ghostly Ink 
  • 2 Regular Ghostly Ink 
  • 4 Light Sources 

RS3 Vessel of the Harbinger Guide

To begin Vessel Of The Harbinger head to the City of Um, find Death, and ask him about Rasial. He will tell you that necromancers often create their own Vessels, the likes of which you've already encountered. Death will mention that Necrovarus was Rasial’s apprentice, and he can teach you more about Rasial's plans.

The Request Of Necrovarus

After your dialogue with Death, head to the Ectofuntus and speak to Necrovarus. The fastest way to get there is to use the Ectophial. At this point, you must equip your Ghostspeak Amulet unless you’ve completed the Hard Morytania Achievements. After your short conversation with Necrovarus, he will agree to help you but will ask you for a favor in return. 

Necrovarus will tell you the Ectofuntus has become stronger over time, and the Tortured Souls outside are preventing it from reaching its full potential. He’ll ask you to defeat the five Tortured Souls using Necromancy, and then he will give you a Soul Urn to collect their souls. Thankfully, only just over half of the damage dealt to the Tortured Souls needs to be from Necromancy in order for the souls to count toward the task. So, you can make use of some other combat methods to speed up the process, just keep an eye on the damage you deal to ensure your efforts are for nothing. As long as 1,500 damage comes from Necromancy attacks, you can switch to other weapons for the kill, and it will still count towards the quest objective. 

Once you defeat the Tortured Souls and fill the Soul Urn, the next step in Vessel of the Harbinger in RS3 is to worship the Ectofuntus with a Bucket of Slime and a full Soul Urn in the backpack. With this, you will earn 100 Necromancy XP. If you didn’t obtain the Bucket of Slime, you must head to the Pool of Slime in the basement and get some. Once you do this, return to Necrovarus and talk to him. He will tell you to perform a ritual to empower the Well of Souls, but sadly, he forgot how to do it. Instead, Necrovarus will tell you the information needed is in the Book of Haricanto, and you must ask Netty to get it back. 

vessel of the harbinger rs3

The Book Of Haricanto

After this conversation, head to Netty’s house. You will find it east of the Slayer Tower; using a Ring of Slaying or Dungeoneering Cape is the fastest way to get there. If you can’t use either of these items, you can teleport to the Canifis lodestone and then run northwest until you reach the Lustrous Wisp colony. You will immediately know Netty is not around, but you will find a pile of letters on the floor. Inspect the letters, and quickly, you will realize you need to visit Velorina in Port Phasmatys. 

To continue with Vessel of the Harbinger in RS3, return to the Ectofuntus using your preferred teleport method and head south, passing the energy barrier to Port Phasmatys. Run northeast to find her in the northernmost house. Talk to Velorina; she will inform you that Netty died some time ago when she was gathering some nettles for her tea. You must head to the City of Um and then go to The Last Call Pub. There, you will find Netty’s ghost standing in the northeastern corner of the place. Speak with her, and after a quick catch-up, you will tell Netty you need the Book of Haricanto. She will tell you it is inside a chest in her house, and she will give you her Death Certificate and Will; with this, you can claim her key from the Bank of Port Phasmatys. 

Note: If you have the Ghostspeak ability, or the Ghostspeak amulet equipped, Netty will tell you that it is unnecessary to do so; despite her being a ghost.. 

Your next step in RS3 Vessel of the Harbinger is to go to the bank in Port Phasmatys and talk with the Ghost Banker to obtain Netty’s key. To do so, use Netty’s Death Certificate and Will on the banker, it will deposit the key into your bank, and you don’t have to go through all the dialogue with the Ghost Banker. 

With Netty’s key with you, return to her house and open the Locked Chest. You will see how Netty’s Skeleton appears, and you must fight it before you can get the book. Her skeleton is immune to any type of damage, and you can’t defeat it using regular methods. Instead, you must cast Conjure Skeleton Warrior, which requires a Conduit and one Ectoplasm near the skeleton. This will cause it to collapse due to its poor self-esteem. Once you complete this task in the Vessel of the Harbinger RS3 quest, you will be able to open the chest and find the Book of Haricanto. 

Empower The Vessel

With the book in your inventory, return to the Ectofuntus and speak to Necrovarus. He will tell you to get the Bucket of Power Slime from the Ectofuntus; to do so, just use a Bucket on the Ectofuntus to obtain it. Head to the City of Um to perform the Empower Vessel Ritual. This ritual requires the following items: 

  • 2 Elemental I glyphs
  • 1 Charge I glyph
  • 1 Commune I glyph
  • 4 Ritual Light Sources
  • 1 Bucket of Powerful Slime
  • 11 Basic Ghostly Ink
  • 2 regular Ghostly Ink
  • 4 Basic Ritual Candles or better

Once you have everything, complete the ritual. This will trigger a cutscene where you can see Rasial, the First Necromancer, appear and send Necrovarus away. If the cutscene doesn’t play, return and talk to Necrovarus. When the cutscene ends, head back to Death to finish the Vessel of the Harbinger in RS3. 

Vessel of the Harbinger RS3 Rewards

Congratulations! You've completed the RS3 Vessel of the Harbinger quest. After covering quite some distance between Port Phasmatys and the City of Um, we're sure you're itching to know what's up for grabs. Along with taking your first steps in empowering your vessel and working through your Necromancy abilities, you will also be rewarded with the following: 

  • 1 Quest Point
  • 10,000 Necromancy XP lamp
  • 5,000 Prayer XP lamp
  • 25 souls added to the Well of Souls
  • 2 Treasure Hunter keys (Ironman accounts will not receive these)

vessel of the harbinger rs3 rewards

RS3 Vessel of the Harbinger FAQ

Even the very best of players can have their doubts, but don't be ashamed about those wanderings. It's our job to help your questing adventures become the best they can be, which is why we have compiled some of the most frequently asked questions about this underworld adventure to ease your confusion. Take a look below:

What achievements will unlock after completing Vessel Of The Harbinger in RS3?

Once you complete the Vessel Of The Harbinger quest, you will unlock the following achievements: Vessel Of the Harbinger for completion of the quest and Legal Entitlement, when you inform the Old Man about the fate of his mother after Vessel Of The Harbinger. 

Which quests will require RS3 Vessel Of The Harbinger to enter them?

After you go through Vessel Of The Harbinger, you will unlock The Spirit of War quest, which requires completion to get access to it. The Spirit of War is also part of The First Necromancer quest series. 

Vessel of the Harbinger RS3 Conclusion

After your adventure retrieving the Book of Haricanto, it’s time to relax or maybe you’d prefer to jump into a new quest or journey. With the endless possibilities that come with RS3, you can spend your time doing what you think is best. If you feel your bank is lighter following the adventure, you can replenish it by purchasing RS3 gold and focusing on the things that matter without wasting your time on money-making methods. If you like this guide, you can find more of it in our blog section. That’s all for now. See you in our next blog.

logo
Rune Mythos RS3 - The Origins Of Necromancy Rune Mythos RS3 - The Origins Of Necromancy Questing

After your journey through death and your return to life in the Necromancy! quest, introducing you to the different aspects of the underworld and the Necromancy skill now it’s time to discover the origin of Necromancy. Learn just how powerful you can become and dive further into the lore of the City of Um. We'd like to welcome you back to our blog series, where each week, we cover a new and exciting game topic and walkthrough. In today's article, we will cover the Rune Mythos quest in RS3, and everything that goes with it. So, let's break it down! 

rs3 rune mythos

RS3 Requirements Rune Mythos

Before you begin your adventure through the City of Um and its mysteries, you must know this is a Members-only quest. It is short to medium in length, so you can expect to spend around 10 to 20 minutes navigating through Rune Mythos RS3. Apart from that, the requirements for this quest are simple and uncomplicated; here’s what you need to go through all the endeavors: 

  • 24 Necromancy 
  • Resources for the Lesser Essence Ritual
  • 200 Noted Pure Essence 
  • 8 Basic Ghostly Ink 
  • 4 Regular Ghostly Ink 

Thankfully, this quest has no enemies for you to face, meaning you can go through this journey without worrying about any sort of showdown. 

Rune Mythos RS3 Guide

To begin with Rune Mythos RS3, you must head to the Ritual Site in the City of Um. Next to the Ritual site, you will see Malignius Mortifer. You'll need to speak with him to get the quest going, but before that, ensure you have an empty inventory. There are several chat options that you can cycle through if you wish to learn about Necromantic Runes or Incantations, but the one to get the quest going will be 'I'm good, what's next?' You don't have to worry about the other options; they won't affect your quest journey either way, but they are there if you wish to grow your knowledge. 

 Once you've selected the correct dialogue to get the quest started, Malignius will give you everything you need for the Lesser Essence Ritual: 

  • 200 Noted Pure Essence 
  • 8 Basic Ghostly Ink 
  • 4 Regular Ghostly Ink 
  • 4 Basic Ritual Candles. 

If you have some items, he will give you only the ones you missed. It is vital that you do not drop or lose the materials he provides you, as he will not replace them. Once you have all the items in your inventory, it’s time to head to the Pedestal in the Ritual Site; here, you must click the center and select the Lesser Essence Ritual. Performing this ritual will require cleaning any remains from previous Glyphs to make space for your ritual. 

rs3 rune mythos

To complete this ritual, you must create 2 Elemental I Glyphs that will cost you 3 Basic Ghostly Ink each, and 2 Change I Glyphs that cost you 2 Basic Ghostly Ink and 1 Regular Ghostly Ink each. You must place the candles to create the sources of light required for the ritual. Once everything is ready, stand on the platform and perform the ritual. This ritual will consume the Pure Essence Malignius gave you. 

After completing the ritual, head to the Ritual Chest close to Malignius, take as much Impure Essence as you can carry in your inventory, and then bank all the other items. Head to the northeastern area of the City of Um, and you must go through the Dark Portal. Before entering the portal, you must ensure you have at least one Unnoted Impure Essence. 

To continue your journey in Rune Mythos quest, you must attempt to craft some Spirits Runes, but before you are able, Rasial, The First Necromancer, will tell you to stop “playing with things you aren’t ready for.” Moreover, he won’t let you craft the runes until you speak to him. You must go through all the conversations and dialogue with Rasial until he finishes and disappears. Once he’s gone, craft the runes and return to Malignius Mortifer to receive your rewards. 

Rune Mythos Rewards RS3

Congratulations! You have completed Rune Mythos RS3. Even though this was a short and sweet quest, there are still some decent rewards at play. So, now that you've come to the end of the road let's take a look at what you receive for your efforts: 

  • 1 quest point
  • 1,500 Necromancy XP lamp
  • 250 Runecrafting XP lamp
  • Access to Lesser, Greater, and Powerful Essence Rituals
  • Access to Necromancy Runecrafting
  • Access to Necromancy Incantations
  • City of Um Teleport incantation
  • Lesser Bone Shield incantation
  • 2 Treasure Hunter keys (Ironman accounts will not receive these)

rune mythos rs3

Rune Mythos RS3 FAQ

After going through the process of the Rune Mythos quest, you may have some questions. It may be a short quest, but the doubts surrounding what is to come in the next quest of the series, and some general wonderings may be playing on your mind. So, we're here to answer those all-important questions. Let’s begin! 

What achievements can you unlock after completing the Rune Mythos quest RS3?

Once you finish the quest, you will receive the following achievements: Rune Mythos, which you earned by completing the quest and City of Um Set Task. The last one you will receive is from Ichlarin, and you can find him near the Ritual Site of the City of Um, but you need to complete all Easy Tasks in the city first. 

What quest will be unlocked after completing RS3 Rune Mythos?

Since this is the second quest in the First Necromancer quest series, you will unlock the third quest 'Vessel of the Harbinger'. This will continue your journey through the underworld, and the Necromancy skill. 

RS3 Rune Mythos Summary

It feels nice completing one more quest, even the short ones like Rune Mythos. However, it’s not just the reward and completion of the quest that is worth the time, but the knowledge you obtain that will be useful in the upcoming quests. Until then, take a look at some of our other RS3 titles in our blog section, and if you want to build your bank without the grind, consider buying RS3 gold to level up your gear, skills, and everything related to conquering Gielinor. That’s all for now, we’ll see you on the next blog.

logo
The Needle Skips RS3 - Unlocking The Story The Needle Skips RS3 - Unlocking The Story Questing

Are you looking for a narrative-driven experience inside RS3? This quest will focus on a local family and the Needle, a powerful artifact created by the elder gods to aid them with the planetary construction. It’s your call to get involved in The Needle Skips in RS3 to unlock a glimpse of history trapped inside a bubble. If you went through Murder Mystery or One Piercing Note, you would have had a similar experience. This quest will show you many different perspectives as you traverse the storyline. So, let's take a look at what this adventure entails: 

The Needle Skips Requirements RS3

For RS3 The Needle Skips, you must be a Member, though there are very few other requirements. You won't be required to complete any quests, have specific skill levels, or carry an abundance of items. However, there are still some recommendations that can assist you as you navigate the quest. Here's what you'll need: 

  • 4 empty Backpack spaces
  • Phoenix Lair Teleport, access to the Fairy Ring (AKG) or Memory Strands to easily reach the quest arena. 

The Needle Skips Quest RS3

To begin with The Needle Skips in RS3, you must search the Needle, located west of Piscatoris Fishing Colony. You must follow the southern path to the west, and when you reach a small bridge, head north. Once you’re about to arrive at a large house, turn to the east and then walk over the stone pathway. 

the needle skips rs3

The Needle

When you search the Needle, there will be a short dialogue that is followed by a cutscene. It will show the nearby buildings while you’re wondering what happened in this place. Once the cutscene ends, you will get a Shard of the Needle, and a Mysterious Body will appear on the ground beside the Needle. 

If you get close and search the body, you will find that the body is frozen in time, with a blood-written message that says “Megan” near it. By communing with the shard you will be able to search for keywords within the story. Enter 'Megan' into the interface and this will unlock a fragment of a memory. You can then view this through the Shard.

You must continue searching in the quest area for more keywords and enter them into the Shard to unlock more fragments of memories; this will also add characters and objects to the quest area. You will see how everything constantly changes after using the keywords on the Shard. Once you complete a chapter, you will see a temporal portal appear next to the Needle, which is an essential part of progressing to the next chapter. It’s worth noting that you don’t need to complete all the fragments to progress. 

You don’t need to enter the keywords and memory fragments in any specific order, so there’s no point in making it strict. Additionally, you're allowed some leniency, as entering '30' will work for a clue which is '30th'.

Chapter One in The Needle Skips RS3 - Megan’s Perspective

In this chapter, the story will be told from Megan’s perspective. If you want to follow up on the story, you must type the first word of each memory fragment and play it in order. Some words will repeat so, when you enter the keyword, it will play two fragments without a specific order. If you don’t want to continue with the story, skip most keywords and enter “fire” or “fireplace” in your Needle Shard and interact with the fireplace. This will open a portal you can use to move to the next chapter in RS3 The Needle Skips. Here’s the list with all the keywords to complete Megan’s section of the Needle Shard: 

  • 30th, abandoned, adventures, angry, apprentice, argument, attack, banquet
  • Bed, birthday, bleeding, blood, blue, books, brand, calendar
  • Cart, choir, cloth, cook, creatures, cry, death, disease
  • Doctor, dying, fear, fireplace, flames, friends, fuel, gail
  • Gods, hannibus, help, homeowner, house, husband, illness, imagination
  • Joss, journey, killed, laziness, learn, letter, love, marriage
  • Medicine, megan, misery, monsters, month, mother, murdered, needle
  • Pack, poetry, potions, prayers, primrose, ramblings, saradomin, scar
  • Sea trolls, secret, sing, sloop, song, spear, spells, stranger
  • Study, temper, thinner, tower, toys, voice, wand, weak
  • Wishes, wizards, yak, year, zamorak 

If you want to unlock all the memories, you only need to use the following keywords: 

  • 30th, adventures, doctor, joss
  • Letter, love, megan, monsters
  • Sea trolls, sing, sloop, tower

the needle skips rs3

Chapter Tow Of The Needle Skips RS3 - Primrose’s Perspective

For the second chapter in The Needle Skips in RS3, it will be shown from Primrose’s perspective. If you don’t want to go over the story, you can skip the memory fragments and enter the word “birthday”. Head to the portal and continue to the next chapter. Here’s the complete list of keywords: 

  • 30th, apprentice, baba, beautiful, bed, birthday, book, books
  • Boredom, bottle, boyfriend, burn, cloak, clown, constellations, dad
  • Daemonheim, danced, demon, diary, dome, doubt, dubbo, friends
  • Gail, ghost, giant, gilly, gossip, grave, hannibus, joss
  • Key, letters, liar, lies, lizard, lizardman, look, lover
  • Lying, magic, medicine, megan, metum, mum, overbearing, plagiarism
  • Poison, possessed, potion, return, runt, scar, scary, shade
  • Sheep, sickness, sloop, snake, strength, thing, thok, time, willikers 

If you want to unlock all the memory fragments, you must use the following keywords: 

  • 30th, birthday, demon, diary
  • Liar, look, medicine, metum
  • Shade, sloop, strength, thok

Chapter Three Of The Needle Skips RS3 - Gail’s Perspective

During Chapter 3, the story is told from Gail’s perspective. If you don’t want to go through the whole story, you can continue to the next phase of the quest using the word “wenla”. Head to the Needle and investigate it to finish the chapter. Here are all the keywords you can find in this chapter: 

  • Anger, angry, bed, betrayed, book, buckthorn, burn, childhood
  • Cost, cruel, dead, demon, disease, dying, ending, energy
  • Evil, fainted, fainting, family, fate, father, fix, following
  • Gail, happiness, happy, help, ill, illness, infected, knife
  • Legs, loop, megan, metum, mistakes, monster, mother, necessary
  • Necessary evil, needle, no, note, paper, parents, peeling, people
  • Possessed, primrose, return, returning, scar, siblings, skin, stories
  • Story, thing, traitor, wenla, worse  

If you want to unlock all the memories, you must enter the following ones: 

  • Books, buckthorn, dead, demon
  • Evil, fainting, happy, illness
  • Knife, loop, metum, needle,
  • Note, wenla

rs3 the needle skips                                   

The Final Act

Once you complete all the chapters, you must go back to the Needle to enter the finale. During this section of RS3 The Needle Skips, you will be in the present, and you will need to find a cure for Gail, Primrose, and Megan. You can use the Leaves and Berries from the Buckthorn Bush to cure the illness, as Gail mentioned before. To help cure the illness, head down the path from the house and pick the Leaves and Berries from the Buckthorn Bush by the river. 

Your next step is to grind the Leaves, crush the berries, and head back to the house. You must go inside and search in the bookcase northeast of Megan. Here, you must talk with Megan, who is now possessed by the demon, and the only way to free her is by saying the correct name of the demon, “Metum”. To find the correct name, you must search in the bookcase. 

Once you have the name, head upstairs and use the Buckthorn Smelling Salts on Primrose, who is unconscious on the floor. Use the crushed Buckthorn Berries, which are now a Bottle of Crushed Berries, on the stove or a fireplace in the house to finally create a Buckthorn Salve. With this healing salve, you can save Gail, who is still on the hill next to the Needle. Once she has fully recovered, go back and talk to Megan about continuing with The Needle Skips in RS3. After a short dialogue, you must go to the Needle and pick a note. Read it, and then return to the house. You must talk to Megan again to finish the quest. 

RS3 Rewards The Needle Skips

Congratulations! You have finished The Needle Skips, a narrative where you are the helping hand in an adventure filled with ghosts, demons, keywords and sickness. For all your hard work, you will receive the following rewards: 

  • 1 quest point
  • 1 small XP lamp
  • 2 Treasure Hunter keys (Ironman accounts will not receive these)  

However, you can get additional rewards by doing some extras during the quest. Here’s what you can obtain: 

  • Discover all chapters to claim a Medium Lamp
  • Replayable chapters of The Needle Skips, if you have a full completion of the quest by finding all the words in each chapter. You can get into it by searching The Needle. 
  • A Large XP Lamp (if you talk to Megan outside the quest replays)

the needle skips rs3

The Needle Skips RS3 FAQ

This narrative-driven quest may take you by surprise; building your story and saving lives can leave anyone a little confused. So, if you have any lingering questions, take a look below to put those wonders to rest:

Is The Needle Skips in RS3 part of a quest series?

Although it may seem like a standalone quest, RS3 The Needle Skips is the second quest in The Elder God War series and part of the Sixth Age in the World Guardian timeline. 

What are The Needle Skips RS3 Achievements you will unlock upon completion of the quest?

In this quest, you can unlock two achievements: The Needle Skips once you complete the quest and Pulling on the Threads when you discover all chapters in The Needle Skips (you must claim this reward from Megan).

RS3 The Needle Skips Conclusion

After this journey to cure a family and uncover the story behind the Needle, take a moment to relax before you embark on your next RS3 adventure. When you are ready, you can check more guides in our blog section that cover walkthroughs, news and more about RS3. Also, you can check our page if you want to buy RS3 gold at the best prices. That will be all for now. See you in our next blog!