Mastering Extinction RS3: Conquer The Epic Quest

By Armand Visser | Created: September 04, 2023 | Last updated: July 11, 2025 | Read Time: 11 minutes

Extinction RS3 Introduction

Welcome to our comprehensive Extinction quest guide for RS3. In this guide, we will walk you through every step of the quest, providing detailed explanations, tips, and strategies to help you complete it successfully. Extinction is a grandmaster quest that takes you on an adventure filled with challenges and rewards. Let's dive in!

Extinction RS3 Quest Overview

Extinction is a thrilling quest that follows the events of the "Desperate Measures" quest. It is set in the world of Gielinor, where players will once again assume the role of a hero tasked with uncovering a menacing plot. In this quest, you will need to utilize your Archaeology skill and various other abilities to navigate treacherous terrain, solve puzzles, and confront formidable adversaries.

Quest Details

  • Quest Name: Extinction
  • Quest Difficulty: Grandmaster
  • Quest Requirements: Completion of the "Desperate Measures" quest
  • Skills Requirements: 75 Archaeology, 76 Agility, 76 Strength, 77 Thieving, 78 Hunter, 78 Mining, 78 Divination, 78 Woodcutting
  • Items Needed: A rope, a light source (such as a bullseye lantern), a tinderbox, an iron bar, a mithril bar, a runite bar, a dragon bar, and a lockpick

Quest Lore

After the events of "Desperate Measures," the world of Gielinor remains in turmoil. The Elder Gods' impending return casts a shadow over the land, and you, the hero, must once again step up to face the challenges that lie ahead. The quest's storyline revolves around a newly discovered Abyssal Space within Kharid-et Dig Site. As you venture into this mysterious realm, you will uncover hidden memories, face a formidable faction, and ultimately strive to prevent an extinction-level threat.

Starting the Quest

You have to finish a variety of quests before being able to do this one, as mentioned before. Your journey in Extinction begins by interacting with Relomia, an NPC located in the Archaeology Guild, north-east of Varrock. Relomia, who plays a crucial role in the events unfolding after "Desperate Measures," will provide you with valuable insights into the situation. To start the quest, follow these steps:

  • Locate Relomia: Make your way to the Archaeology Guild. You can reach the guild by using the lodestone network, magic spells, or other means of transportation.
  • Initiate Conversation: Once you've found Relomia within the Archaeology Guild, initiate a conversation with her. Pay attention to the dialogue, as it will introduce you to the quest's premise and objectives.
  • Accept the Quest: After learning about the situation from Relomia, express your willingness to help and accept the Extinction quest for RS3.

With the quest officially underway, you're ready to embark on a journey that will test your skills, wits, and determination. Prepare yourself for the challenges that lie ahead and brace for an immersive experience that will shape the fate of Gielinor.

Gathering Materials for Extinction RS3

Before embarking on your journey into the Abyssal Space, you'll need to gather specific materials essential for the quest's progression. These materials include various bars that will play a crucial role in crafting and interacting with elements within the Abyssal Space. Here's how to gather the required materials:

  • Iron Bar: Obtain an iron bar by smelting iron ore in a furnace. If you don't have the required Mining and Smithing levels to mine and smelt iron, you can purchase the bar from the Grand Exchange.
  • Mithril Bar: Similarly, gather a mithril bar by smelting mithril ore in a furnace. If your Mining and Smithing levels are insufficient, consider purchasing the mithril bar from the Grand Exchange.
  • Runite Bar: Smelt runite ore at a furnace to obtain a runite bar. If your Mining and Smithing skills are not high enough, you can buy the bar from the Grand Exchange.
  • Dragon Bar: Acquire a dragon bar by smelting a dragonite ore at a furnace. In case you lack the required Mining and Smithing levels, the dragon bar can be obtained from the Grand Exchange.
  • Other Items: Make sure to have a rope, a light source (such as a bullseye lantern), a tinderbox, and a lockpick before setting out on your journey.

Once you have gathered all the necessary materials, you'll be well-prepared to face the challenges and mysteries that await you in the Abyss. These materials will serve as essential components for crafting and interacting with various elements, so make sure you have them in your inventory before proceeding! If you are having trouble purchasing or finding the items, you can buy RS3 gold.

Entering the Extinction RS3 Abyssal Space

Your journey into the Abyssal Space begins with the excitement of exploring a newly discovered realm. This dimension presents unique challenges and opportunities, and you'll need to take specific steps to enter it safely.

Travel to Kharid-et Dig Site

Begin by traveling to the Kharid-et Dig Site. This dig site is located in the Kharidian Desert and can be accessed using various transportation methods, such as magic spells, lodestone networks, or other means of teleportation.

Locate the Stormguard Citadel Entrance

Once you're at the Kharid-et Dig Site, you'll need to locate the entrance to the Stormguard Citadel. The entrance should be clearly marked and easily identifiable.

Use Your Rope

With the entrance in sight, use your rope on the designated spot to set up a zip line. This zip line will serve as your means of entering the Abyssal Space.

Cross the Zip Line

Interact with the zip line you've set up and embark on a thrilling journey across it. This action will transport you into the Abyss, where your adventure truly begins.

Entering the Abyss is a pivotal moment in the quest. From this point forward, you'll be navigating through a challenging environment, solving puzzles, and uncovering the mysteries that lie within. Make sure to have your rope, light source, and other necessary items ready before you venture further.

extinction rs3, abyssal lord

Exploring the Abyssal Space

Once you've entered the Abyss using the zip line, you'll find yourself in a unique and challenging environment. Navigating this space is central to the progression of Extinction RS3. Here's how to explore the Abyss effectively:

  • Navigational Challenges: The Abyssal Space is filled with various obstacles, chasms, and ledges that you'll need to traverse. Your Agility and Strength skills will be put to the test as you jump across gaps, climb ledges, and utilize agility shortcuts.
  • Use Your Skills: Throughout the Abyss, you'll encounter puzzles and challenges that require specific skills to overcome. Be prepared to use your Thieving, Hunter, Mining, Divination, and Woodcutting skills to progress.
  • Memory Shards: As you explore, you'll come across memory shards. These shards hold valuable information that contributes to the quest's storyline. Use your Archaeology skill to unlock these shards and gather memories.
  • Restoring Memory Streams: Combine unlocked memory shards to restore memory streams. These streams unveil key events and insights related to the quest's narrative.
  • Environmental Puzzles: Expect to encounter puzzles that involve manipulating elements in the environment to advance. These puzzles challenge your intellect and problem-solving abilities.
  • Interactions with Factions: While exploring, you may encounter members of the Menaphite faction. Your choices in interactions can impact the course of the quest, so choose wisely.
  • Survival Challenges: The Abyss isn't just about solving puzzles; it's also about survival. Be prepared to face adversaries and demonstrate your combat prowess when necessary.

Exploring the Abyssal Space is a dynamic and engaging aspect of Extinction RS3. Be sure to thoroughly examine your surroundings, utilize your skills strategically, and pay attention to the clues and information provided to you.

Unlocking Memories in Extinction RS3

As you explore the Abyssal Space, you will come across scattered memory shards. These memory shards are fragments of the past that hold vital information about the events that have transpired. To progress through Extinction RS3, you'll need to unlock and combine these memory shards to reveal complete memory streams.

Here's how to effectively unlock memories and piece together the story:

  • Locate Memory Shards: As you explore, be on the lookout for memory shards scattered across the Abyss. They are typically found in key locations or after completing specific challenges.
  • Use Your Archaeology Skill: To unlock a memory shard, use your Archaeology skill on it. This action will reveal a piece of the memory, providing insight into the quest's narrative.
  • Combine Memory Shards: As you unlock multiple memory shards, you'll have the opportunity to combine them into memory streams. These streams present a clearer picture of events, characters, and motivations.
  • Reveal Hidden Details: Unlocking memories and combining memory streams is essential for understanding the plot, the factions involved, and the threat facing Gielinor. Pay close attention to the details, as they may provide clues to solving puzzles and making informed decisions.
  • Enhance the Immersion: The memory system in Extinction RS3 adds depth to the storytelling. Immerse yourself in the memories you unlock, and allow them to guide your choices and actions as you progress.

By effectively unlocking memories and restoring memory streams, you'll not only unravel the mysteries of the Abyssal Space but also contribute to the overarching narrative of the quest.

Confronting the Menaphite Threat

As you explore the Abyssal Space and uncover hidden memories, you'll stumble upon a critical plot development involving the Menaphite faction. This faction plays a crucial role in the unfolding events, and confronting the Menaphite threat is a pivotal moment in the RS3 Extinction quest.

  • Uncover the Plot: Through the memories you unlock, you'll gain insight into the Menaphite faction's motives and their involvement in the extinction-level threat. Pay close attention to the information you gather.
  • Gather Evidence: Collect evidence that sheds light on the Menaphite faction's plans and actions. This evidence will prove invaluable when confronting their leader.
  • Strategize: Before confronting the Menaphite leader, take the time to strategize. Review the evidence you've gathered, consider your combat abilities, and decide on a plan of action.
  • Engage in Battle: The confrontation with the Menaphite leader will likely involve a challenging battle. Equip yourself with your best combat gear, stock up on supplies, and be prepared for a fierce fight.
  • Utilize Skills: During the battle, you may need to utilize various skills beyond combat. Agility, strength, and quick reflexes could make all the difference in overcoming the Menaphite threat.
  • Make Choices: Your interactions with the Menaphite leader and their faction during the confrontation may present choices that impact the quest's outcome. Choose wisely, as your decisions could have far-reaching consequences.
  • Unveil the Truth: As the battle unfolds, you'll uncover the truth behind the Menaphite threat and their connection to the Abyssal Space. Be prepared for surprising revelations that tie together the quest's narrative.

Confronting the Menaphite threat is a climactic moment in Extinction. The decisions you make and the outcomes you achieve will significantly shape the course of the quest's resolution.

extinction rs3, seren

The Final Showdown

The culmination of your journey in Extinction RS3 leads to the final showdown, where you will confront the ultimate threat that looms over Gielinor. This is a battle with three phases that is relatively challenging - However, if you die at any phase, your gravestone will be placed by the world gate. This confrontation will test your skills, decision-making, and resolve. Here's what to expect during the showdown:

  • Preparation: Before engaging in the final showdown, ensure that you are well-prepared. Stock up on food, potions, and any necessary combat gear. Double-check your inventory to make sure you have all the items required for the encounter.
  • Dialogue: The showdown often begins with a crucial dialogue between your character and the Seren. Pay close attention to the dialogue options, as your choices may impact the outcome of the confrontation.
  • Preparation is Key: Before facing the showdown, ensure you're well-equipped. Arm yourself with high-level combat gear, ample food, and restorative potions.
  • Meet Your Enemy: Engage in crucial dialogue with your adversary. Pay attention to their motives and intent, as this might impact your approach.
  • Combat Tactics: As the battle begins, activate your protection prayers and defensive abilities to minimize damage. Maintain distance and adapt tactics based on your adversary's attack patterns.
  • Adapt to Mechanics: Be alert for unique mechanics and special attacks. Swiftly respond to them to avoid taking unnecessary damage.
  • Offense Strategy: Focus on accurate attacks and utilize damage-dealing abilities. Watch your health while striking a balance between offense and defense.
  • Persistence Pays: If the battle proves challenging, don't hesitate to regroup, heal, and reattempt the showdown. Persistence is key to success.
  • Quest Completion: Upon successfully overcoming the challenges of the final showdown, you will achieve victory and complete Extinction RS3. Enjoy the satisfaction of a well-earned triumph and the rewards that come with it.

The showdown is often the climax of the quest, where all your efforts and decisions culminate. Approach the encounter with confidence, determination, and a strategic mindset.

Reaping the Rewards of Extinction RS3

As you emerge victorious from the final showdown and complete the Extinction quest, you'll be rewarded with a range of benefits that acknowledge your heroic efforts. Here's what you can expect in terms of rewards:

  • 175,000 Experience Points: Successfully completing Extinction will grant you experience points in various skills. This experience can help you level up and improve your character's abilities.
  • 4 Quest Points: The quest rewards you with quest points, which contribute to your total quest point count. A higher quest point count can unlock access to new quests and content in the game.
  • Unique Items: Depending on the quest's storyline, you may receive unique items that are exclusive to this quest. These items include 4 XP lamps, a warped gem and 2 treasure hunter keys.
  • Story Progression: Quests like Extinction play a crucial role in the overarching storyline of the game. By completing this quest, you contribute to the ongoing narrative of RuneScape.
  • Unlocked Content: This includes Access to Anachronia Dinosaur Farm teleports and Accidental Fletching and Firemaking.
  • Personal Satisfaction: Completing a challenging quest is an achievement in itself. The satisfaction of overcoming obstacles, making tough decisions, and emerging victorious can be a rewarding experience.
  • Game Impact: Your choices and actions throughout the quest may impact the world of Gielinor in subtle or significant ways. Your decisions could shape the future of the game's lore and gameplay.

The rewards received from this quest are some of the most bountiful. Reaping the rewards of completing the Extinction quest is a satisfying culmination of your efforts. Cherish the experience, utilize the rewards to enhance your character, and look forward to more adventures in the RuneScape world.

extinction rs3, quest rewards

Extinction RS3 FAQ

How Long Does it Take to Complete Extinction RS3?

The time to complete Extinction in RuneScape 3 can vary. On average, players might spend around 2 to 4 hours completing the quest, considering factors like their familiarity with game mechanics, skill levels, and puzzle-solving abilities. Those experienced with the game might finish it faster, while newcomers or those taking their time could extend the duration. Ultimately, the quest's complexity, involving exploration, combat, and puzzles, contributes to the time needed for a fulfilling questing experience.

What is the Best Way to Beat Seren in Extinction?

To defeat Seren in the Extinction quest of RuneScape 3, prioritize preparation. Gear up with high-level combat equipment, food, and potions. Utilize protection prayers and defensive abilities to mitigate damage. Seren uses various attacks, so maintain distance and adapt tactics accordingly. Watch for special mechanics and attack patterns. Focus on accuracy and damage-dealing abilities, while being mindful of your health. Swiftly respond to her attacks and utilize your character's abilities strategically. Effective gear, combat knowledge, and quick reflexes are key to conquering Seren and progressing through the quest.

Extinction RS3 Conclusion

Congratulations! You've successfully completed Extinction in RuneScape 3. Throughout this quest, you've ventured into the Abyssal Space, confronted a menacing faction, and overcome various challenges. The rewards and post-quest content will surely enhance your RuneScape experience. We hope this RS3 Extinction quest guide has been helpful in your journey, and we wish you the best of luck in your future adventures! Remember that questing in RuneScape is not only about completing tasks but also about enjoying the immersive stories and landscapes the game has to offer. Stay tuned for more quest guides and RuneScape tips from our community. Safe travels, adventurer!


Author profile
Armand Visser

Armand is a blogger at Chicks Gold with a passion for gaming, SEO, and copywriting. He creates fresh, research-driven content that informs and entertains a wide range of readers across niches.


Related Articles
logo
Branches of Darkmeyer RS3: Helping Myreque Branches of Darkmeyer RS3: Helping Myreque

Welcome back to our blog series, where we cover the different quests in RS3. Today’s quest is Branches of Darkmeyer, the seventh quest of the Myreque quest series and part of the Fifth Age. In this quest, you must access the Darkmeyer and find the Blisterwood Tree, which is capable of harming the vampires; because of this, Lord Drakan had previously sealed off the city to protect his kind. Vanstrom Klause has also been tasked with obliterating the entirety of the Myreque in this adventure. So, if you're up to the task of being a hero, let's dive into Branches of Darkmeyer RS3 and uncover the Blisterwood Tree before it's too late.

rs3 branches of darkmeyer

Requirements Branches of Darkmeyer RS3

Before you take on this adventure, there are a few things to be considered. Firstly, this is a members only quest, secondly if you're wondering how long does Branches of Darkmeyer take in RS3, expect to spend an average of 50 minutes; making it a long quest. Lastly, there are some requirements that you must have to navigate the quest. So, let's take a look: 

  • Completion of Legacy of Seergaze and Legends’ Quest. 
  • 63 Agility 
  • 64 Crafting
  • 63 Farming 
  • 70 Fletching
  • 70 Magic
  • 67 Slayer
  • 76 Woodcutting
  • Gadderhammer (recommended if you want a higher vampyric title)
  • Wolfsbane Dagger
  • Combat equipment
  • Food
  • 4 Thread (obtainable during the quest)
  • Ability to defeat level 98 Harold and level 140 Vanstrom Klause.

RS3 Branches of Darkmeyer Walkthrough

To begin this quest, head under the pub in Burgh de Rott and speak to Veliaf Hurtz. He will ask you for help with Vanstrims Klause and the Vyrewatch, which become stronger while the Myreque weakens. He will also explain to you, in more detail, the situation the Myreque and Burgh de Rott are in. The supply routes to Meiyerditch were cut off, and the Vyrewatch discovered Burgh de Rott. They also abducted Marius and brutally murdered him. 

Ask what you can do to help and this will mark the beginning of the Branches of Darkmeyer RS3 quest. Veliaf will tell you he feels terrible asking, but will go on to tell you Cornelius saw a shadowy figure digging south of the bank a couple of nights before, and it looks like an entrance to something underneath there. No one has been down just yet for the danger it represents, but someone has to do it. Veliaf believes the mysterious figure is Vanstrom, and there’s a chance he’s still there. He will ask you to go down and explore what is underneath and defeat Vanstrom if you find him. 

branches of darkmeyer rs3

Branches of Darkmeyer RS3: The Tunnel

Your next stage in Branches of Darkmeyer RS3 is to head to the dungeon entrance south of Burgh de Rott bank and go down. You will see yourself inside a tunnel with a rope connecting to the surface. Moreover, you will see a coffin, a blood drop symbol on the floor, a letter, a decaying tome and a blood fountain. You must pick up the letter, which is addressed to Safalaan Hallow, from someone called ‘V’. He knew about Safalaan’s parents and his childhood. In the letter, V mentioned that they had the answers that Safalaan was seeking and requested to meet with him in the clearing in middle sector four. 

At this stage, you will find a decaying tome in the corner, with only two readable pages, since the rest is stained with blood. One of the pages you can read will mention something about Icyene. You must inspect the coffin; when you do so, a small amount of blood will be spilt, inflicting 10 points of damage to your life points. Inside the coffin, you will find a Medallion with an orange symbol on it, similar to the one seen on the floor when you entered. 

Once you finish your endeavors, head back to Veliaf and explain to him what you found. When you mention the Medallion, he will tell you it is the symbol of Drakan, and had vampyric origins. Veliaf is doubtful that the medallion was placed there by Vanstrom, as it is too old looking and dusty. He will refuse to take it and refers to it as ‘evil’. After this, show him the letter. This time he is more inclined to believe that the letter could have been placed by Vanstrom, as it appears to be much cleaner than the Medallion, and doesn't seem to have been there long. 

Veliaf thinks that noticing Vanstrom descending into the tunnel might ruin his plans to pretend to be a Meiyerditch citizen. He also believes that the plan is too subtle for Vanstrom and points out that you took the letter that was referred to Safalaan. He will also tell you it is dangerous to enter Meiyerditch in any usual way. Then he will give you a teletab to let you reach Safalaan before Veliaf sends you away and will tell you about Safalaan and his preoccupations that make him not feel like himself lately. Once you agree to use the teletab, you will head to the Meiyerditch Myreque hideout. 

branches of darkmeyer rs3

Safalaan

Next, you must speak to Safalaan to continue with Branches of Darkmeyer RS3; to do so, head to the north end of the hideout. He will ask you how you got there and tell you the supply runners from Burgh de Rott have been unable to get through. You must explain to him about the Medallion, and Safalaan will ask you where you found it. Tell him about the cave and what Veliaf explained to you about it. When you show him the Medallion, he will say it looks familiar and ask you to take it from you. When you hand it to him, you will see that it begins to glow in his hand. He will then inform you that he has added a new destination to the Medallion; the Meiyerditch Myreque hideout. Safalaan will be surprised because he didn’t know he was able to alter a vampyric artifact and asks you to take the Medallion away from him. 

You must ask him what the vampyres are doing, and he will tell you that tithes increase, and any citizen unable to meet them is forced and taken away to a mysterious location. Rogue vyrewatch have also been appearing and snatching healthier citizens. Safalaan claims they seem restless, and they’re not following tithing orders. 

At this point of Branches of Darkmeyer RS3, you must tell Safalaan you have a letter for him. He will ask you where it came from, and you must explain everything that happens in Burgh de Rott. He will take the letter and read it. Ask him what he thinks, and he will express disbelief and ask you if you are sure it was Vanstrom. You must repeat the story about the night the cave was uncovered. Still, Safalaan will have some doubts since the letter speaks about his parents, experiences, and visions. 

You must go through the dialogue options that appear in this stage of RS3 Branches of Darkmeyer quest. Safalaan will tell you that he doesn’t remember much about his past; even, he can’t remember how old he is. He will tell you he has had visions and recently feels some great power growing in him, ready to be released soon. 

Ask what your next step should be in Branches of Darkmeyer RS3, and he will tell you he will meet with the letter’s sender. Safalaan thinks Vanstrom must know something, and if he were truly after Burgh de Rott, he would attack. You will tell him it might be a trap, and Safalaan will agree. However, he won’t give Vanstrom what he wants; he will find out what’s happening. Safalaan decides you should go in his place, and sends Vertida Sefalatis and Mekritus A’hara with you, telling you to look from a window to the north of the clearing before meeting the contact. 

rs3 branches of darkmeyer

Branches of Darkmeyer RS3: Meiyerditch

It’s time to travel to the meeting spot, exit the base, and go through the wall to the north. You will find stairs you must use to go up, then jump the floorboard to the west and use the ladder to go down. Open the door to exit, head west a bit, then south until you find a barricade. You will be in front of a building, and you must head inside. Open the door, and you will be in a room with the portrait. Use the ladder to go up and continue with RS3 Branches of Darkmeyer quest.

At this stage of Branches of Darkmeyer RS3, you will run into two of the rogue vyrewatches described by Safalaan. The first you encounter wants more than a tithe from you; the second will tell it to wait and then says you are “the one”. The other will agree and call you fresh and full of blood. It will continue saying you will “have a worse time with her”. Ask them what they are talking about, but they just fly off. You must jump over the wall to the building to the west and use the ladder to go down. Next, open the door and exit; it’s important you close the door before you head north and then west around the building. Enter the building and head east to find Vertida standing.

Speak with him, and he will tell you that Mekritus is upstairs and can climb the wall beside him to reach him. Once you reach Mekritus, he will explain that the windows overlook the meeting place and can be used to check whether the coast is clear. Mekritus and Vertida will give you ground support by flanking around. To spy, you must click on the white sickle logo, which will trigger a cutscene showing Vertida and Mekritus in position when the informant exits a building: a young girl called Nessie who is crying. You must head downstairs and speak with her. 

The Contact

In this stage of Branches of Darkmeyer in RS3, Nessie will say she saw you in the window and ask why you took too long to come down. She will claim she knows your name since you are the great hero of the Myreque. When you ask her what she is doing here, she will tell you she’s lost, and a scary vampyre called Vanstrom told her to stay there. You will tell her he’s the worst vampyre, second only to Drakan, but Nessie will laugh, saying his power is nothing compared to hers. Immediately, she will transform into Vanescula Drakan. 

Vertida will yell for you to attack. You must do so, and she will counter with something that looks like a Ring of Smoke, which will throw you backwards and teleport your Myreque companion far away. You will then have the option to speak to Vanescula because she’s not there to fight. She asks you to calm down since you aren’t a challenge; to do so, you must step back until you are out of sight of Vanescula before leaving your combat posture. You will ask her what she is doing here, and she replies she’s here to help. She was the one who planted the letter in Burgh de Rott, and she knew about Safalaan, but any information related to him was between them. 

Vanescula is aware of Myreque’s dream of defeating Drakan and freeing Meiyerditch. She will explain there’s no reason why that shouldn’t happen, but at the same time, she thinks the Myreque are not doing a decent job alone. She will also tell you she will help the Myreque because she thinks Lowerniel Drakan is not a good leader, and he’s spending most of his time shut in his castle obsessing over a rock. Drakan doesn’t even notice the influx of the Mercenary Protocol, the threats from Misthalin, or the recent fight amongst the vyrewatch. Vanescula thinks he’s a blind fool, letting the vampyric society fall into ruin. Moreover, she is bored. 

Sadly, she can’t kill Drakan because she needs to command the respect of the vyrelords. Vanescula also tells you her discoveries made through the study of Haemalchemy, which means that vampyres could survive without blood. With this, the citizens of Meiyerditch could taste freedom if she were the leader. She will also say you must trust her because she hasn’t killed you yet. Vanescula will claim you are her personal blood tithe, so you won’t have any problem with any vyrewatch while you are traveling to Meiyerdtich. 

She then goes on to tell you about the vampyre city Darkmeyer, “where the greatest weapon lies”, before mentioning the Blisterwood Tree, and stating if a vampyre touches it, it will cause harm to them. This can be a more potent weapon than the Ivandis Flail, if you are able to chop it and have the logs carved. Finally, she will give you a written offer, which you must provide to Safalaan to continue with the Branches of Darkmeyer RS3 quest. 

branches of darkmeyer rs3

Darkmeyer

Your next task in RS3 Branches of Darkmeyer quest is to use the Medallion to return to the Meiyerditch Hideout with the letter Vanescula gave you. Head to Safalaan, who is worried about you. Once he sees you, he will be excited, and when he reads the letter, he’ll be excited about its contents. Vanescula knows about his past, which is an exciting prospect for him, but you must ask that he focuses on her promises to help them instead. Safalaan will agree and suggest that you follow Vanescula's advice. He will also tell you to talk with Vertida for advice since he will be busy with the letter. 

When you reach Vertida, talk to him. He’s unsure if he can trust Vanescula and Safalaan since Safalaan hasn't been himself lately. Vertida thinks Safalaan is desperate for information and is not thinking clearly. Another thing Vertida will mention is the walls of Darkmeyer and how dangerous this city can be. It’s almost impossible to enter, except if you’re using a Drainage Gate along the uppermost wall in the eastern Meiyerditch. This allows you to continue with Branches of Darkmeyer in RS3 because you can climb under to access the city. 

Vertida also recommends taking some Smoke Bombs and a Hatchet from the storeroom to help you cut the Blisterwood Tree. He will tell you to be on the lookout for seeds to plant and grow their own tree. With all that being said, you must head to the storeroom and take 30 Smoke Bombs from the crate west of the exit ladder, then head to the Drainage Gate by using the Medallion to teleport to Meiyerditch Laboratories. Once you get there, go upstairs through the slashed tapestry and exit the building. After you leave the building, run southwest along the diamond building clockwise and then run north until you reach the Drainage Gate. 

If you don’t have the Medallion, you can walk to reach Darkmeyer by heading out of the Myreque Hideout to continue with the Branches of Darkmeyer in RS3. Go upstairs and across into the next building. Exit this building and go through the building directly north. Turn right, then continue your path north. When you pass the Fish Shop, turn left and head north to reach the Drainage Gate.

On the other side of the Drainage Gate, you will meet Vanescula, and she will tell you the tree is guarded in the upper tier of Darkmeyer. The Darkmeyer vyrewatch are more independent than the ones in Meiyerditch. She will also tell you to use the Smoke Bombs to find a Darkmeyer Outfit to fool the vampyre juvinates. However, this outfit won’t help you with the vyrewatch because they have the ability to smell you. Vanescula will tell you to find the Darkmeyer disguise, and she will give you a Needle and some Thread to adjust the outfit. 

Once she finishes talking, you must continue your mission in RS3 Branches of Darkmeyer. You must only use the Smoke Bombs after you are out of sight of the juvinates, and stay away from the vyrewatch. Instead, search for the chests inside the buildings and find the four outfit pieces. If you get caught, you will be teleported back to Vanescula. You must reach the building before your Smoke Shourd Vanishes. Once inside, immediately close the door and move to the back of the building. Doing so will help you keep the vampyres outside, and you can continue your path without being teleported. You will notice they may wait for you until you re-emerge and teleport you away. To avoid this, look for any vyrewatch or juvinates that match your movements, as they will also try to catch you when you leave. If you see a vyrewatch or juvinate waiting for you, exit to the lobby, and they will move on.  

After you find, fix, and equip the four outfit pieces of the Darkmeyer outfit, you will see your title change to Vyreling, and the vampyres will be a bit nicer to you; well, at least they won’t throw you out. Return to Vanescula, and she will cover your scent with her own, masking your human smell and tell you how to get the Blisterwood Tree. 

branches of darkmeyers rs3

Gaining Status in Branches of Darkmeyer RS3

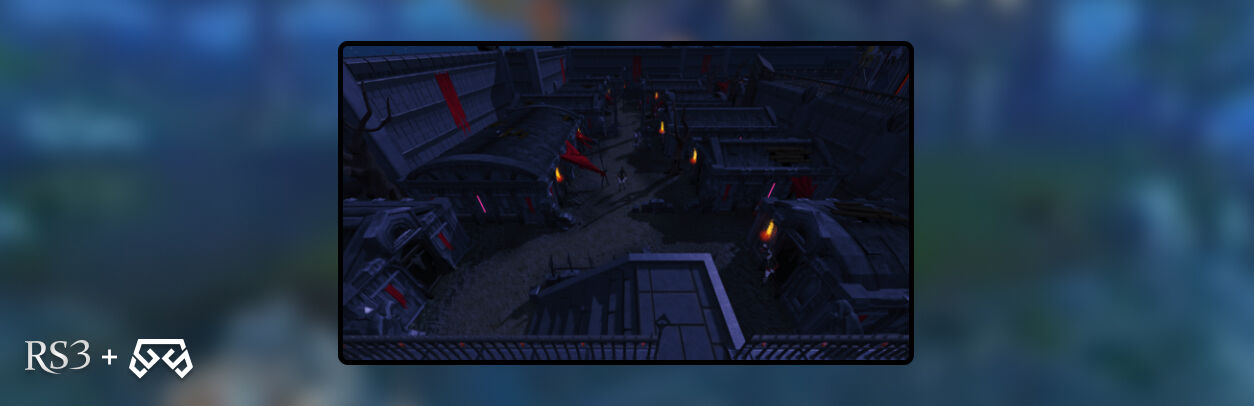
Your next step in Branches of Darkmeyer in RS3 is to get to the Arboretum with the Blisterwood Tree; however, you’ll need to gain respect among vampyres first. You must raise your status in Darkmeyer, so go northeast through the low tier to reach the middle tier, where you can find Vanescula waiting for you. Sentinel Mortshade will ask you what your vampyric name is, and you'll be shown some options on your screen; make one up using them.. Don’t worry if you want to change it, you can do it later once you complete the quest by speaking to Vanescula. 

With your new vampyric name, head to the named vampyres to get all the tasks from them to continue with RS3 Branches of Darkmeyer. Once you complete these tasks, you will earn a rating, and when you hit the halfway mark of the rating, you will get access to the upper section. When you reach three-quarters full, you can access the Arboretum. Here are some of the tasks you will find:

Middle Tier

  • Recapture the Six Bloodveld. These vanish for up to 30 minutes, which means they can appear in places you've already checked. They can be in buildings with closed doors. So it’s better to start this one first so you can catch them while running around in the middle or lower tier.
  • You must vandalize posters put up by vyrelords and vyreladies since this task came from Sanguinus Varnis. Of the two options for vandalizing, pick the one with lighthearted options (e.g., cat ears vs. red eyes).
  • Talk to Maria Gadderanks in jail while wielding the Gadderhammer to achieve more reputation than you would for talking to her without it.
  • Use the Angry, Laugh, Stomp, or Trick emotes a few times beside Maria to terrorize her. You can also use the Zombie Walk and Zombie Dance emotes. If you scare her too much, she will refuse to leave her cell if you try to free her later.
  • Talk to Valentina Kaust, and she will offer you a vial of blood to drink. Select any of the options available. It’s important to note that drinking the blood damages you for half your health, so click on it to drink and then click no (which will throw it on the floor). Say that you are already full from drinking blood. You will still gain most of the reputation.
  • Once your status bar is halfway full, talk to Sentinel Gorthaur, Sentinel Mortshade, or Sentinel Draemus about Citizens in Meiyerditch, The Myreque and The town of Burgh de Rott.

Upper Tier

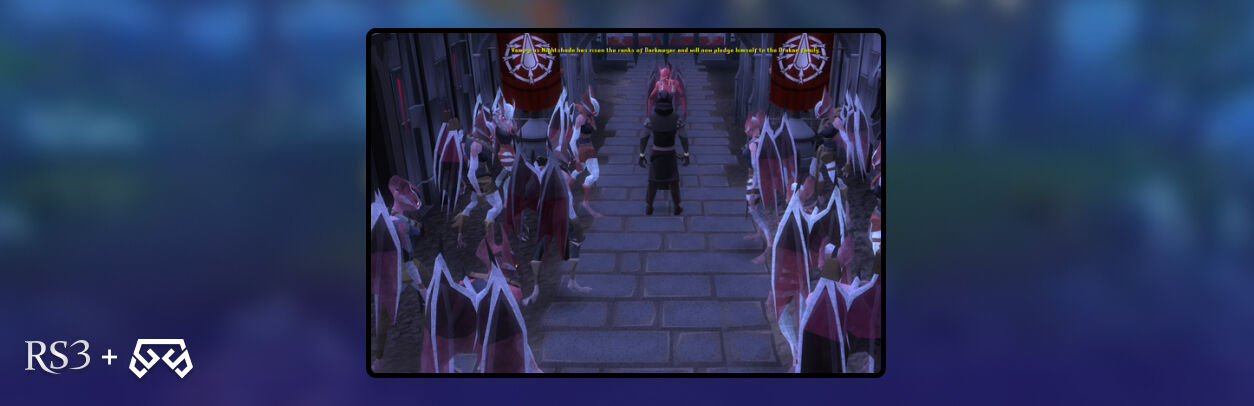
  • Speak to Vanescula Drakan to pledge allegiance to the Drakan family.
  • You must talk to any upper-tier sentinel about your opinion of Vanstrom Klause and Lord Drakan.
  • Entertain Misdrievus Vakan by humiliating a blood tither, then talk to the tithe master about the tither (you can find him in the building west of Misdrievus Vakan). If you let him go this time, you will get 13 status points. If you choose to lie, he will order his death, and you will get 24 status points.
  • You must kill captured Meiyerditch citizens for the vyrewatch guards. If you refuse, you will need a Wolfbane Dagger if you want to gain enough status to enter the Arboretum.
  • Beware if you have LootShare enabled that killing the citizens will NOT give you a reputation.
  • In the case you do not wish to kill the citizens, you must tell the guard about it when you talk to him. Otherwise, you will have no choice but to kill them to complete the quest. You will note sparing the citizens gives less status.
  • If you refuse to kill the citizens, the guard will ask you to get him some blood from the Darkmeyer Blood Trader. The only thing you must remember is the blood types he asks for (AB, A, B and O). When you head into the Darkmeyer Blood Trader, they will initially refuse as you have yet to get any Darkmeyer notes. He will instead ask you to recover money for him from a werewolf. The werewolf is either the male or female Canifis Settler, which you can find located in the lowest tier of Darkmeyer. You will need the Wolfbane Dagger to convince them to give you Darkmeyer Notes. When you get it, trade with the Darkmeyer Blood Trader and get the blood for the guard. Once you are done, return to the guard to gain status.
  • If you choose not to kill the citizens, you can talk to Vanescula Drakan after the quest, and she'll lead you to the guards, and he will ask you for more bottles of blood from who will ask the Darkmeyer Blood Trader. This will give you 20 status points every time you do it; however, you won’t find the option unless you complete Branches of Darkmeyer in RS3 quest.

rs3 branches of darkmeyer

Branches of Darkmeyer RS3: The Arboretum

After you gain enough status to continue with RS3 Branches of Darkmeyer, talk to Vanescula, and she will tell you to go to the Arboretum; during this conversation, she will remind you to be cautious about Ranis

Upon your arrival at the Arboretum, Ranis will stop you as you approach the doors. He will question you as to whether you think he or Vanescula, with whom you hold an alliance too, is more important. He will then ask you to pledge loyalty to him, and you must do so. After that, the blood mark you have will cause you pain, and Ranis will dismiss you but give you a warning that he’ll be watching. 

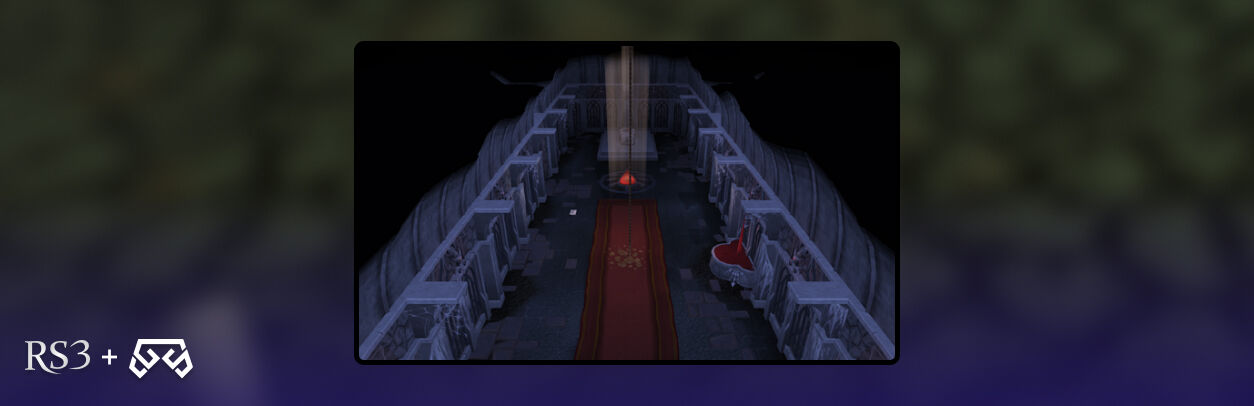
During this phase of Branches of Darkmeyer RS3, remember to check the health of the Blisterwood Tree because, as you have been told, the Tree needs to be given sequences of energy in the correct order to survive. The first one is water, light and then nutrition. In front of you, there will be a machine, you must pull the lever to make it work. You will see how the first three rows of circles will glow, and you must see each has a different color from top to bottom. You can move the circles clockwise by clicking on the bottom left of a group of four. You will see four sets of circles: bottom left, top left, bottom right and top right. 

Note: If you can’t distinguish the circle colors, you can right-click on them to learn what they are about. Moreover, if you encounter a glitch after you pull the lever and the game freezes, all you need to do is press the escape key to close the overlay, and if it doesn’t work, adjust the graphics to the minimum during the puzzle. Then, once you finish, set everything back.

To begin with the puzzle in Branches of Darkmeyer RS3, you must start aligning the first three rows of circles like this: 

  • Water, water, water, water
  • Light, light, light, light
  • Nutrition, nutrition, nutrition, nutrition

Once you line up all the circles, pull the lever and check the Tree. This time, your combination will change, and the Blisterwood Tree will need nutrition, water, light, and nutrition. This means you will use four rows this time, so pull the lever to get more circles and move them as before. This must be your alignment: 

  • Nutrition, nutrition, nutrition, nutrition
  • Water, water, water, water
  • Light, light, light, light
  • Nutrition, nutrition, nutrition, nutrition

You must check the Tree again; this time, the instructions will become complex. At this time, no water can touch another water, nor can nutrition touch nutrition, diagonally, vertically, or horizontally. In any case, water and nutrition can touch each other, and light can touch anything. Here’s a solution: 

  • Light, nutrition, water, nutrition
  • Water, light, light, light
  • Nutrition, light, water, nutrition 
  • Water, light, light, light

Once you finish, check the Tree again, and you will enter the final part of the puzzle of Branches of Darkmeyer in RS3. Your last infusion may not touch energy, light, and water by any means; however, light can touch light, water can touch water, and nutrition can touch anything. Here’s one solution: 

  • Light, light, light, nutrition
  • Nutrition, nutrition, nutrition, nutrition
  • Water, Water, Water, Water 
  • Nutrition, nutrition, nutrition, water
  • Light, light, nutrition, water
  • Light, light, nutrition, water

Once you complete the four energy infusions, you will be able to chop the three logs from the Blisterwood Tree. However, this will attract Ranis's attention and he will demand that you come out of the Arboretum while changing to his vyre form. You will not fight him because Vanescula will break out in her vyre form, and Rains will tell her he doesn’t think you will ever be one of them. After he says that, the screen will become black, and you will see Rains’ corpse on the floor with Vanescula standing next to him. 

After you see this awful scene in Branches of Darkmeyer RS3, leave the Arboretum and talk to Vanescula; you can take a moment to collect additional logs if you wish to create more stakes. When you talk to her, she will blame the death of Ranis on you (the Myreque), but it’s something that has to be done because he would have exposed you. 

Vanescula will also tell you that the Blisterwood Tree doesn’t produce seeds and that Vanstrom discovered the Myreque Hideout in Meiyerditch. She will also demand you take the Medallion off to restore its full potential before you can use it again. She will hand it back once she finishes. She will also add a teleport to Darkmeyer and the Barrows to the medallion before returning it. After she is done, she will teleport you away, leaving you just outside Darkmeyer, to bring you into safety while she explains what happened with the vampyres. 

branches of darkmeyer rs3

Emergency Status 

You must return to Myreque base using the medallion to reach Meiyerditch by teleportation. There, find Vertida and talk to him. He discovered that Safalaan had been missing since the moments after you left Darkmeyer. This will result in Vertida calling a meeting to discuss everything you have discovered during your journey so far. 

At this stage of Branches of Darkmeyer RS3, Kael will remark he’s suspicious of Vanescula during all the meetings. You will inform Myreque that Vanstrom discovered the location of the base, and Vertida will immediately want to evacuate. Kael and Mekritus will reply that they are tired of running and hiding and wish to fight back. Vertida will agree with the majority, and instead of his original plan to evacuate, they plan to take the fight to Vanstrom and enter Darkmeyer. You must go alone since you are a respected member of the vampyre society and recognized amongst the vyres ranks. 

Speak with Vertida; he will explain how to make Blisterwood Weapons. Part of his explanation will be advice for making one weapon in each style and getting two silver sickles from Kael. You must use a Knife on the set of Blisterwood Logs you collected and start making the Polearm, Staff and some Stakes; if you do not have a knife, Vertida will offer you one. Once you have the three weapons, it will be time to face the final boss. If you don’t have the necessary weapons, you won’t be able to enter the fight, and you will see the following message: “This looks far too dangerous for now”. 

Alongside the Blisterwood Weapons, you will receive a Bottle of Holy Water, which is useful against the Vampyre’s Mist and the Bloodveld Minions Vanstrom is known to utilize. Vertida also suggests you ask the other Myreque for advice on fighting Vanstrom. If you go and talk Kael will tell you about Vanstrom’s Darkness Attack, which he witnessed when he was a vampyre juvinate. When you reach Merkitus, he will warn you that Vanstrom will turn into mist if he’s weakened severely. 

With all the information with you, continue your path in the Branches of Darkmeyer in RS3 by teleporting back to Darkmeyer and bank in the Darkmeyer Treasury bank chest. Remember to take with you: 

  • Super Potion Set, 
  • Extreme Set or Overloads, 
  • Food, The best armor you have, 
  • the Holy Water 
  • Drakan’s Medallion.
  • Something to restore energy
  • A Spirit Terrorbird 
  • Scrolls

Once you have all you need to face the foe, head to Vanstrom’s house southeast of Vanescula’s and look for the biggest house. Once you enter, you will see a level 98 Bloodvled Pet, Harold, who will attack you when he sees you. This fight won’t represent a challenge if you have decent armor and high-level Combat stats. You must throw the Holy Water on him to accelerate this fight and defeat him quickly. Moreover, use a different weapon than the Polearm to defeat Harold and then return to the bank, take the Blisterwood Weapon, and take more supplies you need before you get back on track to face Vanstrom. 

If you die inside the house, you will keep the medallion and the Darkmeyer Disguise, making it easy to teleport back to your gravestone. You will find it outside the house. After you defeat Harold, go through the metal door on the other side of the hall's entrance, and when you pass through it, Vanstrom will be waiting for you. 

Before the final fight of Branches of Darkmeyer RS3, Vanstrom will tell you that he wants to kill Safalaan. The main reason is that Safalaan is half-Icyene and harnesses considerable powers. For all the previous events, like bringing him to Myreque Hideout and rebuilding Burgh de Rott, Vanstrom will thank you. But the thanks is short- lived as he will attack you after this conversation, so make sure you have equipped your armor and drink your potion before entering the room. 

rs3 branches of darkmeyer

The Final Battle in Branches of Darkmeyer RS3

When Vanstrom finishes talking, he will attack you in his human form. You can attack him with your chosen weapon, but we recommend using the Blisterwood Polearm. Once you do him some damage, he will transform into his vampyric form and become more powerful (Vanstrom’s vampyric form is level 140). 

If you have Combat stats level 80 or more, you shouldn’t find this fight difficult; lower-level players will face some struggles. You must continue to hit him with your chosen weapon and use Protect against/deflect Melee to reduce the damage he deals. Vanstrom will use Melee attacks when possible; if you’re out of range, he will use magical attacks like red energy balls instead. Be careful since both of his styles will deal you 250 life points. 

Vanstrom will also use different deadly attacks randomly during your battle with him. Here are the four abilities Vanstrom will use during Branches of Darkmeyer RS3: 

  • Darkness “Stare into the darkness”: When Vanstrom uses this ability, the screen turns black for a few seconds. You must face your character and the camera away from him since this ability will deal you 4,000 damage. 
  • Blood “Let the blood consume you”: You will be teleported into the middle of the room, and a small patch of blood will appear underneath you. When you see this, run away immediately to avoid receiving damage from this ability. 
  • Flight: You will see how Vanstrom flies into the air and starts attacking you with magic; he will throw balls under you, similar to the blood pool attack. It will deal high damage (up to 4,000 life points). During this ability, we recommend you use your Blisterwood Stakes against him. 
  • Heal “Come, fiends, and aid your master”: During the fly, Vanstrom will summon two level 35 Bloodveld Leechers that will heal him if you don’t kill them quickly. Thankfully, they are weak and slow, so you can act before they heal Vanstrom. 

When you drop Vanstrom’s health below 25%, he will transform into a Ball of Mist, and if you try to touch or get near him, you will receive damage. You must use the Bottle of Holy Water to lure him into the puddles and damage him. 

Be careful before you finish Vanstrom; he will scream, “You have me, but I won’t be going down alone”. He will cast an attack at the point of death and this attack will take most of your life points, so heal as much as possible because otherwise, you will die and have to go over the fight again. 

After he explodes, he will summon eight level 98 Bloodveld Guardians. However, you will faint because of the large amount of damage, but luckily Vanescula and Sarius will enter the room. You will see how Sarius protects you, and Vanescula will take control to kill the Bloodvled Guardians. The Guardians will attack her but never damage her vampyre form. Sadly, at this part of the Branches of Darkmeyer RS3, you won’t be able to attack the Guardians directly; however, you can deal some damage with special attacks (Dart, Shadow Stalk, and Shriek). 

After the Bloodvelds are defeated, Vanescula will destroy Vanstrom’s desk with an explosion to delete all his information on the Myreque. She will tell you that she must return to Meiyerditch after Sarius comments that Vanescula can do it since she knows the location of the Myreque hideout. She knows about it because her father, Mauritys, was a Myreque member. Vanescula won’t be happy with what Sarius said, but she will praise Sarius for her courage. However, to continue with the final part of the Branches of Darkmeyer RS3, Sarius will take your unconscious body to the Myreque Hideout, where you will wake up next to Mekritus. 

Returning To Myreque Hideout

After you wake up, find Vertida and speak to him. He will congratulate you on your achievement. Defeating Vanstrom is an impressive thing you accomplished. At this point in Branches of Darkmeyer RS3, you will see a cutscene where Safalaan leaves Meiyerditch, but several vyrewatches stop him. Vanescula will appear and send all vyrewatch away, and Safalaan will tell her he is heeding her warning, and she will tell him that they will begin once he’s back from his endeavor. 

After that, Vertida will send you to meet Veliaf at the pub's basement in Burgh de Rott because there is nothing valuable in Meiyerditch to reward you. So, you must teleport to Burgh de Rott using the medallion and then go to the Myreque Hideout under the ruined pub. Find Veliaf and explain to him you defeated Vanstrom Klause. Veliaf will reply that Vanstrom’s and Ranis’ deaths have put the Myreque in greater danger than before since vampyres now consider them a threat. 

A few seconds later, Veliaf will reconsider and tell you they may be closer than ever to defeating Drakan with two of his stronger vampyres gone for good. This will mark the end of the Branches of Darkmeyer RS3 quest. 

RS3 Rewards Branches of Darkmeyer 

Congratulations! You have completed the Branches of Darkmeyer quest, and after a very long journey full of vampyres, secrets and battles, you deserve a reward that matches your efforts to help Myreque and take a step closer to defeating Drakan. Here’s what you will get after the completion of the quest: 

  • ​​2 Quest Points
  • 20,000 Agility experience
  • 50,000 Woodcutting experience
  • 20,000 Farming experience
  • 40,000 Fletching experience
  • 20,000 Crafting experience
  • 25,000 Slayer experience
  • 35,000 Magic experience
  • A tome of XP 3rd ed with three 50,000 experience chapters in any skill 60 or higher.
  • Access to Darkmeyer.
  • Ability to fletch and use Blisterwood weapons.
  • Darkmeyer disguise (can be put into a Costume box in a Player-owned house).
  • A new title depending on your status bar progress
  • Vyreling [Name] (0–24%)
  • Vyre Grunt [Name] (25–49%)
  • Vyrewatch [Name] (50–99%)
  • Vyrelord / Vyrelady [Name] (100%)
  • Drakan's medallion allows teleportation to various places in Morytania (Barrows, Burgh de Rott, Meiyerditch, Darkmeyer and Meiyerditch Dungeon).
  • Ability to receive Vyrewatch as a Slayer task from Chaeldar, Sumona, Duradel or Lapalok, Kuradal, and Morvran.
  • Access to a Bloodwood Tree outside the Arboretum.
  • 2 Treasure Hunter keys (Ironman accounts will not receive these)

Branches of Darkmeyer RS3 FAQ

What a journey you had tracking and defeating one of the strongest vampyres in Meiyerditch. All of your hard work has taken the Myrequre one step closer to Drakan, but success doesn’t mean you won’t have some interesting questions to be answered. So, to ensure you have a full grasp on the understanding of this quest and all of its components, take a look below at some of the most frequently asked questions:

What are the achievements you can unlock during Branches of Darkmeyer in RS3?

During this quest, you will be able to unlock various achievements like: 

  • The Branches of Darkmeyer - to complete this quest.
  • Got a Vyre Reputation - by unlocking the Vyrelord/Vyrelady title and reaching the maximum vyre reputation in Darkmeyer. 
  • Hard - Raising The Stakes - Fletch a Blisterwood Polearm in Morytania 
  • Elite - On Wings Of Bling - By using the Drakan’s Medallion to teleport you to Darkmeyer
  • Elite - Properly Metal - By clearing wave 15 in a Gold or Platinum wave of the Rush of Blood D&D. 

What are the following quests in the Myreque quest series?

To continue your journey to help the Myreque restore their peace, you must complete the following quests in the series: The Lord of Vampurium, In Memory of the Myreque, The Lost Toy, River of Blood and Continued In… quests.  

RS3 Branches of Darkmeyer Summary

Though this long journey has come to an end, it’s just the beginning in some ways. As the restoration of peace will never be truly complete until Drakan is defeated. So, gear up for action in the upcoming quests within the series by taking a look at some of other quest guides to level up skills, hone your combat talents and grow your knowledge; all can be found right here on our site in our blog section. You can also purchase RS3 gold, items and other services to ensure you’re ready to take down Drakan when the time is right. We’ll be back real soon with some more exciting gaming guides to keep your days brimming with action; until next time dear readers!

logo
Vessel Of The Harbinger RS3 - Learn the Ins and Outs Vessel Of The Harbinger RS3 - Learn the Ins and Outs Questing

Welcome back to our blog series, where we cover different quests through RS3. Today’s blog will touch on the Vessel of the Harbinger in RS3, a continuation of your journey hrough the underworld and discovering all that the Necromancy skill has to offer. We’ve already covered Necromancy! and Rune Mythos, so don’t forget to check them if you haven’t already. In the third quest of The First Necromancer series, you will learn more about Rasial from one of his previous students at Port Phasmatys. With all being said, let’s break it down! 

rs3 ectofuntus, rs3 vessel of the harbinger

Vessel of the Harbinger Requirements RS3

Before you start your adventure, you must know some details about RS3 Vessel of the Harbinger; first, this is a Member only quest with an estimated medium length, so you must expect to spend about 20 to 30 minutes going through this quest. Moreover, here are all the requirements you will need to complete Vessel Of The Harbinger quest: 

  • 46 Necromancy 
  • 40 Prayer
  • Ghostspeak Amulet or Cramulet (Unless you’ve completed Hard Morytania Achievements)
  • Bucket of Slime 
  • Ectoplasm 
  • Necromancy Weapons (including Conduit)
  • Bucket
  • Ectophial 
  • A way to quickly teleport to the Slayer Tower (Ring of Slaying, Dungeoneering Cape, Activated Canifis lodestone)
  • Teleport to the City of Um (10 Spirit Runes to cast City of Um teleport twice, Activated City of Um lodestone, or Underworld Grimoire 2)
  • Salve Amulet or Salve Amulet (e) (To increase damage against the Tortured Souls) 
  • Completion of Rune Mythos and Ghosts Ahoy
  • Ability to defeat five Tortured Souls level 53

Items for the Empower Vessel Ritual: 

  • 11 Basic Ghostly Ink 
  • 2 Regular Ghostly Ink 
  • 4 Light Sources 

RS3 Vessel of the Harbinger Guide

To begin Vessel Of The Harbinger head to the City of Um, find Death, and ask him about Rasial. He will tell you that necromancers often create their own Vessels, the likes of which you've already encountered. Death will mention that Necrovarus was Rasial’s apprentice, and he can teach you more about Rasial's plans.

The Request Of Necrovarus

After your dialogue with Death, head to the Ectofuntus and speak to Necrovarus. The fastest way to get there is to use the Ectophial. At this point, you must equip your Ghostspeak Amulet unless you’ve completed the Hard Morytania Achievements. After your short conversation with Necrovarus, he will agree to help you but will ask you for a favor in return. 

Necrovarus will tell you the Ectofuntus has become stronger over time, and the Tortured Souls outside are preventing it from reaching its full potential. He’ll ask you to defeat the five Tortured Souls using Necromancy, and then he will give you a Soul Urn to collect their souls. Thankfully, only just over half of the damage dealt to the Tortured Souls needs to be from Necromancy in order for the souls to count toward the task. So, you can make use of some other combat methods to speed up the process, just keep an eye on the damage you deal to ensure your efforts are for nothing. As long as 1,500 damage comes from Necromancy attacks, you can switch to other weapons for the kill, and it will still count towards the quest objective. 

Once you defeat the Tortured Souls and fill the Soul Urn, the next step in Vessel of the Harbinger in RS3 is to worship the Ectofuntus with a Bucket of Slime and a full Soul Urn in the backpack. With this, you will earn 100 Necromancy XP. If you didn’t obtain the Bucket of Slime, you must head to the Pool of Slime in the basement and get some. Once you do this, return to Necrovarus and talk to him. He will tell you to perform a ritual to empower the Well of Souls, but sadly, he forgot how to do it. Instead, Necrovarus will tell you the information needed is in the Book of Haricanto, and you must ask Netty to get it back. 

vessel of the harbinger rs3

The Book Of Haricanto

After this conversation, head to Netty’s house. You will find it east of the Slayer Tower; using a Ring of Slaying or Dungeoneering Cape is the fastest way to get there. If you can’t use either of these items, you can teleport to the Canifis lodestone and then run northwest until you reach the Lustrous Wisp colony. You will immediately know Netty is not around, but you will find a pile of letters on the floor. Inspect the letters, and quickly, you will realize you need to visit Velorina in Port Phasmatys. 

To continue with Vessel of the Harbinger in RS3, return to the Ectofuntus using your preferred teleport method and head south, passing the energy barrier to Port Phasmatys. Run northeast to find her in the northernmost house. Talk to Velorina; she will inform you that Netty died some time ago when she was gathering some nettles for her tea. You must head to the City of Um and then go to The Last Call Pub. There, you will find Netty’s ghost standing in the northeastern corner of the place. Speak with her, and after a quick catch-up, you will tell Netty you need the Book of Haricanto. She will tell you it is inside a chest in her house, and she will give you her Death Certificate and Will; with this, you can claim her key from the Bank of Port Phasmatys. 

Note: If you have the Ghostspeak ability, or the Ghostspeak amulet equipped, Netty will tell you that it is unnecessary to do so; despite her being a ghost.. 

Your next step in RS3 Vessel of the Harbinger is to go to the bank in Port Phasmatys and talk with the Ghost Banker to obtain Netty’s key. To do so, use Netty’s Death Certificate and Will on the banker, it will deposit the key into your bank, and you don’t have to go through all the dialogue with the Ghost Banker. 

With Netty’s key with you, return to her house and open the Locked Chest. You will see how Netty’s Skeleton appears, and you must fight it before you can get the book. Her skeleton is immune to any type of damage, and you can’t defeat it using regular methods. Instead, you must cast Conjure Skeleton Warrior, which requires a Conduit and one Ectoplasm near the skeleton. This will cause it to collapse due to its poor self-esteem. Once you complete this task in the Vessel of the Harbinger RS3 quest, you will be able to open the chest and find the Book of Haricanto. 

Empower The Vessel

With the book in your inventory, return to the Ectofuntus and speak to Necrovarus. He will tell you to get the Bucket of Power Slime from the Ectofuntus; to do so, just use a Bucket on the Ectofuntus to obtain it. Head to the City of Um to perform the Empower Vessel Ritual. This ritual requires the following items: 

  • 2 Elemental I glyphs
  • 1 Charge I glyph
  • 1 Commune I glyph
  • 4 Ritual Light Sources
  • 1 Bucket of Powerful Slime
  • 11 Basic Ghostly Ink
  • 2 regular Ghostly Ink
  • 4 Basic Ritual Candles or better

Once you have everything, complete the ritual. This will trigger a cutscene where you can see Rasial, the First Necromancer, appear and send Necrovarus away. If the cutscene doesn’t play, return and talk to Necrovarus. When the cutscene ends, head back to Death to finish the Vessel of the Harbinger in RS3. 

Vessel of the Harbinger RS3 Rewards

Congratulations! You've completed the RS3 Vessel of the Harbinger quest. After covering quite some distance between Port Phasmatys and the City of Um, we're sure you're itching to know what's up for grabs. Along with taking your first steps in empowering your vessel and working through your Necromancy abilities, you will also be rewarded with the following: 

  • 1 Quest Point
  • 10,000 Necromancy XP lamp
  • 5,000 Prayer XP lamp
  • 25 souls added to the Well of Souls
  • 2 Treasure Hunter keys (Ironman accounts will not receive these)

vessel of the harbinger rs3 rewards

RS3 Vessel of the Harbinger FAQ

Even the very best of players can have their doubts, but don't be ashamed about those wanderings. It's our job to help your questing adventures become the best they can be, which is why we have compiled some of the most frequently asked questions about this underworld adventure to ease your confusion. Take a look below:

What achievements will unlock after completing Vessel Of The Harbinger in RS3?

Once you complete the Vessel Of The Harbinger quest, you will unlock the following achievements: Vessel Of the Harbinger for completion of the quest and Legal Entitlement, when you inform the Old Man about the fate of his mother after Vessel Of The Harbinger. 

Which quests will require RS3 Vessel Of The Harbinger to enter them?

After you go through Vessel Of The Harbinger, you will unlock The Spirit of War quest, which requires completion to get access to it. The Spirit of War is also part of The First Necromancer quest series. 

Vessel of the Harbinger RS3 Conclusion

After your adventure retrieving the Book of Haricanto, it’s time to relax or maybe you’d prefer to jump into a new quest or journey. With the endless possibilities that come with RS3, you can spend your time doing what you think is best. If you feel your bank is lighter following the adventure, you can replenish it by purchasing RS3 gold and focusing on the things that matter without wasting your time on money-making methods. If you like this guide, you can find more of it in our blog section. That’s all for now. See you in our next blog.

logo
Rune Mythos RS3 - The Origins Of Necromancy Rune Mythos RS3 - The Origins Of Necromancy Questing

After your journey through death and your return to life in the Necromancy! quest, introducing you to the different aspects of the underworld and the Necromancy skill now it’s time to discover the origin of Necromancy. Learn just how powerful you can become and dive further into the lore of the City of Um. We'd like to welcome you back to our blog series, where each week, we cover a new and exciting game topic and walkthrough. In today's article, we will cover the Rune Mythos quest in RS3, and everything that goes with it. So, let's break it down! 

rs3 rune mythos

RS3 Requirements Rune Mythos

Before you begin your adventure through the City of Um and its mysteries, you must know this is a Members-only quest. It is short to medium in length, so you can expect to spend around 10 to 20 minutes navigating through Rune Mythos RS3. Apart from that, the requirements for this quest are simple and uncomplicated; here’s what you need to go through all the endeavors: 

  • 24 Necromancy 
  • Resources for the Lesser Essence Ritual
  • 200 Noted Pure Essence 
  • 8 Basic Ghostly Ink 
  • 4 Regular Ghostly Ink 

Thankfully, this quest has no enemies for you to face, meaning you can go through this journey without worrying about any sort of showdown. 

Rune Mythos RS3 Guide

To begin with Rune Mythos RS3, you must head to the Ritual Site in the City of Um. Next to the Ritual site, you will see Malignius Mortifer. You'll need to speak with him to get the quest going, but before that, ensure you have an empty inventory. There are several chat options that you can cycle through if you wish to learn about Necromantic Runes or Incantations, but the one to get the quest going will be 'I'm good, what's next?' You don't have to worry about the other options; they won't affect your quest journey either way, but they are there if you wish to grow your knowledge. 

 Once you've selected the correct dialogue to get the quest started, Malignius will give you everything you need for the Lesser Essence Ritual: 

  • 200 Noted Pure Essence 
  • 8 Basic Ghostly Ink 
  • 4 Regular Ghostly Ink 
  • 4 Basic Ritual Candles. 

If you have some items, he will give you only the ones you missed. It is vital that you do not drop or lose the materials he provides you, as he will not replace them. Once you have all the items in your inventory, it’s time to head to the Pedestal in the Ritual Site; here, you must click the center and select the Lesser Essence Ritual. Performing this ritual will require cleaning any remains from previous Glyphs to make space for your ritual. 

rs3 rune mythos

To complete this ritual, you must create 2 Elemental I Glyphs that will cost you 3 Basic Ghostly Ink each, and 2 Change I Glyphs that cost you 2 Basic Ghostly Ink and 1 Regular Ghostly Ink each. You must place the candles to create the sources of light required for the ritual. Once everything is ready, stand on the platform and perform the ritual. This ritual will consume the Pure Essence Malignius gave you. 

After completing the ritual, head to the Ritual Chest close to Malignius, take as much Impure Essence as you can carry in your inventory, and then bank all the other items. Head to the northeastern area of the City of Um, and you must go through the Dark Portal. Before entering the portal, you must ensure you have at least one Unnoted Impure Essence. 

To continue your journey in Rune Mythos quest, you must attempt to craft some Spirits Runes, but before you are able, Rasial, The First Necromancer, will tell you to stop “playing with things you aren’t ready for.” Moreover, he won’t let you craft the runes until you speak to him. You must go through all the conversations and dialogue with Rasial until he finishes and disappears. Once he’s gone, craft the runes and return to Malignius Mortifer to receive your rewards. 

Rune Mythos Rewards RS3

Congratulations! You have completed Rune Mythos RS3. Even though this was a short and sweet quest, there are still some decent rewards at play. So, now that you've come to the end of the road let's take a look at what you receive for your efforts: 

  • 1 quest point
  • 1,500 Necromancy XP lamp
  • 250 Runecrafting XP lamp
  • Access to Lesser, Greater, and Powerful Essence Rituals
  • Access to Necromancy Runecrafting
  • Access to Necromancy Incantations
  • City of Um Teleport incantation
  • Lesser Bone Shield incantation
  • 2 Treasure Hunter keys (Ironman accounts will not receive these)

rune mythos rs3

Rune Mythos RS3 FAQ

After going through the process of the Rune Mythos quest, you may have some questions. It may be a short quest, but the doubts surrounding what is to come in the next quest of the series, and some general wonderings may be playing on your mind. So, we're here to answer those all-important questions. Let’s begin! 

What achievements can you unlock after completing the Rune Mythos quest RS3?

Once you finish the quest, you will receive the following achievements: Rune Mythos, which you earned by completing the quest and City of Um Set Task. The last one you will receive is from Ichlarin, and you can find him near the Ritual Site of the City of Um, but you need to complete all Easy Tasks in the city first. 

What quest will be unlocked after completing RS3 Rune Mythos?

Since this is the second quest in the First Necromancer quest series, you will unlock the third quest 'Vessel of the Harbinger'. This will continue your journey through the underworld, and the Necromancy skill. 

RS3 Rune Mythos Summary

It feels nice completing one more quest, even the short ones like Rune Mythos. However, it’s not just the reward and completion of the quest that is worth the time, but the knowledge you obtain that will be useful in the upcoming quests. Until then, take a look at some of our other RS3 titles in our blog section, and if you want to build your bank without the grind, consider buying RS3 gold to level up your gear, skills, and everything related to conquering Gielinor. That’s all for now, we’ll see you on the next blog.

logo
The Needle Skips RS3 - Unlocking The Story The Needle Skips RS3 - Unlocking The Story Questing

Are you looking for a narrative-driven experience inside RS3? This quest will focus on a local family and the Needle, a powerful artifact created by the elder gods to aid them with the planetary construction. It’s your call to get involved in The Needle Skips in RS3 to unlock a glimpse of history trapped inside a bubble. If you went through Murder Mystery or One Piercing Note, you would have had a similar experience. This quest will show you many different perspectives as you traverse the storyline. So, let's take a look at what this adventure entails: 

The Needle Skips Requirements RS3

For RS3 The Needle Skips, you must be a Member, though there are very few other requirements. You won't be required to complete any quests, have specific skill levels, or carry an abundance of items. However, there are still some recommendations that can assist you as you navigate the quest. Here's what you'll need: 

  • 4 empty Backpack spaces
  • Phoenix Lair Teleport, access to the Fairy Ring (AKG) or Memory Strands to easily reach the quest arena. 

The Needle Skips Quest RS3

To begin with The Needle Skips in RS3, you must search the Needle, located west of Piscatoris Fishing Colony. You must follow the southern path to the west, and when you reach a small bridge, head north. Once you’re about to arrive at a large house, turn to the east and then walk over the stone pathway. 

the needle skips rs3

The Needle

When you search the Needle, there will be a short dialogue that is followed by a cutscene. It will show the nearby buildings while you’re wondering what happened in this place. Once the cutscene ends, you will get a Shard of the Needle, and a Mysterious Body will appear on the ground beside the Needle. 

If you get close and search the body, you will find that the body is frozen in time, with a blood-written message that says “Megan” near it. By communing with the shard you will be able to search for keywords within the story. Enter 'Megan' into the interface and this will unlock a fragment of a memory. You can then view this through the Shard.

You must continue searching in the quest area for more keywords and enter them into the Shard to unlock more fragments of memories; this will also add characters and objects to the quest area. You will see how everything constantly changes after using the keywords on the Shard. Once you complete a chapter, you will see a temporal portal appear next to the Needle, which is an essential part of progressing to the next chapter. It’s worth noting that you don’t need to complete all the fragments to progress. 

You don’t need to enter the keywords and memory fragments in any specific order, so there’s no point in making it strict. Additionally, you're allowed some leniency, as entering '30' will work for a clue which is '30th'.

Chapter One in The Needle Skips RS3 - Megan’s Perspective

In this chapter, the story will be told from Megan’s perspective. If you want to follow up on the story, you must type the first word of each memory fragment and play it in order. Some words will repeat so, when you enter the keyword, it will play two fragments without a specific order. If you don’t want to continue with the story, skip most keywords and enter “fire” or “fireplace” in your Needle Shard and interact with the fireplace. This will open a portal you can use to move to the next chapter in RS3 The Needle Skips. Here’s the list with all the keywords to complete Megan’s section of the Needle Shard: 

  • 30th, abandoned, adventures, angry, apprentice, argument, attack, banquet
  • Bed, birthday, bleeding, blood, blue, books, brand, calendar
  • Cart, choir, cloth, cook, creatures, cry, death, disease
  • Doctor, dying, fear, fireplace, flames, friends, fuel, gail
  • Gods, hannibus, help, homeowner, house, husband, illness, imagination
  • Joss, journey, killed, laziness, learn, letter, love, marriage
  • Medicine, megan, misery, monsters, month, mother, murdered, needle
  • Pack, poetry, potions, prayers, primrose, ramblings, saradomin, scar
  • Sea trolls, secret, sing, sloop, song, spear, spells, stranger
  • Study, temper, thinner, tower, toys, voice, wand, weak
  • Wishes, wizards, yak, year, zamorak 

If you want to unlock all the memories, you only need to use the following keywords: 

  • 30th, adventures, doctor, joss
  • Letter, love, megan, monsters
  • Sea trolls, sing, sloop, tower

the needle skips rs3

Chapter Tow Of The Needle Skips RS3 - Primrose’s Perspective

For the second chapter in The Needle Skips in RS3, it will be shown from Primrose’s perspective. If you don’t want to go over the story, you can skip the memory fragments and enter the word “birthday”. Head to the portal and continue to the next chapter. Here’s the complete list of keywords: 

  • 30th, apprentice, baba, beautiful, bed, birthday, book, books
  • Boredom, bottle, boyfriend, burn, cloak, clown, constellations, dad
  • Daemonheim, danced, demon, diary, dome, doubt, dubbo, friends
  • Gail, ghost, giant, gilly, gossip, grave, hannibus, joss
  • Key, letters, liar, lies, lizard, lizardman, look, lover
  • Lying, magic, medicine, megan, metum, mum, overbearing, plagiarism
  • Poison, possessed, potion, return, runt, scar, scary, shade
  • Sheep, sickness, sloop, snake, strength, thing, thok, time, willikers 

If you want to unlock all the memory fragments, you must use the following keywords: 

  • 30th, birthday, demon, diary
  • Liar, look, medicine, metum
  • Shade, sloop, strength, thok

Chapter Three Of The Needle Skips RS3 - Gail’s Perspective

During Chapter 3, the story is told from Gail’s perspective. If you don’t want to go through the whole story, you can continue to the next phase of the quest using the word “wenla”. Head to the Needle and investigate it to finish the chapter. Here are all the keywords you can find in this chapter: 

  • Anger, angry, bed, betrayed, book, buckthorn, burn, childhood
  • Cost, cruel, dead, demon, disease, dying, ending, energy
  • Evil, fainted, fainting, family, fate, father, fix, following
  • Gail, happiness, happy, help, ill, illness, infected, knife
  • Legs, loop, megan, metum, mistakes, monster, mother, necessary
  • Necessary evil, needle, no, note, paper, parents, peeling, people
  • Possessed, primrose, return, returning, scar, siblings, skin, stories
  • Story, thing, traitor, wenla, worse  

If you want to unlock all the memories, you must enter the following ones: 

  • Books, buckthorn, dead, demon
  • Evil, fainting, happy, illness
  • Knife, loop, metum, needle,
  • Note, wenla

rs3 the needle skips                                   

The Final Act

Once you complete all the chapters, you must go back to the Needle to enter the finale. During this section of RS3 The Needle Skips, you will be in the present, and you will need to find a cure for Gail, Primrose, and Megan. You can use the Leaves and Berries from the Buckthorn Bush to cure the illness, as Gail mentioned before. To help cure the illness, head down the path from the house and pick the Leaves and Berries from the Buckthorn Bush by the river. 

Your next step is to grind the Leaves, crush the berries, and head back to the house. You must go inside and search in the bookcase northeast of Megan. Here, you must talk with Megan, who is now possessed by the demon, and the only way to free her is by saying the correct name of the demon, “Metum”. To find the correct name, you must search in the bookcase. 

Once you have the name, head upstairs and use the Buckthorn Smelling Salts on Primrose, who is unconscious on the floor. Use the crushed Buckthorn Berries, which are now a Bottle of Crushed Berries, on the stove or a fireplace in the house to finally create a Buckthorn Salve. With this healing salve, you can save Gail, who is still on the hill next to the Needle. Once she has fully recovered, go back and talk to Megan about continuing with The Needle Skips in RS3. After a short dialogue, you must go to the Needle and pick a note. Read it, and then return to the house. You must talk to Megan again to finish the quest. 

RS3 Rewards The Needle Skips

Congratulations! You have finished The Needle Skips, a narrative where you are the helping hand in an adventure filled with ghosts, demons, keywords and sickness. For all your hard work, you will receive the following rewards: 

  • 1 quest point
  • 1 small XP lamp
  • 2 Treasure Hunter keys (Ironman accounts will not receive these)  

However, you can get additional rewards by doing some extras during the quest. Here’s what you can obtain: 

  • Discover all chapters to claim a Medium Lamp
  • Replayable chapters of The Needle Skips, if you have a full completion of the quest by finding all the words in each chapter. You can get into it by searching The Needle. 
  • A Large XP Lamp (if you talk to Megan outside the quest replays)

the needle skips rs3

The Needle Skips RS3 FAQ

This narrative-driven quest may take you by surprise; building your story and saving lives can leave anyone a little confused. So, if you have any lingering questions, take a look below to put those wonders to rest:

Is The Needle Skips in RS3 part of a quest series?

Although it may seem like a standalone quest, RS3 The Needle Skips is the second quest in The Elder God War series and part of the Sixth Age in the World Guardian timeline. 

What are The Needle Skips RS3 Achievements you will unlock upon completion of the quest?

In this quest, you can unlock two achievements: The Needle Skips once you complete the quest and Pulling on the Threads when you discover all chapters in The Needle Skips (you must claim this reward from Megan).

RS3 The Needle Skips Conclusion

After this journey to cure a family and uncover the story behind the Needle, take a moment to relax before you embark on your next RS3 adventure. When you are ready, you can check more guides in our blog section that cover walkthroughs, news and more about RS3. Also, you can check our page if you want to buy RS3 gold at the best prices. That will be all for now. See you in our next blog!