Ancient Awakening RS3: Zemouregal’s Plan

By Jesus Marquez | Created: April 04, 2025 | Last updated: April 04, 2025 | Read Time: 10 minutes

Welcome back to our blog series, where we cover different quests and help you go through them. Today’s blog is about Ancient Awakening RS3, a quest taking place in the Sixth Age, formerly part of the Fort Forinthry quest series. You will embark on an expedition to Ungael, and your mission is to uncover Zemouregal’s plan. With everything said, it’s time to travel to Fort Forinthry to begin your adventure!

RS3 Ancient Awakening Requirements

Before you start Ancient Awakening RS3, you must know that this is a Members-only quest, and it is of medium length, which means it takes about 20 to 25 minutes to complete. Moreover, you will need to fulfill these requirements to be able to start this quest:

  • 50 Necromancy
  • 85 Combat recommended
  • Salve Amulet or Salve Amulet (e)
  • Completion of Dead And Buried quest
  • Ability to defeat: 4 tomb zombies (level 40). Several waves consisting of:
    • Necrotic Slime (Level 76)
    • Phantom Wizards (Level 76)
    • Skeleton Archers (Level 76)
    • Zombie Warriors (Level 76)
    • Phantom Sorcerers (Level 97)
    • Skeleton Knights (Level 97)
    • Skeleton Rangers (Level 97)
    • Unstable Zombies (Level 97)
    • Zombie Knights (Level 97)
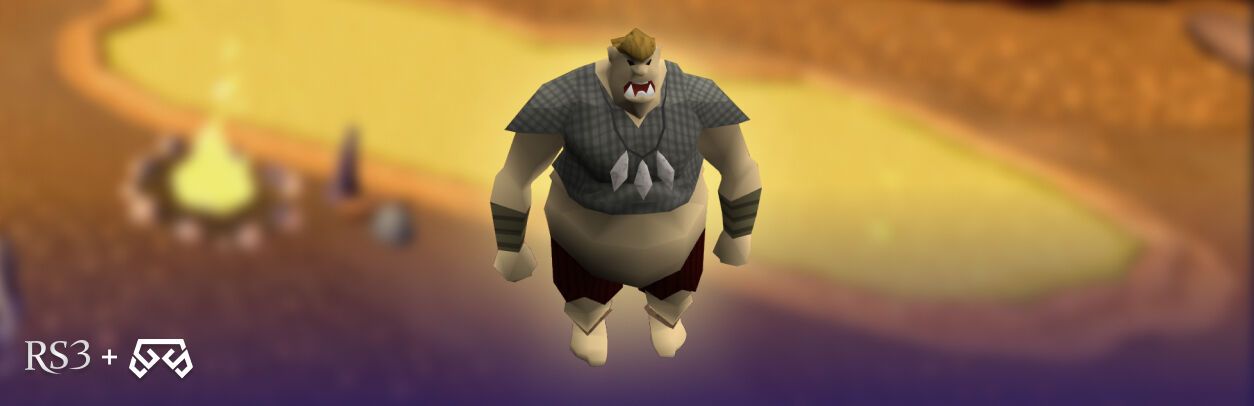
    • Undead Giant (Level 300)

ancient awakening rs3, finding artefacts

RS3 Ancient Awakening Guide

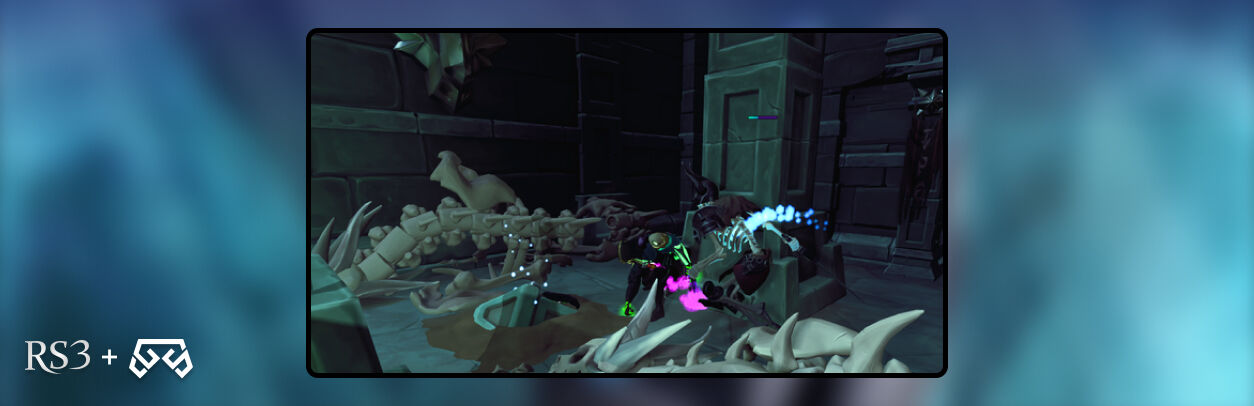
To begin with this quest, travel to Fort Forinthry to meet with the Overseer Siv in the Command Center. She will tell you she’s worried about Aster, the Raptor, and a whole team of archaeologists who have spent a long time in a crypt north of the fort; she hasn’t heard from them in a while. She will ask you to check on them and see what happened. To do so, you must go inside the Wilderness Crypt Entrance and follow the south path until you see the Ancient Door. During this journey, you will have to face multiple Risen Ghosts that will attack you on your way to the door. We recommend you bring enough food and Protect or Deflect Magic for damage reduction.

Once you enter the Ancient Door and descend into the crypt, you will find the Raptor and an archaeologist. Talk with them, and while you are going through the exhausting dialogue options, they will ask for your help to find 20 Dragonkin Artifacts.

The Artifacts

Accept the task and begin exploring the crypt. During your path, you will find various Dragonkin Artifacts nodes scattered in the area; collect them. Along your way to the archaeologist excavating the nodes, you will need to fight 40 Tomb Zombies. When you defeat them, they will drop three artifacts; to meet the requirements, you need eleven collection nodes and 3 Zombies. After collecting these artifacts, Aster discovers an “Ancient Weapon” lying in “Leagnu.” You or an archaeologist must rectify them with Ungeal. Once you do so, the Raptor will request a meeting with you on the first floor of the Jolly Boar Inn to continue with the Ancient Awakening RS3 quest.

rs3 ancient awakening

The Inn

Head to the Jolly Boar Inn, and you’ll see a quest instance marker at the entrance. Follow this quest marker and enter the Inn. Inside the building, you must talk to Bill; he’s standing by the bar. He will introduce you to Bill Jr., a mounted crossbow, and he will tell you details about his past. Once you have finished the dialogue with him, go upstairs and speak with Ellamaria. She’s the queen, and she will explain her fear of Zemouregal if he obtains the Ancient Weapon. She will also mention a plan to send an expedition to Ungael.

Ellamaria will ask you to assemble with the fort staff and keep an eye on Aster. He’s been acting strangely lately, and the last place he was seen was near Draynor Manor. After you complete your conversation with Ellamaria, head southwest of the Varrock lodestone directly to Draynor Manor, near the bridge over the river, you will find another quest instance icon, and when you click on it, it will open a menu with Aster standing near the shore of the River Lum; he’s south, near a Wooden Headstone, crying. You must go through a dialogue, after which Aster will leave the fort and leave a mysterious letter on the ground. For this section of Ancient Awakening RS3, it’s important that you are in Bianca’s grave.

The Travel to Ungael

After this scene, you must return to Fort Forinthry and interact with the quest instance marker that is now in front of the Town Hall. Enter the town hall; you can speak with anyone inside, and during the conversation, you will find that you will lead a team of Aster, Bill, and the Raptor to Ungael. You will use the Fremennik ship, which you can reach with a rowboat docked at the fort’s Grove by Overseer Siv. You must equip yourself well to fight against several mid to high-level enemies. Bring enough food and potions, and have an emergency teleport just in case.

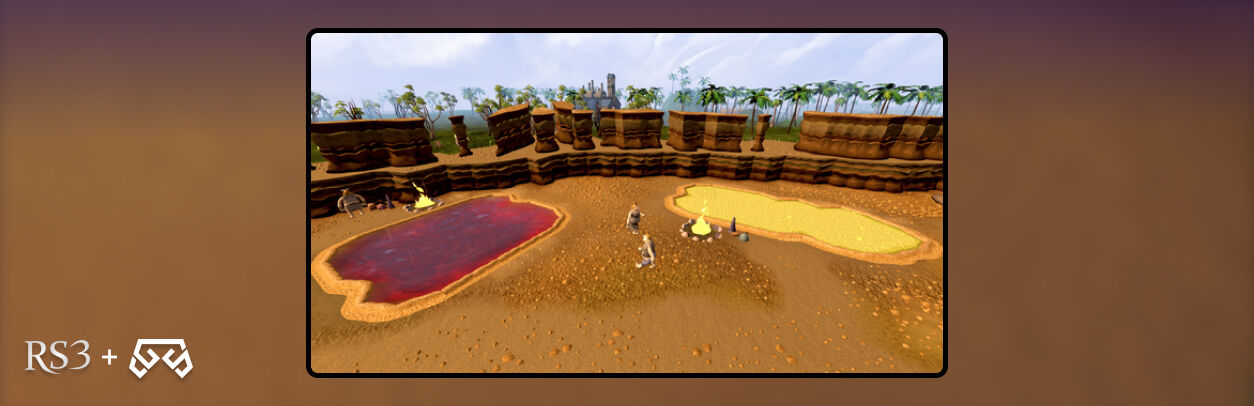
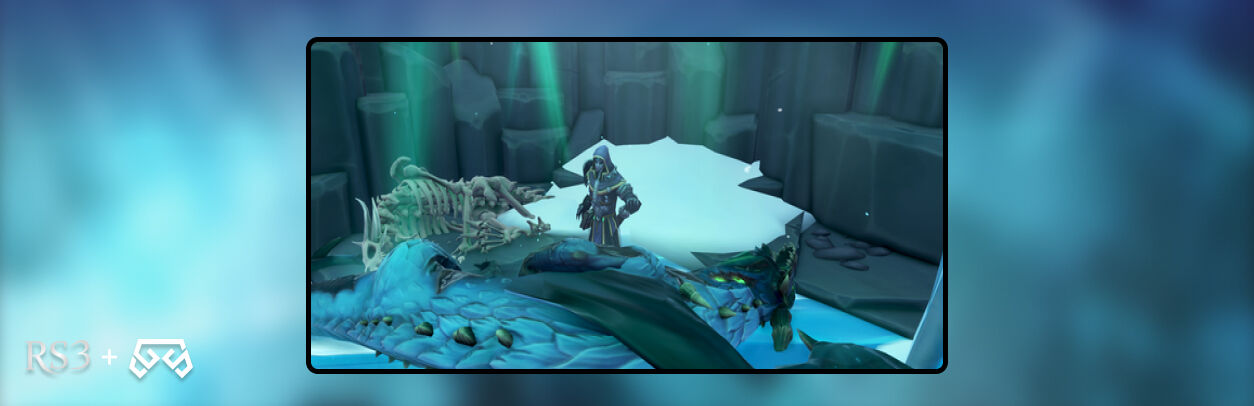
When you feel ready and prepared, head to the Grove and find the rowboat next to the cabin. Interact with it to travel to Ungael. After you do so, it will trigger a cutscene starring Zemourefal talking about the search for the Ancient Weapon. When the cutscene finishes and you land on the island, you and your team will be ambushed by several monsters. First, three Zombie Warriors will attack you, and then two more and a Skeleton Knight will follow. After that, another Zombie Warrior and a Skeleton Knight will join the party. It will be a short fight, and when you are done, make a plan to travel to a tower at the top of the island. Head north, enter the Ruins Entrance, and once you are inside, continue north until you reach the Tower Entrance.
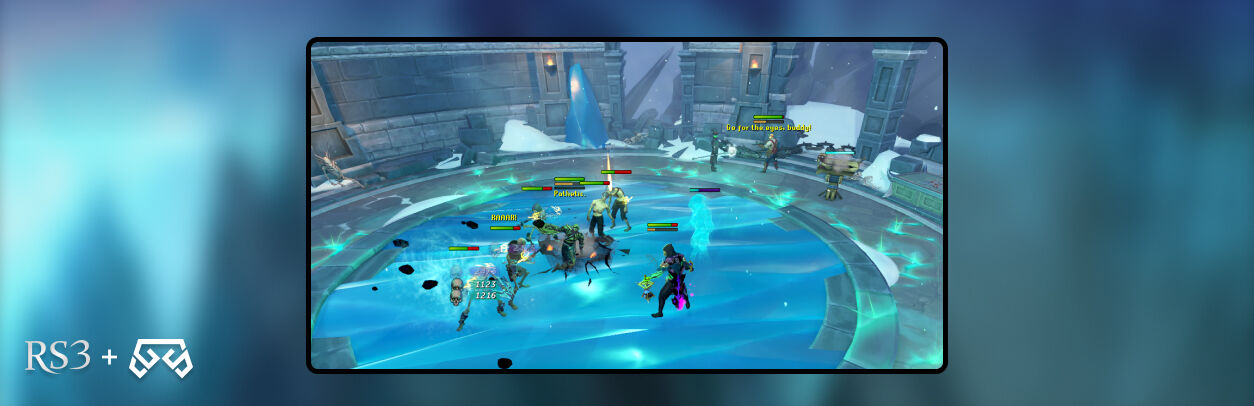
ancient awakening rs3, waves

Monster’s Waves

During these fights, you will have complete command over the Raptor, Aster, and Bill. You can use them to fight the monsters. Don’t worry if they die during a fight because they will respawn on the next wave. You can even teleport out during the fight if you need to, but it will restart the wave you did it on when you go back to continue Ancient Awakening RS3.

Beware, as the monster will aggressively attack the nearest possible target after spawning; if you are a low-level player, we recommend staying away from the middle. Likewise, if you attack them, they will change their focus to you.

It’s important to know your allies’ passives since each has a unique one:

  • The Raptor: he will become invulnerable for a short period, and when the effect ends, he will damage all the enemies nearby and apply a stun for two seconds.
  • Aster: He will shoot fire-tipped bolts that will cause damage over time.
  • Bill: He can summon Bill Jr. to fight alongside and will act as a stationary turret.

When you enter the tower, a cutscene will trigger, showing Zemouregal trying to reanimate Vorkath using necrotic energy. After that, he will conjure several Zombie Warriors and Skeleton Knights. For this section of Ancient Awakening RS3, you must go through 12 monster waves. During every odd-numbered wave, you will have the option to choose a random power-up for the following waves:

  • Encouraging Speech: Your companions’ damage is increased by 25%, and their HP is increased by 20%.
  • Enraged Spirits: Your Necromancy conjures deal 15% more necromancy spirit damage.
  • Going Out with a Bang: Cause your enemies to explode on death, dealing up to 10% of their HP as damage (maximum 5000) to enemies in a 3x3 area.
  • Gotta Go Faster: Reduces the cooldown of Escape, Surge, Dive, and Bladed Dive to 1.2 seconds.
  • Overclock: The turrets created by Bill attack twice as fast and have increased range.
  • Personal Bodyguard: 25% of the damage a player receives is redirected to the Raptor instead.
  • Provoking Shout: The Raptor taunts enemies in a 10x10 area.
  • Self-Destruct: The turrets created by Bill explode upon despawn, dealing between 8325-11,650 magic damage to nearby foes.
  • Thorns: Reflect 30% of damage received to the enemy who dealt it.
  • Well-cooked Meal: Food heals you for 150% of its usual amount.
  • Who Dunnit?: Aster's attacks deal up to 15,000 damage to enemies below 25% health (10% for large enemies).
  • Wildfire: Aster's burn damage is increased to 1400-1800 damage every 1.2 seconds for 6 seconds. It can spread to two nearby enemies.

Here, you can check how many monsters will spawn in each wave:

  1. 4zombie warriors, shortly followed by 1 skeleton knight and 1 zombie knight
  2. 1 skeleton knight, 1 zombie knight, and 2 zombie warriors, shortly followed by 2 skeleton archers
  3. 1 unstable zombie, shortly followed by 1 zombie knight and 1 zombie warrior
  4. 2 zombie warriors, shortly followed by 1 zombie knight, shortly followed by 1 phantom wizard and 2 skeleton archers
  5. 2 zombie warriors, shortly followed by 1 skeleton knight and 1 zombie knight, shortly followed by 2 phantom wizards and 2 skeleton archers
  6. 1 unstable zombie, 1 zombie knight, and 1 zombie warrior, shortly followed by 1 skeleton archer and 1 skeleton ranger, shortly followed by 1 phantom sorcerer and 1 phantom wizard
  7. 3 zombie warriors, shortly followed by 1 zombie knight, shortly followed by 1 phantom wizard and 2 skeleton rangers
  8. 3 zombie warriors, shortly followed by 1 zombie knight, shortly followed by 2 phantom sorcerers and 1 skeleton archer
  9. 1 skeleton knight, 1 zombie knight, and 2 zombie warriors, shortly followed by 1 skeleton archer and 1 skeleton ranger, shortly followed by 1 phantom sorcerer and 1 phantom wizard
  10. 2 skeleton knights, 2 unstable zombies, and 2 zombie knights, shortly followed by 1 skeleton ranger, shortly followed by 1 phantom sorcerer
  11. 2 skeleton knights, 1 zombie knight, and 1 zombie warrior, shortly followed by 2 unstable zombies, shortly followed by 2 phantom sorcerers
  12. 1 undead giant, shortly followed by 1 skeleton archer, shortly followed by 1 phantom wizard

When you kill Unstable Zombies, they will always spawn three Necrotic Slimes. Moreover, if you have the Persistent Rage relic power harnessed, it allows you to cast Regenerate to heal up between each wave. If you are not able to do so, you can rest between each wave instead. Moreover, if you want to deal some extra damage, you can use a cannon and speed up each wave; however, this will make the monsters target you.

ancient awakening rs3, leaving the island

Leaving the Island

Once you complete the 12 monster waves of Ancient Awakening RS3, and despite all your efforts to stop Zemouregal’s ritual, he will be successful in reviving Vorkath and destroying your ship. Your allies will assemble at the entrance of the tower, and after conversing with them, Aster will regret their sister’s decision. You must look for the Doorway to interact with it. Reach an archive with a Runic Projector inside. Interact with the projector; Aster will tell you that it seems like it is in near-perfect condition, but it needs magical energy to work.

During this section of the RS3 Ancient Awakening quest, you must find and catch 3 Motes of Energy to power up the projector. You can find one Mote of Energy outside the archive; the other two will be revealed by searching the Bookcase and Ruined Pillar within the archive. Once you power up the projector, the Archivist, in the form of a holographic Dragonkin, will appear. He only speaks the Dragonkin language (depending on the quest you’ve already completed, you may be able to understand him). He will reveal that Zorgoth created him, once known as the elder of the Dactyl, to use the island as a laboratory for creating the perfect living weapon with the purpose of eradicating humanity.

This Ancient Weapon is the dragon resurrected by Zemouregal. At first, the dragon was a failed experiment that finally led to the creation of Vorkath. The archivist will explain why he is considered a failure and that the remains of other experiments were sent to a tomb located beneath Fort Forinthry. However, the dragon remains on Ungael due to its larger size, and it cannot be moved on. Once you go through this dialogue, the Archivist will activate a one-way conduit that will send you directly to the mentioned tomb.

You must ask the Archivist to open the conduit. When the mysterious device powers up, interact with it, and you and your allies will be teleported to the crypt’s map room. You will go through a short dialogue, and your allies will decide to return to the fort and warn the others. So, return to Fort Forinthry Town Hall and head to the instance marker to interact with it outside the main entrance. You can talk with anyone inside, and the group will unite against Zemouregal. Once you do so, complete the dialogue to complete the Ancient Awakening RS3 quest.

rs3 ancient awakening, rewards

Ancient Awakening RS3 Rewards

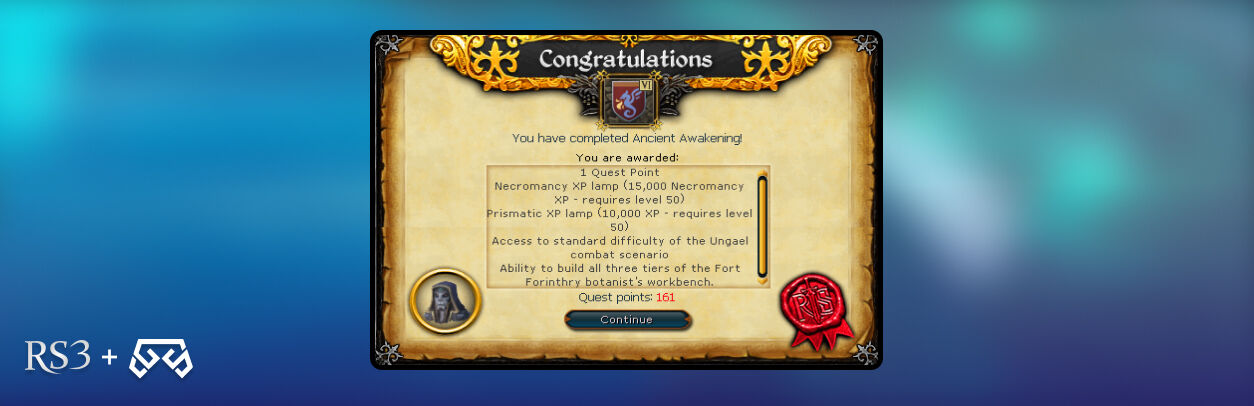
Congratulations! You’ve completed our Ancient Awakening RS3 guide. After going through the exhausting waves, you deserve compensation for your hard work. Here’s what you will get as a reward for completing the quest:

  • 1 quest point
  • 15,000 Necromancy XP lamp (Skill must be level 50 or higher)
  • 10,000 Skills XP lamp (Skill must be level 50 or higher)
  • Access to the standard difficulty of the Ungael combat activity
  • Ability to build all three tiers of the Botanist's Workbench at Fort Forinthry
  • 2 Treasure Hunter Keys

ancient awakening rs3, reanimating vorkath

Ancient Awakening RS3 Guide FAQ

After a long adventure, it’s essential to know why this quest is important and what comes of it. We want to clarify everything related to the RS3 Ancient Awakening before you embark on your next adventure. So, let’s begin!

What quest requires the completion of RS3’s Ancient Awakening?

Once you complete Ancient Awakening, you will be able to continue the Fort Forinthry quest series in the Battle of Forinthry quest. In this following quest, you will be able to fight against Zemouregal and Vorkath.

What will you unlock after the completion of Ancient Awakening?

When you complete this quest, you will also unlock two music tracks and one achievement related to it. The music tracks you will get are Stop Zemouregal and Ungea. Moreover, you will unlock the Ancient Awakening achievement to complete the quest.

RS3 Ancient Awakening Conclusion

By completing Ancient Awakening in RS3, you’ll be halfway through the Fort Forinthry quest series. It will take you some time to go through all the problems caused by Zemouregal in this quest line. Stopping him will be a feat, but right now, you deserve some downtime. When you are ready to get back out there, you can find more guides like this in our blog section. Moreover, if you want to level up your account but need some monetary help, you can buy RS3 gold on our web page. That’s all for now. See you in our next blog!


Author profile
Jesus Marquez

Jesús is an SEO and creative writer with a medical background. With passions in fiction and gaming, he uses rich language and precision to make his content both impactful and beautifully crafted.


Related Articles
logo
Aftermath RS3: Reverse The Edicts Aftermath RS3: Reverse The Edicts Questing

Fear is one thing you should have when you enter this quest; however, with our help, you will be able to reverse the Editcs that will banish Zamorak, Lord of Chaos. Aftermath RS3 is part of the quest series, The Elder God Wars being the sixteenth quest in the line. It’s time to continue your fight against Gods and return victorious after conquering this terror. So, let’s begin!

RS3 Aftermath Requirements

You must understand this is a quest of a medium to long duration, so you can expect to spend about 25 to 35 minutes defeating this boss. Moreover, like the other quests in this series, RS3 Aftermath is a Members-only quest. So, you will need to meet the following recommendations to make your journey easier:

  • Completion of Twilight of the Gods quest
  • Ring of Respawn, Passage of the Abyss, Falador Teleport, activated Falador lodestone, or Master Archaeologist's Outfit for quick access to the White Knights' Castle
  • Archaeology journal or Master Archaeologist's outfit to teleport to Kharid-et Dig Site
  • Clan vexillum or Master Archaeologist's outfit to teleport to Armadyl's Tower
  • Ability to defeat various enemies within The Zamorakian Undercity and Zamorak, Lord of Chaos level 14,000

aftermath rs3, zamorak

Aftermath Quest RS3 Walkthrough

To begin with, Aftermath in RS3, head west of the library on the first floor of the White Knights’ Castle to find Adrasteia. Talk to her, and she will reveal that in order to reach Zamorak, you must go through The Zamorakian Undercity. You will find the undercity deep within Senntisten, a place occupied by Zamorakinas after the events of the Elder God Wars. Once you’re there, go through the portal located within. Adrasteia will suggest you meet with Sir Cadian, who is the leader of an assault into the undercity.

Knights

For your next step into the RS3 Aftermath quest, you must enter the undercity, and the best way to do it is through the Varrock Dig Site entrance of Senntisten. Once you are inside, enter the undercity by using the pulley lift; it’s near the larger-looking pulley lift used to enter and exit Senntisten. After you enter the undercity, walk north and meet with Sir Cadian. You must go through some dialogue options, and then a cutscene will begin. He will mention that The White Knights have been staging assaults against the followers of Zamorak, but all their tries were unsuccessful. They try to get the portal that leads to the Wilderness Crater. More information is revealed, and players will find out that Zamoriakians are sacrificing troops from the Elder God Wars Dungeon to fuel the portal.

In this section, you will be able to clear the Zamorakian Undercity without any difficulty. However, if you have already defeated Zamorak, Lord of Chaos, and exited the arena, you can go through the portal instead of teleporting; in other words, you can skip this step.

Edicts of Guthix

After you go through the Zamorakian Undercity and defeat Demons, Cultists, Hellhounds, and Waterfinds, it’s time to banish Zamorak by successfully reinstating the Guthixian Edicts. Part of this journey will have you fight him, and once you defeat and banish him, you will have to return to Adrasteia on the first floor of the library to continue with Aftermath in RS3. Tell her that the Edicts of Guthix were re-established and that you stopped Zamorak.

aftermath rs3, adrasteia

The Zarasians

Adrasteia will ask you to join her in saying her farewells to Saradomin on the second floor. Head to the second floor, and when you are talking to Saradomin, a cutscene will appear where you see him appointing Adrasteia as the new leader of the Saradominists on Gielinor. Once the cutscene is finished, he will ask Commander Zilyana to watch over Adrasteia and tell the people what happened. The latter will muster the last of his strength and leave Gielinor. Moreover, Adrasteia will suggest talking with Azzanadra and Armanyl before they depart.

Pack your bags and travel to the Kharid-et Dig Site to find Dr. Nabanik. Talk to him, and you will be immediately teleported to the Praetorium inside Kharid-et, where you will meet Azzanadra, Nex, Trindine and Wahisietel. Join them, and Azzandra will say that he and Nex will depart for Freneskae to plan the following steps. He will also task Trindine with following Adrasteia and intervening on her behalf when she isn’t able to. Azzandra will also discuss with Wahisietel about his human alter ego, Dr. Nabanik, to help Trindine out as much as he can with his knowledge of humans.

aftermath rs3, adrasteia

Armandyl And Adrasteia

In this section of Aftermath RS3, you must visit Armandyl at his tower south of Falador and talk to him. He will express all his regrets about not spending his final hours in Gielinor at the ruins of the farm he and Obi’Sooth built (what is now Wilderness), where he died along with countless other aviansie. He will also mention his desires and intentions to help free the Elves of Tarddiad from being bound to crystals and build a colony for aviansie there. He expects to find balance and a peaceful coexistence between his and Seren’s followers. Furthermore, he will thank you and depart as well.

Return to Adrasteia in the library. She will reveal her concerns about the Zamorakian civil war and how Moia will handle it. After finishing this conversation, you will complete the quest.

aftermath rs3, rewards

Aftermath RS3 Rewards

Congratulations! You’ve completed the Aftermath RS3 quest! After going through the undercity and banishing Zamorak, Lord of Chaos, your endeavours are still not done. However, you deserve rewards to use on your upcoming quests. Here’s what you will get for completing this one:

  • Small XP Lamp
  • Chaos Die Reroll Token

Aftermath Quest RS3 FAQ

Although your fight against the gods is not yet over, you will get some downtime to outline a new plan to help Gielinor overcome this dark period. However, before you move on and continue your questing journey, let’s clear some doubts you may have with this quest.

What achievements are unlocked after completing the Aftermath RS3 quest?

After you complete the Aftermath miniquest RS3 in the Elder God Series, you will unlock the achievement called “Aftermath.”

How many sections must I go through in The Zamorakian Undercity?

You have to go through three different sections on your way to banish Zamorak. You will pass through Section I, Section II (Mefis) and Section III (Eterna), where you must fight your way against the hordes of chaos.

RS3 Aftermath Summary

Once you complete this quest, you will be one step closer to finishing the Elder God Wars quest series. However, you will still need to go on more adventures to learn all of Gielinor’s lore. Likewise, to help you in your endeavors you can buy RS3 gold and skip the tedious bits without difficulties. Also, if you need a helping hand on your questing journey, you can check our blog section. That’s all for now. See you in our next blog!

logo
As A First Resort RS3: Ogresses Spa As A First Resort RS3: Ogresses Spa Questing

Welcome back to our blog section, where we cover different quests and make detailed guides for you. Today’s blog is about As a First Resort RS3, an experienced quest in the Ogre quest series where you will help the ogresses of Oo’glog expand their hot springs into a resort. Part of your job is to assist in the area preparation and eliminate a pest problem. Prepare yourself to help open a new Spa and Resort!

As A First Resort RS3 Requirements

Before thinking of diving into the hot springs, you will need to know this is a Member-only quest of long duration, so you will spend roughly 30 to 45 minutes completing all the steps and endeavors. With this clarification on the table, here’s what you will need to go through RS3 As a First Resort quest:

  • 51 Firemaking
  • 48 Hunter
  • 58 Woodcutting
  • Box Trap
  • Bird Snare
  • Teasing Stick (Unless you are buying the 8 larupia furs from the grand exchange)
  • 4 Spears of the same type (Bone Spears work; Poisoned Spears and Leaf-bladed Spears won’t work)

Available just outside Oo'glog:

  • 8 Achey Tree Logs
  • 15-26 Eucalyptus Logs (20 will be enough If you don't make any mistakes in the logic section)
  • 2 Raw Chompy (available to be caught in the Ogre Chompy Hunting Area)
  • 8 Stripy Feathers (available from the Tropical Wagtails in the hunting area to the north of Oo'glog)
  • 4 Wolf Bones (available from killing the wolves outside Oo'glog)
  • 8 Larupia Furs (tatty or perfect, available from pit-fall hunting Larupia in the hunting area to the north of Oo'glog)
  • At least ten each of the following plants found near Oo'glog, suggested around 15 or so of each:
    • Fever grass
    • Lavender
    • Primweed
    • Stinkbloom
    • Tansymum
  • Some Logs of any kind for traps
  • Teleport via Oo'glog lodestone
  • Archaeology Teleport to Chief Tess
  • Runes for South Feldip Hills Teleport (or Ring of Duelling), which is a short run from Oo'glog
  • Fairy Ring (code: AKS) is north of Oo'glog
  • Spirit Tree at South Feldip Hills Teleport

As A First Resort Quest Guide

To begin with the quest, you must travel to the center of the Oo’glog city and directly south of Yanille to find Chief Tess. Talk to her, and she will explain she can’t open her business unless the “Bossy Lady” at the bank of Oo’glog allows her to do so. After this short conversation, offer her your help, and the Chief will tell you to speak with Balnea, the “Human Lady” located in the ogre village’s bank. During the start of As a First Resort RS3, you will discover Balnea promised the ogres ‘shiny pretties’ in exchange for letting her establish her spa in the city.

Once you find the bank, enter and talk to Balnea. You will go through an extended dialogue with her, which is filled with business talk before she asks you to help turn Oo’glog into a spa. Agree to help, and she will send you to help the village’s Chief set up a spit and cooking fire.

as a first resort rs3, chargurr

What Do You Need?

Head to the ogre cook, Chargurr, north of the bank and speak with her. She will tell you she needs to make a big fire that requires several logs to cook chompy food. You must agree to help her and give her 8 Achey Logs and 10 Eucalyptus Logs. This has to be done in one go, so you must have 18 free spaces in your inventory to carry all the logs.

Once you have the logs, you must lay them in the pit to set up an Unlit Stove. Speak with Chargurr one more time, and she will ask you to find big, long spears to cook chompies on. You have to give her four spears to use as spits. To do so in this section of As a First Resort RS3, you must talk to Chargurr again and tell her you would like to give her the four spears. You will hang them in the trees, over the logs. Return and talk to Chargurr, who will ask you for 2 Chompy Birds this time. Find the Raw Chompy Birds and stick them on the Spears.

You must talk with Chargurr again. She will request that you light the fire; do so and inform her that everything is ready to complete this first task and set up catering services for the Resort.

Raw Meat Pillows in As a First Resort RS3

Return to the bank and speak with Balnea. She will ask you to help Snurgh, the hotel manager. She’s in the building on the southeast corner of the village She will inform you that the pillows in the hotel are made with Raw Meat, the softest thing she could find. Explain to her that Feathers would work better than meat, and she will agree and ask you if you can get her some Stripy Feathers. You must give her 8 Stripy Feather from Tropical Wagtails. Give them to her so she can make the pillows and return to Balnea to continue with the quest.

Hair Salon

You will have another conversation with Balnea, and she will assign you to help Kringk in the hair salon. The salon is east of the bank, and once you are there, Kringk will ask how she can do hair without tools. Tell her you can help with that and fetch her 4 Wolf Bones and 8 Larupia Furs. Once you have the items, talk to her again and give them the 4 “Wolsie Bone” and the 8 “Lup-Lup Furses” to complete this section.

as a first resort rs3, flying bugs

Flying Bugs

Head to the bank for the fourth time and speak with Balnea. This time, she will ask you to help Seegud, who is in the hut (northeast of the bank). Once there, talk to Seegud, and she will tell you she needs to eliminate the Flying Bugs from the five Spa Pools. You must light fires in the fire pits next to each pool to do so. For each bug, you must use Eucalyptus Logs and a specific plant to keep the swarms away. You will see Seegud stones next to each fire pit to help her remember what to burn. Although each combination is different for each player, you can use this list as a reference to complete this section of As a First Resort RS3 quest:

  • Long Brown: Eucalyptus Log
  • Green Lump-Shaped: Fever Grass
  • Red Round: Primweed
  • Yellow Egg-Shaped: Tansymum
  • Orange Squarish: Stinkbloom
  • Purple Tall: Lavender

Head outside Oo’glog to collect the plants and then combine each with the Eucalyptus Logs to light the fire. The first location you must go to is northwest of Seegud and examine the pile of stones between the Saltwater Spring and the fire pit. A message will appear in your chat section describing which type of stones they are. Once you know this information, place the logs with the right plants and light the fire pit. After you do so, you will notice the bugs are still flying over the pool, and you will hear a mischievous ogre child laughing.

With your failed attempt to kill the bugs, return to Seegud and speak with her. She will tell you that the ogre child must have mixed up the stones, so you now need to discover which plants the mixed-up stones represent to continue with this task of RS3 As a First Resort quest.

Run west of Seegud, and by the saltwater spring, you will find an ogre child called Snarrl. She recommends you start with a thermal bath, so you must go to the north of Seegud to see it. In this section of As a First Resort, you must discover the relationship between the stones and the plants, which will be done through elimination. Once you know which stone represents each plant, make a note of the match so you won’t need to go through the whole process since you can’t check what plant you used after you lit the fire. Each combination you will do requires two plants and one Eucalyptus Log, except for the Bandos Pool.

You must examine the pile of stones next to each pool, and place the logs with one of the plants in the fire pit, then light them. If you see the following message, “The fire has pungent aroma, but it doesn’t seem to have any effect on the insect”, it means it’s not the correct combination. So, place another log, use a different plant and try again. Remember, you must use a new log each time you intend to light the fire pit. Once you have the right combination, you will see this message: “The pungent smell makes the insects disperse”.

You can follow this route to complete and light all the fire pits in order for As a First Resort RS3.

  • Start right off the Thermal Bath north of Seegud (the green bath). You will see long brownstones that refer to Eucalyptus logs, so place one and figure out which plant will disperse the insects.
  • Move to the east to the Mud Bath as your second location and find the right plant which will disperse the insects.
  • Your next move is to the Saltwater Spring, west of the Thermal Bath. Here, you will need to use the second plant you used in the Mud Bath and find the correct plant.
  • Head to the Sulphur Spring, where you will find the next pile of stone. There, you need to place the second plant used in the Mud Bath and find the other one to light the fire.
  • Finally, head to the west, directly to the Bandos Pool, and use three different plants plus the Eucalyptus Log. Once you find the right combination, move to the next stage of RS3 As a First Resort.
  • If you need some help, talk to the ogre child (other than the one who laughed at you) to not mess up the patterns.

Once you have dispersed all the bugs, talk to Seegud, then return to the bank and meet Balnea again. You must keep the herbs after completing this section because you will need them in your next task.

as a resort rs3

Creatures in As a First Resort RS3

When you talk with Balnea again, she will tell you about the “one last outstanding matter”. She will ask you to trap creatures who are wandering around the village. Moreover, she will mention it won’t be an easy task and recommends you talk to Chief Tess to learn how to catch these creatures. Run toward Chief Tess and speak to her. She will explain to you that the animals in the area are clever, and you need to be sneaky to capture them. Likewise, she will mention you must burn “stuffs” to lure the animals to the traps.

Kebbits

In this phase, you will need to catch the Diseased Kebbits. To do so, you must set a Deadfall Trap on the boulders to the east and west of the Saltwater Spring. There are 4 Diseased Kebbits to catch, so you must catch two in every trap.

Inside the trap, you must bait with Fever Grass. You must light another Fever Grass and run around to lure a Kebbit to the trap. We recommend you walk instead of running to avoid any problems with attracting the Kebbits. The Fever Grass you lit will last only 30 seconds, so we also recommend you have a few in your inventory before starting this task. You must use the main hand weapon slot for the smoldering grass, so make sure to account for that.

Beware, since the Diseased Kebbits will turn aggressive if you burn Tansymum Flowers nearby them. Moreover, you must set one trap at a time because an ogre child will tell you, "Hey, you, human! You no allowed to clutter up Oo'glog wiv traps. You only set one at a time here."

Wimpy Birds

For these creatures, you will need to set a Bird Snare west of the bank. Here, you must light a Tansymun Flower and run around to attract the birds to your trap. You will need to catch 5 of these Wimpy Birds. During this stage, you must be careful since if you burn Fever Grass, you will repel the birds, and if you burn Lavender, they will peck you.

The final bird can be challenging to catch and may refuse to follow you and unrelated Wimpy Birds may appear in the Bird Snare. If you find this problem, return and ask Chief Tess how to catch Wimpy Birds, and make sure you go through the dialogue and finish with this sentence: "Nothing else to ask." option instead of walking away.

Platypodes in As a First Resort RS3

For these animals, you will need to lay a Box Trap and burn Lavender near Sulphur Sring and west of Chief Tess. Beware of the spurs of these Platypodes because they are poisonous. Don’t try to burn Fever Grass; if you do so, they will attack you with their “webbed feet of doom.”

Once you catch one Platypus, you must check the shaking box to put the animal in your inventory. You must catch a whole family (Patrick, Peanut, Penelope and Peter), head to the northeast corner of the village, and by the coast still in Oo’glog, release the platypodes near the bulrushes. You will find this location easily by seeing the Baby Platypus on the mini map. For every Platypus you release, you will obtain a Casket or an Oyster.

as a first resort rs3

Grand Opening

After you catch all the animals in As a First Resort RS3, it’s time to return to Balnea for the last time, and after you dismiss any active follower, you will trigger a cutscene of the grand opening of the spa. Moreover, the Wise Old Man will be taking water there. This will mark the end of the quest!

As A First Resort RS3 Rewards

Congratulations! You’ve completed As a First Resort, and after a long task list, it’s time to take a relaxing bath inside the resort. Let’s see what you’ll get from completing the quest:

  • 1 quest point
  • 15,000 Firemaking XP
  • 15,000 Hunter XP
  • 15,000 Woodcutting XP
  • A mixture of 4 items, either Caskets or Oysters
  • Access to the Spa facilities
  • Access to the Oo'glog Bank
  • Access to the Oo'glog Hunter area
  • Access to the Platypus Summoning Pet (level 10 Summoning Summoning). If you release your pet in the spot you released the others during the quest, you will receive another casket or oyster.
  • Access to the Fresh Meat shop
  • Access to the Gift Shop
  • Ability to travel to Oo'glog using the Charter ships
  • Ability to create Robust glass and Crystal glass
  • Access to decanting five and six dose flasks into other flasks or vials (speak to Teplin Macagan)
  • 2 Treasure Hunter keys (Not available for Ironman mode)

as a first resort rs3, rewards

RS3 As A First Resort FAQ

With the resort finally open and with rewards in your hands, you should be proud of yourself. However, we know you could have some extra questions you want answered. That’s why we will cover your back and help solve any doubt you have about As a First Resort RS3 quest. So, let’s begin!

What are the achievements unlocked after completing As a First Resort Runescape?

You will unlock three achievements when you complete this quest:

  • As a First Resort: to complete the quest
  • Elite - I’m sugar (part of the Desert Achievements): In Nardah, make a super antifire flask - making both the flask and potion from scratch.
  • Elite - The Expensive Range (part of the Tirannwn Achievements): Create a grand ranging potion in a crystal flask from nothing but raw ingredients.

Is there any extra reward for completing this quest?

Yes, you will also unlock some music tracks related to RS3 As a First Resort. The tracks you unlock after completing the quest are Bish Bash Bosh, Hot ‘n’ Bothered, Shaping Up, and Spa Bizarre.

As A First Resort Guide RS3 Summary

After a long adventure repelling insects, helping ogres and more. However, that doesn’t mean your work is over; you can still make your way and find more quests to complete. If you need help, you can check our blog section to find more guides like this. Moreover, if you want to level up faster, you can buy RS3 gold on our web page to get the best gear without much effort. That’s all for now. See you in the next blog!

logo
Vessel Of The Harbinger RS3 - Learn the Ins and Outs Vessel Of The Harbinger RS3 - Learn the Ins and Outs Questing

Welcome back to our blog series, where we cover different quests through RS3. Today’s blog will touch on the Vessel of the Harbinger in RS3, a continuation of your journey hrough the underworld and discovering all that the Necromancy skill has to offer. We’ve already covered Necromancy! and Rune Mythos, so don’t forget to check them if you haven’t already. In the third quest of The First Necromancer series, you will learn more about Rasial from one of his previous students at Port Phasmatys. With all being said, let’s break it down! 

rs3 ectofuntus, rs3 vessel of the harbinger

Vessel of the Harbinger Requirements RS3

Before you start your adventure, you must know some details about RS3 Vessel of the Harbinger; first, this is a Member only quest with an estimated medium length, so you must expect to spend about 20 to 30 minutes going through this quest. Moreover, here are all the requirements you will need to complete Vessel Of The Harbinger quest: 

  • 46 Necromancy 
  • 40 Prayer
  • Ghostspeak Amulet or Cramulet (Unless you’ve completed Hard Morytania Achievements)
  • Bucket of Slime 
  • Ectoplasm 
  • Necromancy Weapons (including Conduit)
  • Bucket
  • Ectophial 
  • A way to quickly teleport to the Slayer Tower (Ring of Slaying, Dungeoneering Cape, Activated Canifis lodestone)
  • Teleport to the City of Um (10 Spirit Runes to cast City of Um teleport twice, Activated City of Um lodestone, or Underworld Grimoire 2)
  • Salve Amulet or Salve Amulet (e) (To increase damage against the Tortured Souls) 
  • Completion of Rune Mythos and Ghosts Ahoy
  • Ability to defeat five Tortured Souls level 53

Items for the Empower Vessel Ritual: 

  • 11 Basic Ghostly Ink 
  • 2 Regular Ghostly Ink 
  • 4 Light Sources 

RS3 Vessel of the Harbinger Guide

To begin Vessel Of The Harbinger head to the City of Um, find Death, and ask him about Rasial. He will tell you that necromancers often create their own Vessels, the likes of which you've already encountered. Death will mention that Necrovarus was Rasial’s apprentice, and he can teach you more about Rasial's plans.

The Request Of Necrovarus

After your dialogue with Death, head to the Ectofuntus and speak to Necrovarus. The fastest way to get there is to use the Ectophial. At this point, you must equip your Ghostspeak Amulet unless you’ve completed the Hard Morytania Achievements. After your short conversation with Necrovarus, he will agree to help you but will ask you for a favor in return. 

Necrovarus will tell you the Ectofuntus has become stronger over time, and the Tortured Souls outside are preventing it from reaching its full potential. He’ll ask you to defeat the five Tortured Souls using Necromancy, and then he will give you a Soul Urn to collect their souls. Thankfully, only just over half of the damage dealt to the Tortured Souls needs to be from Necromancy in order for the souls to count toward the task. So, you can make use of some other combat methods to speed up the process, just keep an eye on the damage you deal to ensure your efforts are for nothing. As long as 1,500 damage comes from Necromancy attacks, you can switch to other weapons for the kill, and it will still count towards the quest objective. 

Once you defeat the Tortured Souls and fill the Soul Urn, the next step in Vessel of the Harbinger in RS3 is to worship the Ectofuntus with a Bucket of Slime and a full Soul Urn in the backpack. With this, you will earn 100 Necromancy XP. If you didn’t obtain the Bucket of Slime, you must head to the Pool of Slime in the basement and get some. Once you do this, return to Necrovarus and talk to him. He will tell you to perform a ritual to empower the Well of Souls, but sadly, he forgot how to do it. Instead, Necrovarus will tell you the information needed is in the Book of Haricanto, and you must ask Netty to get it back. 

vessel of the harbinger rs3

The Book Of Haricanto

After this conversation, head to Netty’s house. You will find it east of the Slayer Tower; using a Ring of Slaying or Dungeoneering Cape is the fastest way to get there. If you can’t use either of these items, you can teleport to the Canifis lodestone and then run northwest until you reach the Lustrous Wisp colony. You will immediately know Netty is not around, but you will find a pile of letters on the floor. Inspect the letters, and quickly, you will realize you need to visit Velorina in Port Phasmatys. 

To continue with Vessel of the Harbinger in RS3, return to the Ectofuntus using your preferred teleport method and head south, passing the energy barrier to Port Phasmatys. Run northeast to find her in the northernmost house. Talk to Velorina; she will inform you that Netty died some time ago when she was gathering some nettles for her tea. You must head to the City of Um and then go to The Last Call Pub. There, you will find Netty’s ghost standing in the northeastern corner of the place. Speak with her, and after a quick catch-up, you will tell Netty you need the Book of Haricanto. She will tell you it is inside a chest in her house, and she will give you her Death Certificate and Will; with this, you can claim her key from the Bank of Port Phasmatys. 

Note: If you have the Ghostspeak ability, or the Ghostspeak amulet equipped, Netty will tell you that it is unnecessary to do so; despite her being a ghost.. 

Your next step in RS3 Vessel of the Harbinger is to go to the bank in Port Phasmatys and talk with the Ghost Banker to obtain Netty’s key. To do so, use Netty’s Death Certificate and Will on the banker, it will deposit the key into your bank, and you don’t have to go through all the dialogue with the Ghost Banker. 

With Netty’s key with you, return to her house and open the Locked Chest. You will see how Netty’s Skeleton appears, and you must fight it before you can get the book. Her skeleton is immune to any type of damage, and you can’t defeat it using regular methods. Instead, you must cast Conjure Skeleton Warrior, which requires a Conduit and one Ectoplasm near the skeleton. This will cause it to collapse due to its poor self-esteem. Once you complete this task in the Vessel of the Harbinger RS3 quest, you will be able to open the chest and find the Book of Haricanto. 

Empower The Vessel

With the book in your inventory, return to the Ectofuntus and speak to Necrovarus. He will tell you to get the Bucket of Power Slime from the Ectofuntus; to do so, just use a Bucket on the Ectofuntus to obtain it. Head to the City of Um to perform the Empower Vessel Ritual. This ritual requires the following items: 

  • 2 Elemental I glyphs
  • 1 Charge I glyph
  • 1 Commune I glyph
  • 4 Ritual Light Sources
  • 1 Bucket of Powerful Slime
  • 11 Basic Ghostly Ink
  • 2 regular Ghostly Ink
  • 4 Basic Ritual Candles or better

Once you have everything, complete the ritual. This will trigger a cutscene where you can see Rasial, the First Necromancer, appear and send Necrovarus away. If the cutscene doesn’t play, return and talk to Necrovarus. When the cutscene ends, head back to Death to finish the Vessel of the Harbinger in RS3. 

Vessel of the Harbinger RS3 Rewards

Congratulations! You've completed the RS3 Vessel of the Harbinger quest. After covering quite some distance between Port Phasmatys and the City of Um, we're sure you're itching to know what's up for grabs. Along with taking your first steps in empowering your vessel and working through your Necromancy abilities, you will also be rewarded with the following: 

  • 1 Quest Point
  • 10,000 Necromancy XP lamp
  • 5,000 Prayer XP lamp
  • 25 souls added to the Well of Souls
  • 2 Treasure Hunter keys (Ironman accounts will not receive these)

vessel of the harbinger rs3 rewards

RS3 Vessel of the Harbinger FAQ

Even the very best of players can have their doubts, but don't be ashamed about those wanderings. It's our job to help your questing adventures become the best they can be, which is why we have compiled some of the most frequently asked questions about this underworld adventure to ease your confusion. Take a look below:

What achievements will unlock after completing Vessel Of The Harbinger in RS3?

Once you complete the Vessel Of The Harbinger quest, you will unlock the following achievements: Vessel Of the Harbinger for completion of the quest and Legal Entitlement, when you inform the Old Man about the fate of his mother after Vessel Of The Harbinger. 

Which quests will require RS3 Vessel Of The Harbinger to enter them?

After you go through Vessel Of The Harbinger, you will unlock The Spirit of War quest, which requires completion to get access to it. The Spirit of War is also part of The First Necromancer quest series. 

Vessel of the Harbinger RS3 Conclusion

After your adventure retrieving the Book of Haricanto, it’s time to relax or maybe you’d prefer to jump into a new quest or journey. With the endless possibilities that come with RS3, you can spend your time doing what you think is best. If you feel your bank is lighter following the adventure, you can replenish it by purchasing RS3 gold and focusing on the things that matter without wasting your time on money-making methods. If you like this guide, you can find more of it in our blog section. That’s all for now. See you in our next blog.

logo
Rune Mythos RS3 - The Origins Of Necromancy Rune Mythos RS3 - The Origins Of Necromancy Questing

After your journey through death and your return to life in the Necromancy! quest, introducing you to the different aspects of the underworld and the Necromancy skill now it’s time to discover the origin of Necromancy. Learn just how powerful you can become and dive further into the lore of the City of Um. We'd like to welcome you back to our blog series, where each week, we cover a new and exciting game topic and walkthrough. In today's article, we will cover the Rune Mythos quest in RS3, and everything that goes with it. So, let's break it down! 

rs3 rune mythos

RS3 Requirements Rune Mythos

Before you begin your adventure through the City of Um and its mysteries, you must know this is a Members-only quest. It is short to medium in length, so you can expect to spend around 10 to 20 minutes navigating through Rune Mythos RS3. Apart from that, the requirements for this quest are simple and uncomplicated; here’s what you need to go through all the endeavors: 

  • 24 Necromancy 
  • Resources for the Lesser Essence Ritual
  • 200 Noted Pure Essence 
  • 8 Basic Ghostly Ink 
  • 4 Regular Ghostly Ink 

Thankfully, this quest has no enemies for you to face, meaning you can go through this journey without worrying about any sort of showdown. 

Rune Mythos RS3 Guide

To begin with Rune Mythos RS3, you must head to the Ritual Site in the City of Um. Next to the Ritual site, you will see Malignius Mortifer. You'll need to speak with him to get the quest going, but before that, ensure you have an empty inventory. There are several chat options that you can cycle through if you wish to learn about Necromantic Runes or Incantations, but the one to get the quest going will be 'I'm good, what's next?' You don't have to worry about the other options; they won't affect your quest journey either way, but they are there if you wish to grow your knowledge. 

 Once you've selected the correct dialogue to get the quest started, Malignius will give you everything you need for the Lesser Essence Ritual: 

  • 200 Noted Pure Essence 
  • 8 Basic Ghostly Ink 
  • 4 Regular Ghostly Ink 
  • 4 Basic Ritual Candles. 

If you have some items, he will give you only the ones you missed. It is vital that you do not drop or lose the materials he provides you, as he will not replace them. Once you have all the items in your inventory, it’s time to head to the Pedestal in the Ritual Site; here, you must click the center and select the Lesser Essence Ritual. Performing this ritual will require cleaning any remains from previous Glyphs to make space for your ritual. 

rs3 rune mythos

To complete this ritual, you must create 2 Elemental I Glyphs that will cost you 3 Basic Ghostly Ink each, and 2 Change I Glyphs that cost you 2 Basic Ghostly Ink and 1 Regular Ghostly Ink each. You must place the candles to create the sources of light required for the ritual. Once everything is ready, stand on the platform and perform the ritual. This ritual will consume the Pure Essence Malignius gave you. 

After completing the ritual, head to the Ritual Chest close to Malignius, take as much Impure Essence as you can carry in your inventory, and then bank all the other items. Head to the northeastern area of the City of Um, and you must go through the Dark Portal. Before entering the portal, you must ensure you have at least one Unnoted Impure Essence. 

To continue your journey in Rune Mythos quest, you must attempt to craft some Spirits Runes, but before you are able, Rasial, The First Necromancer, will tell you to stop “playing with things you aren’t ready for.” Moreover, he won’t let you craft the runes until you speak to him. You must go through all the conversations and dialogue with Rasial until he finishes and disappears. Once he’s gone, craft the runes and return to Malignius Mortifer to receive your rewards. 

Rune Mythos Rewards RS3

Congratulations! You have completed Rune Mythos RS3. Even though this was a short and sweet quest, there are still some decent rewards at play. So, now that you've come to the end of the road let's take a look at what you receive for your efforts: 

  • 1 quest point
  • 1,500 Necromancy XP lamp
  • 250 Runecrafting XP lamp
  • Access to Lesser, Greater, and Powerful Essence Rituals
  • Access to Necromancy Runecrafting
  • Access to Necromancy Incantations
  • City of Um Teleport incantation
  • Lesser Bone Shield incantation
  • 2 Treasure Hunter keys (Ironman accounts will not receive these)

rune mythos rs3

Rune Mythos RS3 FAQ

After going through the process of the Rune Mythos quest, you may have some questions. It may be a short quest, but the doubts surrounding what is to come in the next quest of the series, and some general wonderings may be playing on your mind. So, we're here to answer those all-important questions. Let’s begin! 

What achievements can you unlock after completing the Rune Mythos quest RS3?

Once you finish the quest, you will receive the following achievements: Rune Mythos, which you earned by completing the quest and City of Um Set Task. The last one you will receive is from Ichlarin, and you can find him near the Ritual Site of the City of Um, but you need to complete all Easy Tasks in the city first. 

What quest will be unlocked after completing RS3 Rune Mythos?

Since this is the second quest in the First Necromancer quest series, you will unlock the third quest 'Vessel of the Harbinger'. This will continue your journey through the underworld, and the Necromancy skill. 

RS3 Rune Mythos Summary

It feels nice completing one more quest, even the short ones like Rune Mythos. However, it’s not just the reward and completion of the quest that is worth the time, but the knowledge you obtain that will be useful in the upcoming quests. Until then, take a look at some of our other RS3 titles in our blog section, and if you want to build your bank without the grind, consider buying RS3 gold to level up your gear, skills, and everything related to conquering Gielinor. That’s all for now, we’ll see you on the next blog.